Sunday, 1 November 2015

Mixed media snowflake canvas

Happy Sunday everyone and welcome to November, I really think that time has speeded up again as the days, weeks, months and years seem to be just whizzing past before my very eyes.

Using DecoArt paints and mediums and Tim Holtz dies I am sharing a cold, wintry, blue snowflake canvas today which is my contribution to the new challenge at Country View Challenges.


This canvas has been getting little bits of attention over many days and at last it is finished for Christmas. I didn't get to take too many photos of the process but hopefully you will get the idea of the steps involved.


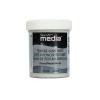
I began with a coat of gesso then painted decoart 'vintage' chalk paint over (if you don't have this try Fresco Finish chalk paint). When dry I used a snowflake mask and decoart sand paste which created a beautiful gritty texture. For the next layer I rubbed in a little victorian velvet and broken china distress paints to create some colour tone both on the canvas and the snowflakes.  I wanted to create the look of snow on the snowflakes so I dragged gesso across the top of the textured areas which got caught in cracks and on the tops of the highest points leaving a random white snowy effect.


A stencil and gesso added more interest in the gaps and I also stamped with white pigment ink.


After brushing on a little watery vintage photo distress ink I achieved some glistening effects by rubbing some glue over the snowflakes and sprinkled on glamour dust.


 I also added some gold foil randomly around the edges.


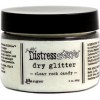
The next step was to die-cut some of  Tim's snowflakes using a variety of dies, punches and some wooden shapes shabbying them using gesso, cobalt blue and cerulean blue fluid acrylic paint and making them twinkle using rock candy distress glitter.


The pieces were layered up to create one large and several smaller snowflakes ....


.... creating varying heights and dimension ....


.... and so it all came together with some smaller white punched snowflakes to fill the gaps and create a snowy day feel to it.


Thanks for taking the time to stop by, I love to see the page visits I get on the stats and there are so many of you who obviously take the trouble to share in what I am making, thank you so much.

I hope to see some of you over at Country View Challenges this month, but in the meantime have a spooktacular weekend.

hugs Brenda xxx


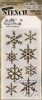
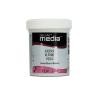
These are the supplies I mainly used and that are available at the Country View Crafts shop. Please be aware that I have substituted some products for similar ones that will still create the same look.

Friday, 30 October 2015

Tag Friday for AVJ - Happy Halloween

Here is an after dark halloween tag with deep blues, purple, gold and black and traditional images to wish you all a
Happy Halloween.

It is also my contribution for the Vintage Journey Tag Friday post which only happens about 4 times a year, this is our third since our birthday in March and there will be one more in January. Do pop over for a varied and mega dose of inspiration from the Creative Guides taking part.


Begin by smooshing three blue/mauve distress inks on your craft mat and spritz with water then drag a tag with a couple of strips of tissue tape through and dry it several times until you get the depth of colour you want.


Stamp text over, heat dry again and lightly paint a layer of mat medium over to seal it. Take the shatter stencil and apply transparent texture paste through with a stencil, leave it dry or help it on it's way with a gentle blow from a heat gun. (Sorry forgot a photo here).
Mix some gold paint with water on the mat and let it drip from a paint brush over the web and before it's properly dry rub as much of the paint away from the raised textures as you can leaving golden threads of webbing showing through. Because we used the mat medium and transparent texture paste we can still see a lot of the blue/mauve tones of colour showing through.


Whilst I had left over distress inks on my mat I dipped and dried more card so as not to waste any and stamped and gold embossed the greeting and then cut it out. To get a more grungy effect also dip in some muslin and use it behind the greeting to lift and create dimension.


After die-cutting the shapes and gathering all the other bits you need assemble the tag.


Supplies
Distress inks - blueprint sketch, chipped sapphire, dusty concord, ground espresso
DecoArt gold acrylic paint
Stamps - undertaker, halloween 2
Mask - shatter
Dies - movers and shapers mini spider and 31 set, mini cat and raven set
Miscellaneous - gold embossing powder, embossing ink, muslin, transparent texture paste, charm, loop pin, seam binding for bow.


Have a great weekend, I'm off to Ramsgate again with my family to meet up with cousins and siblings. We won't be doing anything special for Halloween but we're looking forward to having a relaxing weekend, I hope you are too.

Take care and thanks for stopping by.

hugs Brenda xxx


Monday, 26 October 2015

Evergreen for Country View Crafts


It's my turn to share a project on the Country View Project Blog and I have been making Christmas cards. This is a really easy one to make but still has technique and colour and I have left it flat so that it can post easily.

Here's a couple of sneak peeks to tempt you over to see more details if you are interested.


Thanks for stopping by today and have a great week.

hugs Brenda xxx


Update - copied over from CVC

Good morning crafters, Brenda here to share my latest Christmas card with you. Now it's been designed it doesn't take too long to make and I think I will try it again using different background colours. In real life the background on this card is a bluey green whereas this looks very yellow - obviously the light conditions have affected the photography.
Anyway to make a start take the green distress inks, smoosh them on your craft mat and spritz with water until you see small droplets form.
 Press your card into it and dry with a heat gun, repeating these two steps several times until you have this lovely mottled effect.
Die-cut the tree and flick watery picket fence distress paint over to look lie snow. Ink the edges with ground espresso.

Die-cut the mini reindeer from greyboard, ink and cover with glitter.
Stamp the background card using distress paint, then blend complimentary or contrasting inks over, then use a damp babywipe to remove it from the distress painted parts.

Assemble the pieces and complete the card with some glitter stars and a script word.
My Christmas card box is happily increasing in numbers - what about yours? If you are like me you try to keep costs down when sending cards through the post and this will go as normal letter post, so couldn't be better eh?


Thanks for stopping by today. All the main supplies I used are listed below and with just one click you can be transported to the Country View Crafts shop.

Saturday, 24 October 2015

Halloween Journal pages

I couldn't let October go past without recording Halloween in my visual journal, so here is a double spread to mark the occasion.


You might remember that my journal is in fact an old book called the 'Roadmender' and to get started I pasted in some tissue wrap using matte medium.


I painted on DecoArt media acrylics and before it dried properly I rubbed over with a babywipe to remove the intensity of the colour but still leave enough on to create a darkish background. See how you can still see the book text underneath?


I dried with a heatgun and then finger painted over some contrasting colours,smudging them to create interest.


Next I dipped the pages in watery picket fence distress paint, let it move around the page and heat dried......


.... and then randomly stamped some cobwebs using black archival ink and stencilled the arrows using gesso and a piece of sponge.


 Now to introduce some further colour - I applied water soluble wax pastel over the arrows, dabbed with water and coloured over with chalk pastel pencils.


Taking a sketch and wash pencil I added shadow around them and darkened the edges more with woodless charcoal pencils, this created more interest and focus.


Onto filling up the pages and die-cuts seemed my best option to create the atmosphere and give me the bold images I wanted. Once adhered I set about using white and black charcoal and aquatone pencils to shade and colour until I was happy with the balance and depth to the pages.


I stamped 'beware' and used black modelling paste and a stencil for the 'halloween' and then added more texture with silver embossing paste and the dot fade stencil.


Did you notice the lights are on in the house?


 Having used Ranger, DecoArt, Studio 490 and Derwent products and had fun painting, daubing, rubbing, colouring and texturing the pages I am pretty pleased with the results. This is #37 in my Visual Journal, there is very little room left in the book and the pages are bulging but it is the first ever one I have completely filled so I am feeling rather proud of myself too.


Thanks for stopping by on this wet and miserable day here in Surrey, have a gresat weekend.

hugs Brenda xxx


Wednesday, 21 October 2015

Adding texture at CVC

This is my second sample for the texture challenge at Country View Crafts and  I have two more Christmas baubles for you today that fit with the two I showed at the beginning of the month (see that post here).


The texture was laid down as the previous two were with gesso and texture paste but I had fun playing with different media and colours on these two.


You may remember 
I started by covering all four with gesso and to start the texturing whilst they were still wet I pushed some of them down on the craft mat so that the gesso texturised when I pulled the bauble away.


The second layer of texture is created with texture paste through a stencil and letting it dry.


This first bauble has Tim's snowflake stencil added to it with grey and prussian blue brushos and a little decoart silver acrylic paint to create the base layer. Over that I spritzed water and 'painted' in some of the blue around the snowflakes so that the colour collected in the gaps. 


When dry I gessoed over the snowflakes and also dripped some walnut crystal ink in the gaps to achieve this mixed media background before lightly and very gently applying ultra matte varnish and letting it dry. To finish I laid the stencil back over, gessoed again and when dry painted glue over the snowflakes and sprinkled on crystal glamour dust.


For this next experiment I wanted to try sprays on the background and I wanted the poinsettia to look fairly realistic but still be vintagey. 


So I began by squeezing some decoart cadmium red hue, transparent red iron oxide and prussian blue on my mat in tiny, tiny amounts. Placing the stencil back over the flowers and using a sponge I daubed on the cadmium randomly trying to keep to just the petals, I mixed in a tiny amount of the blue and sponged some shadows and the centres and them mixed a tiny bit with the red iron oxide and sponged a few places to create more texture and colour variation. I then sprayed fired brick distress spray stain, misted it with water and let it run off the sides. It created a few lighter areas so I sprayed antique linen over again spritzed a little water and heat dried. Mmmm I really quite like the effects and you can see the textured gesso. 


I finished by painting the dots gold and the leaves green and edging the bauble with potting soil archival ink.


I hope you've liked the series of baubles and you can see from 1 to 4 how my choices of colour, media and layers improved - well I think they have....


Having finished the texture posts I think I maybe back before I publish this one .... I have an idea.


Yep I'm back. I decided to add some embellishing to brighten up the baubles. 


Tim Holtz greenery and poinsettia, sparkly berries, moss, dried flowers and decoart snowtex.

Thanks for stopping by today. Do pop over to Country View Challenges to see lots of inspiration from the team and hopefully you will find inspiration for your next project.

hugs Brenda xxx


Tuesday, 20 October 2015

Old Fashioned Christmas Card for CVC

It's my turn to share a make at the Country View Crafts Project Blog and I have an old fashioned collage Christmas card, here's a sneak peek.


It's quite a simple one to make using patterned papers and ephemera and a lovely vintage style that I love.

More photos and details are available on the CVC project blog if you would like to see the whole card.

Thanks for stopping by.

hugs Brenda xxx