Tuesday 23 February 2016

Stitches 2016 catch up

I got back from a weekend in Birmingham last night, tired and full of cold but was so fired up with ideas from being at the Stitches show I ended getting up in the middle of the night and getting on with project work. My sample for the next AVJ challenge starting on the 4th March is almost finished and this morning I wanted to have a very quick play with my new distress crayons so there's a 'Checking Out' blog post coming a bit later - but before we get there let me share some photos. I didn't get many (so busy chatting and catching up with people), but I know others have got some so I will try and scrounge some more later.

I felt very privileged to get a space on Tim's workshop on Saturday afternoon ....


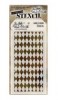
.. and we had a great time learning how some of his new products work ...


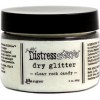
... particularly the new distress crayons and the crazing collage medium.


 Having time to play with them whilst learning about their properties and how they work with each other was amazing ...


 ... and coming home with a beautiful framed vintage collage and our left over goodies, including the pack of crayons we were using, was the icing on the cake.

 It was lovely to catch up with old friends O:), meet friends from Face Book and make completely new friends especially Marie and Ilona from Sweden.
A quick dash to Starbucks with Anne, Julia, Nikki (in the background) and Cathryn and it was great fun having lunch with Kath, Enfys and Hina on Sunday.


 A little time to catch up with Mario ....


 ... and of course great fun with the prankster Andy Skinner on the DecoArt stand. He's always full of fun as well as being super talented with all his grungy, artistic makes. L to R me, Cathryn, Julia, Nikki, Andy and Anne.


 It was also good to catch up with Jenny Marples, Di Oliver, Elizabeth Robinson and Katie Leitch, but sadly no photos of them.

Thanks everyone for a great weekend - looking forward to the next get together.

hugs Brenda xxx


Monday 22 February 2016

Tea or Coffee?

I'm sharing another Journaling for Success recipe today, this was my second sample for recipe 2 taught at Pickwell Farm in January.
I love coffee (particularly Starbucks) and found this great tea or coffee quote and my pages were designed around it.


Each of the double pages is made up of two glued together to create the strip borders top and bottom.


The base layer is tissue wrap given a coat of gesso to tone down the print and coloured with decoart media acrylic paints.


I used watery gesso to achieve the first layer of the steam effects ......


.... and applied decoart modeling paste through a decoart stencil to achieve the textured steam effects. The raised lines were finger painted with decoart pearl white shimmery paint and then sprayed with gathered twigs distress stain and the excess wiped away. The cups and saucers were dipped in watery media fluid paints with the edges sanded and inked.


To get a teapot and a milk bottle in the scene I downloaded free templates of both, cropped them to the sizes I wanted and then painted them to get a realistic look. In fact I was really pleased with this experiment and thank goodness for the wonders of technology that can be combined with art.


So there we have a sample of recipe two but of course it is just a recipe to get you started on developing layers and building journal pages to develop and suit your own style. If you want to come to the next workshop for creating recipes three and four take a look in my side bar to see where to get the details of the next workshop at Pickwell Farm.


My new journal is beginning to get filled, not as quickly as last years but that's because I have got two on the go - one for Wonderlust and one for recipes. But I am still enjoying the challenge of creating pages in different ways.


Have a great week and I hope you find time for being creative yourself.

hugs Brenda xxx


Thursday 18 February 2016

Shabby mixed media board

Welcome everyone - today I am sharing a project over at Country View Crafts Project Blog. I recently bought myself some small 5 x 7 inch canvas boards and have been enjoying working on this size .... so much so I have decided I will make these as little birthday card gifts for my friends this year and this is the first.

 These are my teaser photos (click on them and they will enlarge further) and I'm hoping you will pop over to see the finished article and further details as to how I put it together.


 There's a shabby mixed media background and lots of flowers and embellishments.


Thanks for stopping by. I am looking forward to the weekend as Tim is in town - well Birmingham actually. He is here to attend the Stitches trade fair and is doing workshops on the saturday and guess who has been lucky enough to get a place? Yay roll on Saturday and then I will hopefully get to see him demo over the next couple of days. Andy will also be there with the new DecoArt products and his own stamps and stencils so I will be able to go and chat to him too.


Take care and live in the moment.

hugs Brenda xxx


Update - copied over from CVC

I have a couple of friends birthdays coming up so I thought I would make a different and more special 'card' for their happy day. I don't know about you but I put a lot of effort into making friends cards so why not make one that they can actually keep rather than throw or put sway after the big day. This was to be a wall hanging card which at the end changed my mind and I will add Tim's mini easel on the back so that will definitely mean they can keep it out on their shelf for longer.


I started with a 5 x 7 inch canvas board and layered it with gesso using a brush, palette knife and plastic card to add texture and coverage.


When dry I added some text texture using Tim's typo stencil and DecoArt modeling paste and when that was dry I used his harlequin stencil and some glassy gel from my supplies.

I felt a shabby colour palette would be popular with one of my friends so chose titanium white, titan buff, green gold, hansa yellow, sap green, prussian blue and quinacridone red media fluid acrylics (see shop list below) and the white shimmer mister to mix up the soft palette I wanted. Mixing the greens, cream, white and blue I created watery colours and let them drip and misted them with water to get the mottled effects.


The board then went through a whole process of me experimenting with layers until I was finally happy with the results .... adding more drips of paint and drying them ....


.... adding text stamping using olive archival ink ....


 .... spritzing white paint with the shimmer mister and drying it ......


.... adding some brown distress inks to create shadows round the letters .....


.... spritzing the distress ink to create more drippage ....


.... taking out some of the brown and adding in more of the green because I thought it took away from the shabby feel I was trying to create ....


... and then spritzing with the white mister again and using a piece of cut and dry with white gesso and rubbing over the raised letters to bring them up whiter.


Now feeling happy with the background I set about collecting the embellishments. Paper flowers, a wooden frame, a metal wing, a metal butterfly all painted with gesso. A word band painted with bundled sage distress paint and before it was completely dry I wiped across the surface leaving the lettering slightly green. Lace, leaves, cheesecloth and other little bits (and more came later).


Some close ups of the finished piece - a wordband with some lace and tiny flowers ......


... a shabby bow and a prima mini watch with one of Tim's photos in it (it must have come from one of the 6 x 6 pads to be so small), the little red pear is from my supplies ....


.... I finished by dabbing over some glossy accents and adding some glitter glass for added sparkle but as always it is very difficult to photograph .....


..... and here is a mini bottle I added that had been coated in gesso then decoart white crackle paste and when dry a little bundled sage distress ink rubbed on.


I hope you like my birthday board - I was going to add Tim's mini easel on the back but my Big Shot has had to go back to Sizzix to be looked at, but I will cut one from white mountboard and add to the back then it can easily stand on a shelf.


There is still time to take part in our CVC challenge of make your own backgrounds and maybe I have inspired you to have a go at this shabby mixed media style.

Enjoy the rest of the week into the weekend.

hugs Brenda xxx