Friday 27 January 2017

Canvas board mixed media

I'm over at the Country View Crafts shop project blog again today with a textured background and layered paints and distress ins canvas board. You can see the texture here and if you would like the instructions as to how I made it I would be happy if you popped over to CVC Project Blog to find out.


It's Friday and another weekend but would you believe the last one in January - no I can't believe it either. here we go again.

Take care and enjoy your art.

hugs Brenda xxx


Updated - from CVC project blog

I am using one of my most loved canvas boards which is 5 x 7 ins in size. I have made a fairly simple textured background and then take bits from my 'left overs' box to die-cut the dapper man and create a card.

.
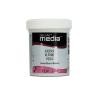
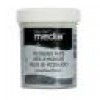
I began by taking a palette knife and mixing DecoArt modeling paste and white gesso together in about a 50:50 mix and then roughly spread it over the surface leaving some of the canvas board exposed and left it to dry.


Choose three colours that will tone and blend together well and not create 'mud', ie 3 warm colours, 3 cool colours or take one colour and make a tint and a shade of it to go with the original.
(In color theory, a tint is the mixture of a color with white, which increases lightness, and a shade is the mixture of a color with black, which reduces lightness. A tone is produced either by the mixture of a color with gray, or by both tinting and shading).

Take blue-green light media fluid acrylic paint, mix with water to create a very watery wash and dip the board in and dry it.


Repeat the above step with burnt umber.


Take blue-green light, mix with titanium white and drip the paint through the canvas, spritzing with water and heat drying when you are happy with it. Repeat with burnt umber mixed with titan buff.


Blend over evergreen bough distress ink, flick with water and roll dry with kitchen paper.


Repeat with vintage photo and again with evergreen bough to get depth of colours.
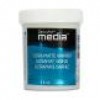
Give a coat of ultra matte varnish to seal the distress inks. Be very light with the brush otherwise the varnish will move the distress inks around.


Rub a coffee archival ink pad around the edges and over the high points.


Then choose the elements you want to add to make a mixed media piece of art or you could add an easel and give it as a card.


I love mixed media backgrounds, hope you like this one.

Have a great weekend.

hugs Brenda xxx

Sunday 22 January 2017

Watercolour powders 1

I have a card and the process steps on the Country View Crafts Project Blog today and thought I would make another one for here.


Follow the steps on the CVC blog HERE but mix and match your powders, I used brown bistre, royal blood infusion and grey brusho to show how they can all work together. The two steps needed to create this are so easy and can produce some amazing effects.


Gather some items to embellish the card and create your focal point.


I edged the card with ground espresso and created a small collage with a sentiment.


There we go, a great vintage card in under an hour and a half, well it can be if you just go for it, but if you're like me you'll spend ages choosing your colours and your collage elements lol and take longer.

Here's the one that can be found at Country View Crafts project Blog, it would be lovely if you could pop over to take a look.


Have fun and happy Sunday.

hugs Brenda xxx

Monday 16 January 2017

Block Heart

I seem to be well into hibernating mode at the moment, I always am this time of the year but I have managed to make my first Valentine project which can be seen over at Country View Crafts project Blog.
I know who will receive this in February.


Have a great week and listen to your HeART.

hugs Brenda xxx

Wednesday 11 January 2017

A raised bottom box tutorial DMMDT


This was my Design Team contribution for DecoArt last October and thought it was about time I shared it here for you.
This is a shadow box I designed using greyboard and I placed the 'base' inside the box so that I could use one of two depths for my project (See dimensions below). If you ever want a box and have some greyboard to work with I go through the dimensions and process steps below.


Step 1 - Create the Shadowbox

1a. Cut two pieces of greyboard 18 x 4 cms and cut another two 13 1/2 x 4 cms to make up the sides.
Cut two more pieces 17 1/2 x 1 1/2 cms and another two 13 x 1 1/2 cms to provide the inside 'step' on which to place the base.
Use artist tape or another thin tape to hold the four sides of the box together, add one layer of tape on the top inside of the box as well as the whole of the outside, layering it if necessary.


1b. Adhere the four thin strips to the inside of the box on the bottom edge (these will form the ridges underneath for the background to sit on).


1c. When they are dry place the base onto the strips to form the background of your box.


1d. Cover the outside and inner panels with tissue wrap and  here you can see the dimensions of the base top and bottom.


Step 2 - Colour Mixing


Usually I just have drops of paint on my craft mat and blend colours as I go along but there are times when I want a specific colour palette and I will do myself a colour mixing chart. Pinterest is a great place to find new palettes to use and then I create one of these. The soft weathered blue that just happened on the alabaster technique below was my starting point and the colour palette that inspired me can be found at http://snapyourcolors.com/Chip/l4T5fR/


Step 3 - The background


3a. Cut a piece of card to fit the base (the size will differ according to which depth you choose to use).
Cover it with tissue wrap to fit in with the sides of the box and then use modeling paste and stencils to add texture.
Choose your paints, mix the blends of colours one at a time and then spritz, drip and dribble them through the texture drying before you add the next colour.
Lightly brayer some white back over the texture.

3b. Whilst completing this step and having mixed each of the colours I finger painted some on the outside and inner lip of the box frame.


Step 4 - The Cameo Frame


4a. Die-cut the frame from grey board and give it a coat of white gesso painting in all directions to get it as smooth as possible.
4b. Drag some texture sand paste over and dry.
4c. Use a wet sea sponge with Titan Buff and medium grey V6 and sponge on random areas of both colours.
4d. Mix three parts resin plaster with one part water and a little titan buff to colour it, pour on frame and drag over 90% of it pressing in with a palette knife and quickly add the smallest spot of prussian blue hue, a drop of the medium grey and a few drops of titanium white, mix together and also drag that across to create an alabaster background.
4e. When dry, rub off any loose surface material and seal with ultra matte varnish, which gets soaked up by the plaster very quickly. Repeat with a second coat when the first has dried out.

Step 5 - The Shadow Box border

5a. On a piece of card paint prussian blue and titan buff, dry it and then layer on a watery wash of prussian blue and dry.


5b. Die cut an ornate border, ink the edges with ground espresso and adhere to the sides with decou-page.


Step 6 - The Embellishments

6a. This is a free image from the internet, printed on photo paper and adhered to an mdf circle. I like to sand the edges and blend brown distress inks around it.


6b. This is a resin cast from a prima mould, painted with the prussian blue and titan buff mixed together and when dry I spritzed it with water and dripped some titanium white over it. Again when dry I highlighted the raised parts by rubbing on some iced espresso metallic lustre.


6c. These metal corners and handle were just spritzed with water with some titanium white dripped and dried. Again I highlighted with iced espresso metallic lustre.


6d. The metallic book plate and nib were given dabs of titanium white, paynes grey and quinacridone gold in separate layers, drying between each and highlighted with champagne ice metallic lustre.


6e. This is a number cut from card that had been embossed. I spritzed it with water, dribbled paynes grey and prussian blue over it. Once dry I blended titanium white over the raised areas using the back of a piece of cut and dry foam,dried it, then gave it a watery wash of quinacridone gold.


Step 7 - Assembly

7a. First glue the number onto the metal plate, then adhere it to the bottom of the cameo frame.


7b. Glue to photo onto the frame and make sure both are dry before the next step. (otherwise they might move a fraction while you are gluing other pieces on - said with experience!!!).
7c. Attach the mould to the top of the cameo frame.


7d. When these three are all completely dry use foam pads behind the frame and the part of the mould that is sticking over the edge and fix to the back of the box. The foam pads add great dimension.
7e. Use modeling paste behind the nib to attach it to the background.
7f. Glue the corners on and again leave it all to dry.


7g. Lastly you can put the frame upright and glue the handle to the top.


Hope you enjoyed seeing how this came together, especially if you missed it last year on the DecoArt blog. I can feel me wanting to have another go at one of these soon.


Monday 9 January 2017

Give-Away

Here's a little treat for today, another double up in my dies collection so I thought I'd give away this little Tim Holtz movers and shapers pack.


As you can see these are the mini mirror and wall clock repositionable dies (brand new and unused), so if you don't have them and would like to add them to your collection, leave your name below by the 31st January and I will do a draw using Random Org to see who the winner will be.

Happy Crafting.

hugs Brenda xxx

Friday 6 January 2017

Going round in cirlces

It's a new challenge at A Vintage Journey and we are going round in circles for a change - actually I feel like this a lot of the time lol.


Here's a 5 x 7 canvas board with easel.


1. Seal the board with gesso and dry then take a stencil and swipe through some white modeling paste - I must have used the stencil before with distress ink as brown came through on the paste but I quite like how it looks, but with the layers I am going to add it won't stay like that for long.


2. Mix some fluid acrylics with water to make watery washes choosing the colours you want to use and then drip, spritz with water and dry layers till you are happy with the background.


3. Add some texture stamping, I wanted to keep mine light and mottled so I used a sponge with the brown and white paint to get those effects.


4.  Adhere some strips of patterned papers in a collage as a focal point ...........


5. ...... and scrape some gesso over with a palette knife.


6. Now take some small metal embellishments and give them a coat of gesso and also some small glass cabochons and adhere them to some of the papers you used in the strips sand cut round them. I also collected and inked some flowers.


7. Create a sentiment or quote to add some meaning to your work. My one was stamped inked lightly flicked with eater and dried then given a coat of ultra matte varnish.


8. Add a little stamping over the gessoed strips of paper and another scrape of gesso over the top.


9. A few flicks of paint ........


10. .... and glue everything on.


I add an easel to the back so that it can stand.


Thanks for stopping by. I hope you will get a chance to hop over to the AVJ challenge blog and see some amazing inspiration from the team.

hugs Brenda xxx

Products used
DecoArt
Metallic Lustres - silver spark, fab fuchsia, iced espresso