Showing posts with label Butterfly. Show all posts

Friday, 11 July 2025

Butterfly panel - watercolouring with distress inks

 Butterfly Metamorphosis

The Great Outdoors CVC #1 July

I'm doing a workshop at CVC headquarters this month with a theme of butterflies, bees and moths and it's focussed on creating sketchbook pages. I had created so many pieces to add, that I am completely zoned in on butterflies again and I wanted to create a butterfly painting by watercolouring using distress inks, but rather than draw and paint I decided to use one of Tim's butterflies being used in the workshop but use it in a completely different way.

To begin I stamped it in antique linen so that I could use the shape but not the pattern.
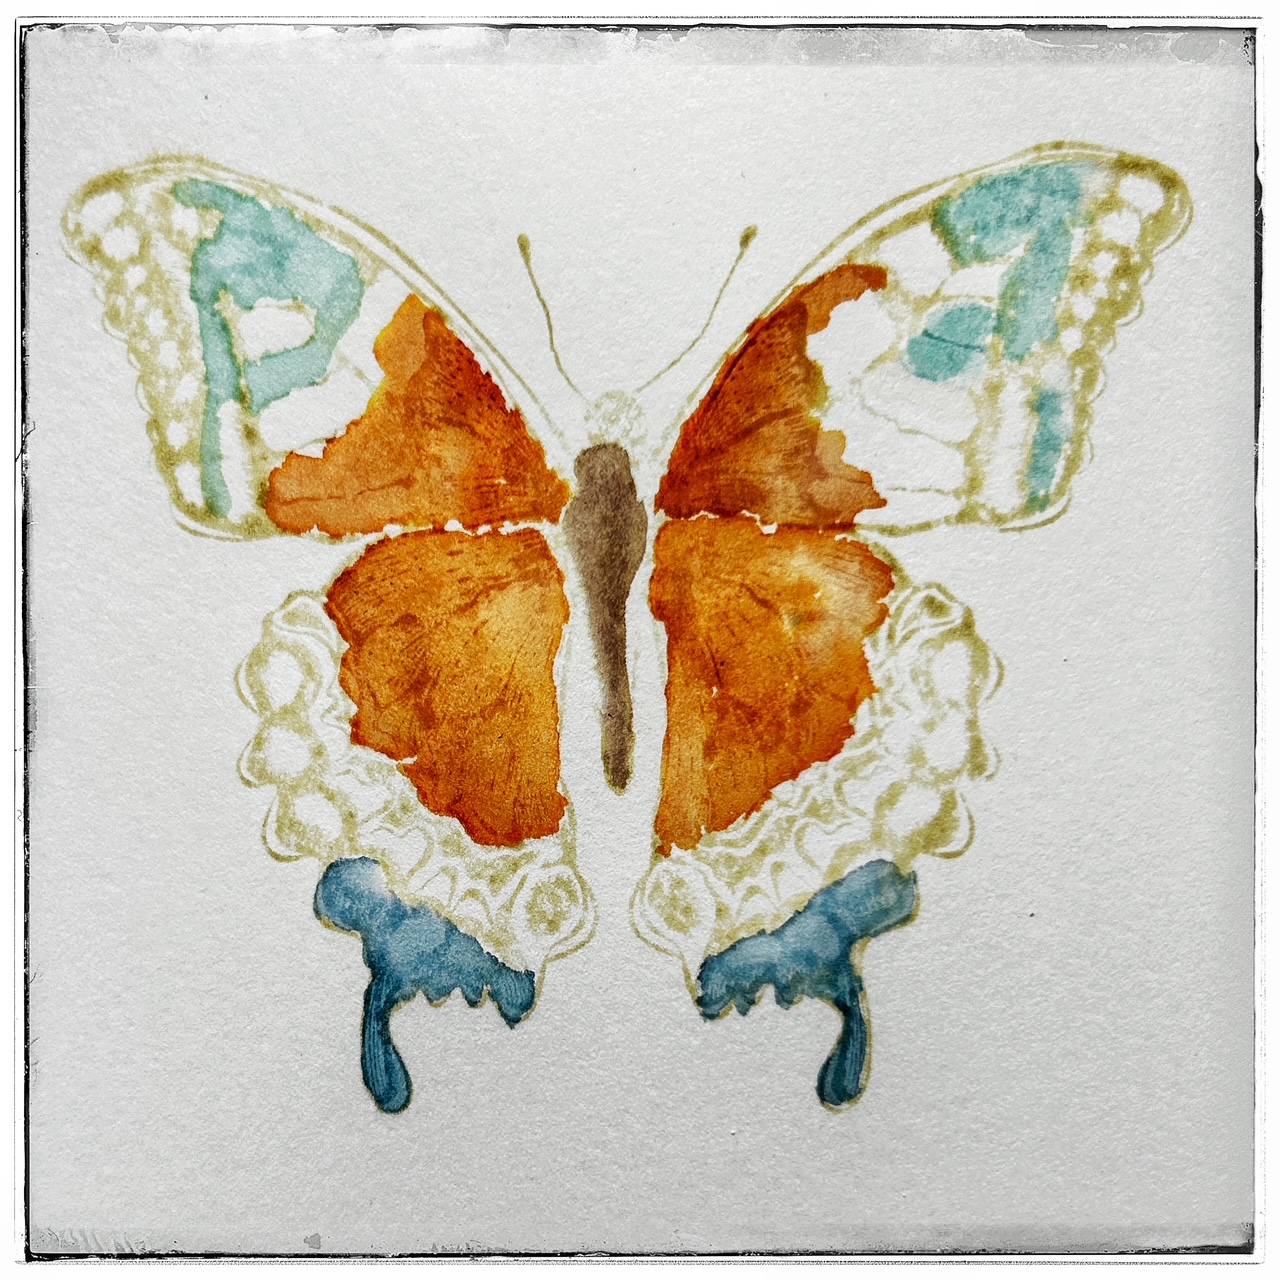
I used salvaged patina, rusty hinge, ground espresso and uncharted mariner with a fine round brush.
I cut out the butterfly .....
.... and blended ground espresso round it.
The orange edges in the wings looked very sharp against the blues so I blended them using white charcoal pencil.
Then used a white posca pen and black drawing pen to add final details.


xx


Supplies

TH Distress inks - Antique Linen, Salvaged Patina, Rusty Hinge, Ground Espresso and Uncharted Mariner,

TH Butterfly stamp - Perspective CMS213, 

White charcoal pencil,   white posca pen,   black ink pen fine 

TH - Collage Strips, Snippets, Remnant Rubs, Mummy Cloth.

Gesso


Monday, 16 June 2025

Paper Dolls panel

 Adding to my Butterflies, Bees and Moths Creative Sketchbook

Whilst pulling together ideas and a large number of designs for a workshop next month, some made the cut and others didn't.

I'm teaching my take on Creative Sketchbooking on the 17th and 18th of July at Country View Crafts headquarters.  Thursday the 17th July is sold out but there are some spaces on Friday 18th. Bookings can be made here

 This was one of the experimental projects I made that didn't make the cut, but I will add it to the sketchbook later along with some other bits and pieces I have left over. It will be good to add them as they are still important being part of the creative process and decision making.

Paper Dolls panel 


Cut panel 10 x 8 cms punch rounded corners. Paint surface with gesso – dry. Using small sponge blend over a mixed colour to your liking.

Dip into puddle of hickory smoke, dry and blend same ink round edges.

Stamp bug with watering can archival ink.

Gather dolls and blend ground espresso round them and the same with snippets.

Add something to ground the girls I used the small alphabet strip.


I will add the actual Creative Sketchbook pages here after the workshop in July. 


xx


Friday, 12 January 2024

ORIGINAL

 A tag collage in my Mixed Media Collage art book.


The background was created with a dip, drip and dry process using Walnut Stain distress ink. The Salvaged Patina through a stencil.


The collage was built with layers of torn book papers, printed and stamped elements, hessian, thread, word sticker and washi tape.


The tag is one of 4 that were laid side by side and stamped together with a range of Tim Holtz stamps.


xxx


Tuesday, 19 May 2020

Stencilled background with acrylic paints - new technique

I have been revisiting old techniques and posting them recently but this one came out of the blue and is now a new technique I'm sure I will call on often.
I was so excited at the results of the layers building this background and made it into a card for this post.

Process steps

1. Scrape a layer of tinting base over the card using a palette knife.
2. Mix a watery wash using the most tiniest pin prick amounts of cobalt teal and grey paint. Dip and dry.
3. Into what is left of the wash add a tiny amount of primary yellow and repeat step 2.
4. Mix a new wash of prussian blue and repeat step 2.


5. Add tiny dots of the yellow, cobalt and prussian blues on a palette. Take a stencil, a small blender with blending foam and a water spritzer. Spritz over the stencil so water goes through onto the background, pick up tiny amounts of one or two of the colours at a time and blend through the stencil and dry.
See this technique also stepped out for a Spring card.


6. Use embossing powders and a text stamp for interest.
7. Spread some resist paste randomly over and paint over a layer of olive grove leave to dry.
8. Rub away with dry kitchen towel and a wetwipe to reveal most of what is underneath again - some of the original background seemed to fade - did I rub too hard?
9. Repeat step 7 using eternal chalk paint this time.
10. Repeat step 8.
11. Scrape some random patches of white crackle paste around the edges and leave to dry.
12. I found that some of the crackle dropped off when I went back to it and I'm sure it must have been because of the resist paste, so I gave it a coat of soft touch varnish and again left to dry. That sealed it in place.


I also made a technique bord using different colours
step 2 - phthalo turquoise and medium grey.
step 3 - add naphthal red
step 4 - prussian blue.
step 5 - create different mixes using naphthal red, diarylide yellow, cerulean blue, prussian blue, titanium white, titan buff - going back over the shapes with different blends of colours to create overlays and depth.


Love the Moroccan/Spanish feel to the design and to see what different effects can be achieved.


xxx


Thursday, 19 March 2020

DecoArt Mixed Media Team Project for March

I have a post going live over on the DecoArt Mixed Media Blog today which came about because I had my arm in a sling and needed to not move it around much. So the three media boards I chose to use all had the same techniques and layers as did the butterflies but the small deviations with stamps and positioning created enough variety of interest to the eye.

To see the full tutorial please pop over to the DecoArt blog where it is listed with lots of process steps and photos.

xxx

Friday, 12 July 2019

Wildflowers and cultivated flowers - mixed media journal page.

I went out with a friend for her birthday recently and I bought an old book of Dickens' A Tale of Two Cities. Unusually there is no printer's date in it but it was scribed by someone and dated the 7th January 1910, over a hundred years old, so now I don't want to tear it up or alter it lol.
However my friend had some books in her car ready for the charity shop and one was A Country Diary birthday book, certainly not old at all but the illustrations are all flowers and are hand painted prints so I decided to take it off her hands and have a play at using some of the gorgeous flower designs in some journal pages.
This is the first one stuck into my nature journal which already had some tissue collage paper glued on it.


To age the illustration I stamped with some text and gave it a light coat of watery gesso and distressed the torn edges.


I painted some wildflower stems .....


.... and drew round one of Tim's transparent butterflies on watercolour paper, dipped it in some pinky paint washes, glued the two together and covered the surface with glue to make it matte. I also added a crochet die border and a quote.


You'd think this would be quite quick to do but as always I overthink everything.

I am also sharing this over on the Country View Crafts project blog.

xxx

Supplies from Country View Crafts
Tim Holtz wildflowers die and crochet die
Tim Holtz stamps Nature's Wonder
Tim Holtz Transparent acetate wings

Friday, 17 May 2019

Acrylic Paints blended background and collage journal panel


For this panel I took quinacridone violet, cobalt teal hue and transparent yellow oxide which are all DecoArt Media transparent colours and translucent white which is semi transparent and blended them over a textured gesso background blending with a blending tool and blending foam and rubbing back with dry kitchen paper. When I was happy with the pale colours I then sanded lightly over the surface to reveal some of the white of the gesso below. Using ground espresso distress ink I blended around the edges of the card to give it a more vintage appeal and rubbed a little in the centre too wiping it back with a damp cloth.


Stamp text stamps using watering can archival ink before splattering with a watery wash of paynes grey. Add a collage with wildflower stems and some dried natural accents, ..........


...... a transparent butterfly coated with matte medium to take the shine off of it, .........


......... vintage photo and quote.


I am also sharing this at Country View Crafts project blog today.


xxx


Supplies available from Country View Crafts


Friday, 22 February 2019

CAS card - Brenda style

If you've seen my work you'll know I don't do CAS style - I'm much more a vintage, shabby, grungy, industrial type artist but this came together with some salvage bits from leftover boxes plus a leaf die cut from the newly released Large Stems die from Sizzix and Tim Holtz


You'll probably recognise the latticework stencil design that I used on a piece of canvas paper and then cut the stitched circle, this helped to create the focal point.


The large leaf stem was covered with embossing ink and sprinkled with the new lime mixed media powder from Ranger.
To create a little more interest I added the garden greens leaves and some stamped and die-cut bugs ......


.... and finished off with a happy birthday sentiment.


Can you tell I love Tim Holtz products????? This is a sample I am sharing over on the Country View Crafts project blog today as well.


I know this is not true CAS style but it pleases me to get somewhere near it..


Thanks for looking ...... and 
xxx