Yay Spring has sprung and this is the second of my posts with that theme today and this one is for the Country View Challenge called Spring. If you missed the earlier one which is my sample for A Vintage Journey, then scroll back one when you've finished here or click the link
.
.
This time I have a canvas board for you made with DecoArt products.

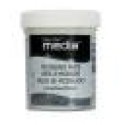
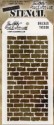
Using one of my 5 x 7 canvas boards I created texture using decoart white modeling paste and a Tim's bricked stencil and left it to dry.
Whist it was doing so I began thinking about the colours I would use.
Whist it was doing so I began thinking about the colours I would use.
I love collecting images on Pinterest and have a colour palette board so I looked for colours to use and these looked perfect especially as though they have a slight vintage hue to them.

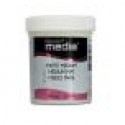
I die-cut the window and window box from mount board and set about creating crackle using the decoart white crackle paste. I began by giving the surface a coat of matte medium and a thin coat of the crackle paste hoping for a fine crackle to appear. You can see I did get some in places but maybe I should have painted it a little thicker to get more. I rubbed in sap green and titanium white paint and rubbed it away with a babywipe, then I sanded it and blended in ground espresso DI.

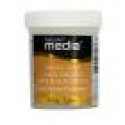
Next I painted a piece of card using media acrylic paints ....


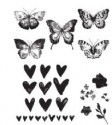
... and stamped three butterflies using vermillion archival ink and cut them out. You will see though that I only used one in the end.

Then I continued with the background and used a collection of media paints to daub, spritz with water and drip until I was happy with the result.

I even used a fine brush and added some vintage photo along the gaps in the bricks.

To finish it off I wiped on some transparent crackle glaze and left it to dry. At this point as it was such a beautiful Easter Friday we went for a long walk with the family on Ash Ranges.


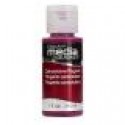
When I got back the crackle glaze had dried so I rubbed in English Red Oxide antiquing cream, let it dry a bit and rubbed over with a damp babywipe to leave the cracks showing through.

I must have either not laid enough down in some places or overworked it as some of the areas didn't crackle at all. The result is a shiny surface where the glaze is so I gave the whole surface a coat of matte varnish.
I even used a fine brush and added some vintage photo along the gaps in the bricks.
To finish it off I wiped on some transparent crackle glaze and left it to dry. At this point as it was such a beautiful Easter Friday we went for a long walk with the family on Ash Ranges.
When I got back the crackle glaze had dried so I rubbed in English Red Oxide antiquing cream, let it dry a bit and rubbed over with a damp babywipe to leave the cracks showing through.
I must have either not laid enough down in some places or overworked it as some of the areas didn't crackle at all. The result is a shiny surface where the glaze is so I gave the whole surface a coat of matte varnish.


A word band painted and most of it rubbed away to leave coloured lettering and some die-cut birds.

Some spring greenery and chloe stem ....

.... and an old prima flower that got a few spritzes of misters.

You can just make out the checked pattern paper that the flower was made out of.

And everything collected together that I thought I would use. Can you see a snippet of wallflower stash paper behind the windows?

This is what it looked like.

The flower centre was originally a pear gem, it still is but I used the paints to colour it up.

The butterfly perched on the window - is he waiting to fly after the birds?

I hope you like my ode to Spring, I for one are certainly looking forward to the warmer weather.

Have a good April, time to get those gardens cleared and ready for the summer bedding. In the times you are unable to get out why not get creating and join us for the Spring challenge? You never know you might be the next winner of a £20 voucher from Country View Crafts or one of our top 3, but please pop over to the challenge blog to see our new teamies and all the inspiration we have for you.
Take care and listen to your heART.
hugs Brenda xxxxx
DecoArt products and other supplies I have used are available at Country View Crafts