I've been busy at the Country View Crafts shop blog this week, this is my second post in three days, but then it's been a bit like London buses, none for ages then they all come together lol.
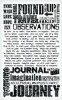
I have another textured tag with the background done in exactly the same way as the one I did last September and the one here and on the shop blog on Sunday.

There are more photos over at CVC Project Blog if you would like to find out more about how I made this tag.
Thanks for stopping by again today. I will see you again on Thursday with another double spread in my Visual Diary. If you haven't joined our blog collection there is no limit to it, it's just for fun.
hugs Brenda xxx
Updated with details from CVC


Updated with details from CVC
Whereas the last one was very much more of a feminine theme, this is for those of you who like to have ideas for more masculine tags and cards. Yes although this is a tag, why not use the ideas to make a card?
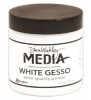
The background was made by swiping gesso over a size 10 tag, spreading it on like buttering bread. Heat dry.
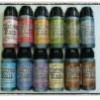
Drip distress paints or distress stains down the tag so that it covers the background and dribbles through the cavities of the textured areas, misting with water of glimmer mists.
Decide and collext together all the pieces you want to add and I love to layer mine, collage style.
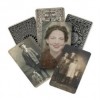
I took one of Tim's found relatives and cut him out but can you see what he is mounted on? Yes I peeled the backing off of the card and then stuck him onto it.
Once the paper layers had been stuck down, I placed the tag under a heavy box to flatten before adding the 3D embellishments.
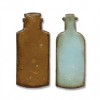
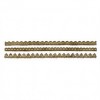
I used the tarnished silver technique for the movers and shapers chipboard bottle and the rusty cog is one I made for a tutorial on A Vintage Journey, you can find out how to make them HERE
.
Pop back again on Thursday when Chris will be sharing another of her fabulous inspirational projects.
Thanks for stopping by.
hugs Brenda xxx