Thursday 29 January 2015

A Visual Journey #5

Today's pages mean I have created freely each week in January and it is already exciting to see the altered book filling up with my experimentations; it really is a personal and safe place to create whatever comes to mind.


For these pages I decided to look on my shelves and find things that are sitting feeling lonely and unused. Old rub-ons, stickers, bags with left over bits from projects and workshops, old paper packs, boxes of die-cuts ..... you get the picture?


used die-cuts and adhered to the page.


Coated the die-cuts with a layer of gesso and when dry I scraped broken china and bundled sage distress paints, misted and dried


Added some torn paper from the old paper stack.


Blended some mustard seed and picket fence DPs over the page.


Used my finger to blend some gesso in places.


Finally I sprayed some bright Dylusions over.


And found these film strip pieces on my desk, they are leftovers from prepping workshops this week, so I decided to utilise them.


This is the last January Link, there will be another new one next month. Thank you to everyone who has shared their work with me I so appreciate it and love looking at what you are making.
Don't forget your visual diary, journal, sketchbook or whatever you call your creative jottings is your creative place and you can make up your own rules as to what’s included and how it’s presented.

If you would like to join the party please take a look at my original post HERE and then add the script below to your blog post.
   
This is not a challenge it is just for fun but it's a great way to see what others are making in their journals around the world whether it be an art journal, visual diary or sketchbook and whatever medium or style you choose.


Have a great weekend.

hugs Brenda xxx


Friday 23 January 2015

Love is in the air at AVJ

A Valentine type theme starts today at A Vintage Journey,  The lovely Astrid is the host and she has chosen the title and describes it thus -
It being nearly the end of January, it's not long until Valentines day.
A flower cannot blossom without sunshine,
And man cannot live without love.
So the saying goes. For this challenge please share what moves your heart with us, be it a Valentine's card for a loved one, a heart themed project, or something else that expresses what true love means to you. Just make sure that Tim's style is evident in what you make.


I have taken the opportunity to make a card for my dear hubby.

A heart with festive berries, barn door and aged mahogany distress paint, dried and covered with rock candy crackle paint. When the cracks appeared and it was dry I painted with brushed pewter distress paint letting it seep into the cracks and wiping off the excess before it dried on. Then covered with walnut stain distress stain and baked on with a heat gun.


A pair of wings were dabbed over with brushed pewter DP, dried, sanded and inked with walnut stain distress stain.

I always collect pieces together that I think will go on my card.


These are the two pieces that formed the background layers. The striped piece is from Tim's Merriment paper stash and the dark red panel is a left over from Christmas where I had used the reverse monoprint technique using the holiday knits stencil. To give me more of the colour I wanted I dipped it into festive berries, barn door and aged mahogany distress paints, smooshing it on my mat and heat drying. Love the effects of the deeper mottled inky background and blended paints on top.


Using a small flourish embossing folder I added texture to the corners of the background piece and gently blended over fired brick and walnut stain distress inks.


I used the trellis framework, cut three pieces from another piece like the red panel, sanded the edges and blended walnut stain over before adhering them to the background

 Finally I added the collected elements to finish my card.


Now I just need to keep this hidden for a few weeks before I give it to Ken.

We are looking forward to seeing what projects you make with a 'love' theme and if you enter the AVJ challenge you could be in with a chance of winning a £10 gift voucher from Country View Crafts, our fabulous sponsor, where the prices are keen and the p&p is free.

Have a wonderful weekend.

hugs Brenda xxx


Thursday 22 January 2015

Visual Journal #4

Do you ever go onto Pinterest and suddenly realise you are looking at similar things that aren't necessarily what you would normally look at? Whilst looking at journal pages earlier this week I realised I was looking at quite a number that had circles in them. I know they are popular, but it's not a shape I have used much, and if I have it's just to print circles from little plastic pots over a journaling page. As they had caught my attention I wanted to have a play.


I started by gessoing the next two pages in my altered book, adhered some music score paper on the two pages and gessoed over the top of those. Love the textures it created as well as the interest for creating on.


I got out my box of journalling bits, found the plastic lids I have collected etc and using black gesso printed some circles in two sizes.
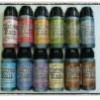
I decided to use distress paints to colour them in as I wanted to see how they looked layered up with colour knowing that dried distress paint is permanent on the page.


The colours I used are salty ocean, evergreen bough, mustard seed and festive berries. Wow is summer here with these colours?


The next step was to repeat the process using smaller circles and adding more colours to all of them. Did I tell you I was finger painting rather than using a brush. I was having such a great time - it took me back to being a teacher, when I was in the classroom.


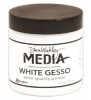
For this part of the process I added some vintage photo distress paint and some white gesso. (Really I suppose I should have got the picket fence distress paint out, but the gesso was already sitting on my desk. I was also texturising the circles at this point dabbing my finger instead of rubbing and adding water to get more translucent colours.


Next I added the background using victorian velvet and tea dye distress stains. With a brush and using a baby wipe I blended them around the circles.


At this point looking at the pages I realised the circle forms were all too neat and perfectly formed, how to change them?  Get out your black pen and draw parts of circles round the lids you used. Works for me.


Then some very small text either in or across the circles, some tiny little black circles and some fine ink splatters. Some of the tiny circles that were not connected to the larger ones looked odd to me so I gently dabbed them with the gesso, dried and dabbed some of the distress inks over them, now they appear to be more in the background
At this point although the pages were almost dry they were beginning to warp quite a bit so I put them under a heavy box for a while.


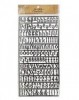
Some walnut stained edges and chit chat stickers saying 
'Laugh forever and share a smile with friends' on the first page ....


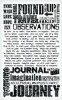
... and some 'real' jouraling using a pen and handwriting -
'Using my journal is about developing my ideas - showing my thought processes and providing insights into my thinking without feeling constrained by others' expectations'.


To get a more aged look to the pages I added a coat of glue and seal with some vintage photo distress ink mixed in (see Tim's tag for January). One thing I learned is that if I am going to seal the pages I need to make sure my writing pen ink is WATERPROOF - but as Tim says 'embrace your imperfections', after all not only is this a visual journey it is a learning journey as well. 

If you would like to join the party please take a look at my original post HERE and then follow the link below to get the script to add to your blog post. Maybe you might like to make some circles.


This is not a challenge it is just for fun but it's a great way to see what others are making in their journals around the world whether it be an art journal, visual diary or sketchbook and whatever medium or style you choose.
An art diary, art journal or visual journal is a daily journal kept by artists, often containing both words and sketches, and occasionally including mixed media elements such as collages. (Wikipedia) Dina Wakely says 'Simply put, an art journal is a journal in which you combine art and words to express yourself. That’s it. It’s not complex, and there really aren't any rules for art journaling. It’s all about self-expression. Art journaling has a long-standing artistic tradition. Artists through the centuries have kept notebooks in which they sketched, practiced, experimented, and recorded themselves. Picasso and DaVinci were two other prolific sketchbook keepers. You are in good company!

Enjoy.

hugs Brenda xxx


Tuesday 20 January 2015

Vintage textured tag

I've been busy at the Country View Crafts shop blog this week, this is my second post in three days, but then it's been a bit like London buses, none for ages then they all come together lol.

I have another textured tag with the background done in exactly the same way as the one I did last September and the one here and on the shop blog on Sunday.


There are more photos over at CVC Project Blog if you would like to find out more about how I made this tag.

Thanks for stopping by again today. I will see you again on Thursday with another double spread in my Visual Diary. If you haven't joined our blog collection there is no limit to it, it's just for fun.

hugs Brenda xxx


Updated with details from CVC

Whereas the last one was very much more of a feminine theme, this is for those of you who like to have ideas for more masculine tags and cards. Yes although this is a tag, why not use the ideas to make a card?


The background was made by swiping gesso over a size 10 tag, spreading it on like buttering bread. Heat dry.


Drip distress paints or distress stains down the tag so that it covers the background and dribbles through the cavities of the textured areas, misting with water of glimmer mists.


Decide and collext together all the pieces you want to add and I love to layer mine, collage style.


I took one of Tim's found relatives and cut him out but can you see what he is mounted on? Yes I peeled the backing off of the card and then stuck him onto it.


Once the paper layers had been stuck down, I placed the tag under a heavy box to flatten before adding the 3D embellishments.


I used the tarnished silver technique for the movers and shapers chipboard bottle and the rusty cog is one I made for a tutorial on A Vintage Journey, you can find out how to make them HERE

.
Pop back again on Thursday when Chris will be sharing another of her fabulous inspirational projects.

Thanks for stopping by.

hugs Brenda xxx