Friday 31 July 2015

Tag Friday at AVJ

Welcome to the fifth friday in July and at A Vintage Journey that means it's Tag Friday. Firstly I would like to wish my hubbie a very happy birthday today - you will see his card on another post later next week. So let's take a look at the tag I made for today.


I also showed you how to use a similar process to create a rusty galvanised tin effect suitable for a watering can and created this little sweetie, but it didn't have a home so here we are with a tag for it.


I took a mop up tag ....


.... blended antique linen, bundled sage and evergreen bough distress stains over it ....


.... dripped and flicked some water and heat dried it.


I gave it a gentle covering of distress micro glaze and left it a minute or two to dry while I started this post and then rubbed it gently with a piece of kitchen towel. I blended over another layer of distress inks and flicks of water creating a double layer of distress.


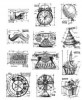
I added some background stamping using a flourish/flowery stamp from a very old set of Tim's called artful flight using potting soil archival ink and heat dried it.


Then added a piece from the mixed media thinlits to give some depth and texture.


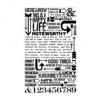
The sentiment is from simple sayings -  the butterflies from french flight framelits ....


.... and I also added the small bird from Tim's new punches range.


I finished off with flowers from the tiny tattered florals set and a rusted muse token.


Now I feel happy that the old watering can has a peaceful home in the garden.

Thanks for stopping by and do please go take a look at the other wonderful tags offered up by the AVJ Creative Guides - you won't be disappointed.

Have a wonderful weekend. I am off to London to the Wendy Vecchi workshop and really looking forward to it. I am also excited about seeing blogging friends some of whom I have never met. I shall post some photos  next week.

Take care.

hugs Brenda xxx


Thursday 30 July 2015

A Visual Journey #30

I am in one of those moods where ideas aren't sparking in my head and I'm bereft of creative connections. It's times like this I need someone to ignite my inner muse and challenge me to try something different, so for me the best place to go for that is Pinterest and take a look around until I see something that inspires me.

Today I was really taken with a video that Marta Lapkowska made for Lindy's Stamp Gang and followed her steps to create a mixed media journal page. I do recommend you take a look whether you need a shot in the arm like me or just to stimulate your curiosity.


I followed Marta's steps to create an artsy background using torn papers, masking tape and I used dylusions ink sprays for the colours. I have to say at this point I was not sure this background was going to work ........


.... but following Marta's steps in my own way I ended up with pages that I am really quite pleased with.


Adding the stamps, the definition lines, the words and the circles really added to the artsy look.


Even through all the layers you can still see some of the torn text and music papers.


Thank you Marta for the inspiration, it was the perfect thing I needed to do right at this moment and I am pleased with the results I got. 


Thanks for stopping by on my Visual Journey and I can't believe I have managed 30 double pages this year, the journal is getting very fat. Please pop on over to Marta's blog and see the amazing projects she has displayed.


Take care.

hugs Brenda xxxx


Tuesday 28 July 2015

Tim's tag for July at CVC

What's on my desk?

Although Tim's tag was inspired by the US celebrations for the 4th July I originally wanted to keep to the red. white and blue theme and make a UK patriotic tag but it didn't work out. So I went a bit more vintage.


Using mini blueprints 4 I chose the vintage desk items and followed Tim's directions to colour up and make the tag stamping onto watercolour paper and using distress markers and a water brush to colour them in.


I applied micro glaze like Tim shows us, it does a brilliant job of sealing the distress inks and I love the distressed effects that can be achieved when you paint inks over it.


My design changes here with the addition of remnant rubs and ideaology.


I will link you to Tim's blog where you will be able to see his patriotic version and all the process steps that you can follow if you want to join in his monthly tag contributions.


Thanks for popping in today.

hugs Brenda


Products can be found at Country View Crafts - press the links to be transported there.


Sunday 26 July 2015

Summer canvas workshop for CVC

Happy Sunday everyone, I hope your weekend has been going well. Today I have posted some photos of the Summer Canvas workshop over at Country View Crafts Project Blog. I had the most amazing session with 19 fabulous ladies who made the day special and very rewarding. I would love it if you could pop over to see what we were up to.

I have split the long photo we took of everyone and there are more over at CVC. 
But we have .....

Hazel, Nikki, Jane, cathryn, Lynda and Chris .....


Me, Gillian, Kate, Carol and Kathy ....


Ann, Anne, Diane and Heather ......


Jacqui, Margaret and Sue.


See you again on Tuesday when I will be slipping my July Tim tag under the wire.

hugs Brenda xxxx

Thursday 23 July 2015

A Visual Journey #29

For all my friends


After gessoing the pages and leaving them to dry I stamped CI 063 Friends in Paris stamp and again on a piece of card using black archival ink. Over the top I rubbed in some of the Tim Holtz distress micro glaze - I wanted to keep an area around the image without colour on it. I also stamped CI 430 Baroque Splatter Script in cornflower blue archival.


I splodged distress inks on my craft mat and dipped the pages in forgetting that DIs and gesso don't complement each other and that the DI doesn't want to dry even when baked with a heat gun. So I did the same with some distress paints and had more success.


You will see where the glaze is neither the inks or the paints stayed I had to wipe them off as they just beaded up and lay on the resistant surface.


To add to the Parisian feel I added texture paste mixed with tarnished bronze distress paint through a fleur de lys stencil and let it dry.


I added a couple of small collage pieces and added white texture paste around them and over the fleur de lys.


Before I added the last layers I dripped some glimmer mist and distress sprays in the textured areas.


Gosh only another couple of weeks and I will be off on holiday and I'm so looking forward to some quality family time round the pool and eating out in the evenings, can't wait.

Have a great end to the week and thanks for stopping by today.

hugs Brenda xxx


Tuesday 21 July 2015

Rusty patina effect using Tim Holtz products


When I posted my June Tim Tag with the rusty patina tarnished trophy I promised a tutorial as to how I achieved the effect using Tim Holtz products. So here goes.


This was inspired by Kate from Lindy's Stamp Gang and her faux verdigris or patina background  - I used her method but swapped in Tim's products. This technique enabled me to use up some of a forest moss distress stain that has gone dark brown with perfect bronze perfect pearls and a drop of water in a mister. 

Spray card with mister of home made glimmer mist making the card really quite wet (the card I use seems to have a coating to it and will withstand lots of wet and painty layers). Add some salt crystals and heat dry slightly.


Spray with gathered twigs distress stain.


Drip in some drops of evergreen bough distress paint and spritz blobs with your home made mister.


Repeat with blck soot distress paint and dab on some kitchen toll to lift some of it if it is too intense.


Spritz more home made mister and dry.


This is from ther first piece I made for the cup above.


This is the piece I made for the tutorial - you can see you will never recreate exactly the same again. This one has much more of a 'bloom' to it created by the misting of the evergreen bough distress paint.


Next I wanted to try to achieve a silver/galvanised effect so I followed the same steps but used the brushed pewter distress spray stain and spritzed with water adding more brushed pewter and a little weathered wood spray stain with drops of  evergreen bough and hickory smoke and when partially dried I added a quick spray of brushed pewter again.
This is what it looks finishing off drying with the salt granules still in it.


Next I wanted to try rusted tin. A spray of hickory smoke which has a decidedly mauve hue to it when wet but dries to a lovely gun metal grey.


Added a spray of pumice stone but the darn thing has turned green - grrrrr so annoying when that happens. So I blotted off as much as I could and dried it.
Next came some random sprayed brushed pewter and some black soot, dried partially with then another spray of brushed pewter


I wanted to add some rust so I sprayed firstly with walnut stain, the colour didn't stay very well so I repeated with vintage photo and its as if the brushed pewter absorbs the other colours - it really looks much greyer than this in real life.


So having found this photo of a rusty tin watering can ....


.... I got out the distress paints, walnut stain, gathered twigs and vintage photo and stippled it on in areas but still not the effects I wanted so I grabbed the gesso, took a small amount and sprayed vintage photo into it then stippled that over the top of the distress paints and whilst still wet sprayed more vintage photo over it - as I was drying it I noticed how it lost its brightness and became dull so I sprayed again and left it to dry naturally, but that didn't work either.


After several layers of stippled distress paint and stains and then sprays of rusty hinge and vintage photo I desperately wanted to capture this 'wet' look which highlights the deeper rusty colours ...


so I spayed once more with rusty hinge and whilst wet I also sprayed  a gloss varnish, dried and repeated with vintage photo. Now there is much more of a silvery/galvanised shine as well as a deep, vibrant and rusty effect.


So now here is my rusty watering can, I feel a tag or card coming on.


 I hope you can make sense of all the products and stages with this tutorial, it shows what didn't work as well as what did and that's all part of the experimenting, trialling and achieving what you want (or not lol).

Enjoy your crafty endeavours.

hugs Brenda xxx