Wednesday, 15 March 2017

Shabby Mother's Day cards - Seed House

I have some old papers in my 12 x 12 supplies that are kept beautifully in a proper scrapbook paper box and I decided to dig some out to make Mother's Day cards for my shop space. It seems to have taken over at the moment but I need to get established with selling slightly more commercial things before I think my mixed - media might stand a chance. Yes it's still early days but I want to do anything and everything I can to get it off the ground - any helpful comments are greatly welcomed.


I took some of the papers and cut to size scraping some white chalk paint round the edges.


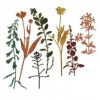
The flower cards were cut from one of the 12 x 12 pages and I also gathered some shabby seam binding ribbon to use. One lot I left plain pink another lot I dyed using distress inks.


The little Mum brad is one of Tim's and I downloaded one of my own backgrounds into photoshop elements and added the word Mum to it then when it was printed out I punched it with a circle punch to fit the brad size. I had painted the brad with the white chalk paint to make it more shabby.


Here it is in situ.


I am using up a horde of flowers that I have bought over the past few years and hardly dipped into ....


.... and again I painted them with the chalk paint to achieve more of the shabby look.


 These are two of the four I made.


Whilst I am sitting writing this post I am wondering if they are selling lol. I'll pop back and let you know at some point.

I hope your week is going well.

Thanks as always for stopping by - I so love having your company.

hugs Brenda xxx

Monday, 13 March 2017

Distress Oxides stamping butterflies

HI everyone - just a quick post today. I had some great fun stamping some butterflies for a workshop recently (the project will be published here on Mother's day) and I absolutely love the results - it's such a shame that however I photographed these the light did not do them justice.


You can see how wonderfully 'chalky' they look.


Tim showed at CHA that if you cross contaminate your ink pads all you have to do is rub them clean again - I tried it and it certainly worked for me.


To get the gorgeous blended look after I had inked the stamp I just spritzed it lightly with water before stamping it. The mixes of the colours are amazing and of course each butterfly is truly unique.


Here's a sneak peek of the one I used on the workshop project.


Let me know if you try this out and what results you get.

Thanks for stopping by.

hugs Brenda xxx

Friday, 10 March 2017

Make your own frames 3

I'm sharing one of my altered frames and this one originally was dark grey plastic and bought for £1 at the pound shop. It now holds a lovely vintage photo of my MiL.

1.  Give the plastic frame a coat of dark colour DecoArt chalky paint and dry - I used cameo. Just cover the raised areas with a second coat.


2.  Gently rub a fine layer of Vaseline on some of the raised areas and give a coat of light chalk paint - I used whisper.  Repeat as necessary and dry.
3. Use a cheap nail file to lightly rub the raised areas to rub away some of the light paint and reveal the red underneath. Do not rub hard as you will rub back to the plastic.


4.      Wipe the frame over with a soft cloth to get rid of all the dust.
5.      Distress and age the frame by using clear and brown wax. Leave to dry.


And there you have a great vintaged frame for just a few pence. It looks great n the windowsill in my conservatory.

Have fun making your own and have a great weekend whatever you have planned.

hugs Brenda xxx


Monday, 6 March 2017

Shabby Mother's Day cards 1 and February Give-Away winners

Knowing I wanted to get a Mother's day focus to my little selling space I decided to make some really pretty, shabby cards to take up to the Packhouse. I actually made four of them - being in a 'wishful thinking' frame of mind. Here's two of them - they were all the same design and colours but each one of them just had that bit of individuality to it.


The winged hearts were metal charms and I gave them four coats of tinting base before rubbing on a little quartz rose treasure gold. It sat perfectly in the little hole of the tags I made. They were stamped with worn lipstick distress oxide, spritzed with water and dried to give them a worn and shabby appeal. The little Mother's Day greeting I made on the PC and printed out the size I needed them.


The flowers are shop bought, some I got when I was in America last year and some are from hobby craft. The beaded berries and white stem are from Anna Marie Designs.


I also used some bleached natural cocoa fibre and some muslin for greater interest.


The patterned papers are from the range and the blue backing and pennant was just from my hoard of papers that need using up.


I finished by painting some of the tinting base on the berries and flowers and eh voila ........


Are they selling? I'll let you know.

Update four days later and two of these cards have sold - woo hoo.

Onto my February give away winners now.

 First chosen by Random Org - #19

Thats Jan Hill - congrats Jan.

Second chosen by Random Org - #12
Thats Jackie Neal - congrats to you too Jackie.

If you could both email me your home addresses I will get these in the post to you and it will be a surprise when it arrives as both of you were happy with either of the dies.

Have a great week everyone.

hugs Brenda xxx


Friday, 3 March 2017

Abstract Art - 001 - Soaring high and All Aboard at AVJ

So it's the third of March and we're celebrating our third birthday at A Vintage Journey and for this special challenge I have created something completely different. Our theme is called 'All Aboard' which leaves it completely open for entries and Creative Guide samples.

At the beginning of the new year I decided I wanted to do more 'art' and what I really mean is looking at my mixed media style and extending it, I needed to do some research and try to create some abstract paintings, which is where I really began my artistic learning back at teacher training college all those years ago. So I'm getting into 2017 with some abstract canvases - yes hopefully there will be some more to see how I get on - but this is the first. I'm looking to soar and fly high and enjoy this new part of my artistic journey.


- Layers of gesso applied with a palette knife and dried between each layer.


- Rub with a wet wipe and brush some thin layers of paint over the canvas and when dry brayer over white to touch the high points of the textured gesso.
- Rub some brown paint around the edges with a cloth.


- Stamp numbers randomly using permanent black ink.


- Now here's where I went 'off piste' and picked up the DecoArt chalky finish paint and using a palette knife scrape two different colours randomly on the canvas.. (I mixed the vintage rose colour using smitten, relic, whisper and cameo).


- Stamp again, this time use letters randomly and permanent black ink. In fact add some words if you like the look.


- Using the a palette knife again apply another colour still leaving previous layers showing through. I chose the cameo.


- At this point I was unhappy with the serene blue so I had another go with that colour and the palette knife - notice the straight lines appearing in these top layers and I remixed some pink too to lighten up some areas.


- Finally I mixed some whisper. and rustic to highlight a few spaces.


- When completely dry I rubbed coffee archival ink round the edges.


Here's the colour inspiration I found on my Pinterest 'colour palette' board.


So there we are, I'm not 'unhappy' with this 20 x 20 cm canvas but I can see I have lots to learn. I'm just gonna run with it and see where my muse takes me when I get a chance to experiment.

So hopefully you will be able to pop over to the AVJ challenge blog to see what else there is for your delight and certainly the Creative Guides have lined up some very magical creations and maybe you will share you art with us too. You never know you might win the £20 voucher being donated by Country View Crafts this month.

Take care and listen to your heArt.

hugs Brenda xxx

Wednesday, 1 March 2017

Tim Holtz inspired for CVC

There is a brand new challenge at Country View Crafts today and the lovely Christine has chosen 'Inspired by Tim'. Now as you all know I love Tim's style and products and recently I purchased his Tiny Houses die and I just had to have a play.


I began by cutting the pieces from mountboard.


Then I used Tim's Wallflower papers to cut out individual pieces to adhere to the mountboard.


I realised the corners would be on show so I spread some texture sand paste over them and let it dry ....


.... and decided to paint them using white tinting base and burnt umber media acrylic paint.


When it was all dry I adhered the pieces together, gave them a coat of decou-page on the surface and put them to one side for a couple of hours while I went for a walk waiting for them to dry out completely.


When I returned  I spritzed a little water and blended over picket fence distress paint to tone the colours of the papers down a bit.


Then I used one of Tim's mini stencils to sponge through some dried marigold distress paint.


I stayed with the nature theme and added some of Tim's new Wildflowers thinlits on both sides cut from core'dinations papers.


Then out came the distress crayons to add some more colour


Finally before adding any embellishments I sanded and inked all the edges.


The colours didn't have enough contrast with the background so I used black and white pens and painted some tinting base between the flowers and leaves then added distress markers over the flowers and foliage to strengthen the colour.


The small talk sayings are perfect to give some meaning to each little house and I painted some greyboard pieces to give them something to stand on.


I hope you like my take on being inspired by Tim, it certainly gives me so much scope as I love so many of his products and playing with something new is always a treat.


hugs Brenda xxx