Friday, 4 September 2015

Home Sweet Home for A Vintage Journey

Today sees our new challenge at A Vintage Journey with Jennie at the helm, her choice of theme to give us a focus this month is 'home sweet home'.


 I was really tight for time so just a few process step photos and a quick explanation of how I went about making this. Altogether I wanted to create a shadow box for a kitchen or cafe that has a warm and vintage feel with brightish cups and vintage wallpapered wall.


I lightly painted the frame with white gesso leaving some of the wood exposed. I cut and adhered papers from the wallflower set making sure I gave them a coat of matte medium over the top to seal the edges as well as the paper itself. When it was dry I blended over some fossilized amber DI and hydrangea archival and used a picket fence distress paint dabber to firstly blend the white paint in random areas and then dab it on with my fingers to blend the colours and papers together. To finish I sanded areas and added my new favourite brown DI, ground espresso.


For the cups and saucer I experimented with the faux gilded technique by Wendy Vecchi using hydrangea, orange blossom and watering can archival inks and stamped the words in potting soil using Tim's hashtags set.


For the background is another piece of the wallflower set stencilled with latticework and fossilized amber DI


Having got myself started on everything I began to assemble the parts, gathering ephemera for the background wall ......


... putting the cups and saucer together .......


... then making up the collage adding dimension with the clock and photobooth picture using foam pads.


Once completed I added a word band altered with distress paints and ....


... a bookplate with the word 'home' in it.


Thanks Jennie for a great challenge theme, I hope you will be able to join us with an entry and keep a look out for our Summertime winner and Pinworthies next week.

I'm off to Basingstoke this morning as I am one of those people who got an Apple Iphone 6+ when it first came put and Apple have reported that some of the early ones seem to have a problem with the cameras. I can't say I've noticed it but best to get it checked and replaced as I use it a lot for taking pictures.
Thanks for stopping by and have a gbreat weekend.

hugs Brenda xxx


Tuesday, 1 September 2015

Numbers (1) for Country View Crafts

Antique French Number Plaques


Here's a very special altered photo frame from me today, you'll find out the significance of it at the end of the post.
I started with an old Ikea deep frame which was quite highly varnished so I gave it a sand down to provide tooth for the gesso to stick to it and painted it with decoart white crackle paint.


Whilst that was drying I die-cut four oval shapes from greyboard ....


.... painted them with black gesso and created a rusted effect using decoart media acrylic paints.


When dry I die-cut the movers and shapers numbers and punched holes in the sides.


For the background I took a piece of card and cut it to the size of the frame - I ran it through an embossing folder (I only have 2 A4 ones so the text seemed the most appropriate). I brayered titan buff, raw umber, burnt umber and viridian decoart media acrylic paints on my craft mat and gently rubbed the embossed text over it ....


.... and I didn't waste any of the paints as I took a piece of A4 card and took a mono print from the textured paint that was left and then used what was left on the roller and the craft mat .....


.... to create a spare painty piece that I used in the background of the die-cut 70 and to adhere to greyboard and die-cut the hearts.


Here you can see the crackle effect on the frame which as also been sanded and inked in prominent places to make it look worn.


I used hot glue to add three paint brushes bound with rusty wire....


.... and I still have three left to use on future projects.


Once I had put the frame and pieces together I have a stand up picture frame as a lovely reminder of the year my educational career started, when my love of art really began and also the year I met the most significant man in my life.


I hope you will be able to join us in our numbers challenge this month where there will be a £20 voucher for the Country View Crafts webshop for one lucky winner.

Thanks for stopping by.

hugs Brenda xxx


Monday, 31 August 2015

Tim's tags for August

Well the weather was atrocious last week and we ended up with flash flooding with our garage and garden underwater, in fact it was well above my ankles round the back and I had to go and carry Cimmie in from the top garden as he wouldn't come through the flooded lower ground. The weekend hasn't been much better with a wet BBQ yesterday and it's rained most of today too, What's happened to the August weather? But I'm not giving up on summer yet and decided to create two tags for Tim's August collection, one in a vintage style like his the other much brighter and reflecting summer at the seaside. Here we meet Georgia at two stages of her young life.


Tag 1
Georgia is 6 years old, she loves the outside especially being at the seaside . My tag is a Tim alternative with a bright summery feel to it but the steps followed are almost the same as the steps Tim teaches us this month.


The background colours are mermaid lagoon, twisted citron. broken china, frayed burlap and hickory smoke and I kept to Tim's steps but added my own version of the upper layers. The metal embellishments have been altered using distress paints and archival ink.


The starfish are the centre of the sand dollar die and cut in hessian to provide texture.


The seahorse was cut from a blue mopup piece of card, painted with rock candy crackle paint and when dry I added peacock feathers and broken china distress stains.


I wonder what else Georgia loves to do apart from be at the beach. Let's find out.


Tag 2
Here Georgia has grown up and at 17 is ready to explore the world, she wants to be an archaeologist and look for historic and beautiful relics. During her childhood she has become very interested in history around the world, has visited museums and archaeological digs and become passionate about saving the world's culture for all to see.


The background colours are barn door, broken china, frayed burlap, hickory smoke and walnut stain and again I have followed Tim's steps keeping to the truer vintage style he has adopted to use this month and adding my own collage.


The embellishing is also different, I've tried to find new ways (for me) to put the idea-ology trinkets together.


I enjoyed experimenting with the techniques this month, they suit my grungy style ......


... but I also loved playing with ways the techniques could be changed especially using different dies and colours.


I am linking, by the skin of my teeth,  to Tim's August collection and you can see his steps for making the tags on his BLOG.

I hope you've had a good weekend especially those in the UK with the extra day for August Bank Holiday. Have a good week ahead and consider as an artist/crafter are you an architect or a gardener. (I think I am a bit of both).

hugs Brenda xxx


“I think there are two types of writers, the architects and the gardeners. The architects plan everything ahead of time, like an architect building a house. They know how many rooms are going to be in the house, what kind of roof they're going to have, where the wires are going to run, what kind of plumbing there's going to be. They have the whole thing designed and blueprinted out before they even nail the first board up. The gardeners dig a hole, drop in a seed and water it. They kind of know what seed it is, they know if planted a fantasy seed or mystery seed or whatever. But as the plant comes up and they water it, they don't know how many branches it's going to have, they find out as it grows. And I'm much more a gardener than an architect.” 
― George R.R. Martin


Monday, 24 August 2015

Microglaze resist tag 2

One of a kind

Following on from the tutorial I did using the distress microglaze recently (see it Here if you missed it) I finished off the second tag and have put the details over on the Country View Crafts Project Blog.
This is just a sneak peek to whet your appetite and I hope you can join me at CVC to see more.


Thanks for stopping by and have a great week.

hugs Brenda xxx


UPDATED FROM CVC PROJECT BLOG


Hello it's Brenda here bringing you a tag using a tutorial I did on my blog a little while ago using the Tim Holtz Microglaze as a resist. To find it and maybe try it out press here.


The original tag looked like this before and after the microglaze treatment. It was a mop up tag taken from a box of leftovers I keep...


... and here it has been blended with distress inks after the microglaze had been applied through a stencil.


Before I made up the tag I added some very light text stamping using walnut stain distress ink.


I gathered together the elements I thought would go with the design in my head ...


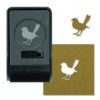
... but you will see I added a couple more when completing it. This is the tiny punched bird from Tim Holtz's range of new punches ....


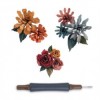
... and this is one of the tiny tattered flowers.


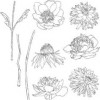
I painted and cut out the flower and stem using the flower garden set of stamps....


... and you can see the resist background, the number stencil worked really well.


Do you think I am moving to autumn mode already? Looks like it to me but I guess it won't be long.


Have a wonderful weekend and let us know if you try out the microglaze resist technique.

hugs Brenda xxx