Monday, 24 August 2015

Microglaze resist tag 2

One of a kind

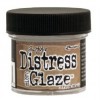
Following on from the tutorial I did using the distress microglaze recently (see it Here if you missed it) I finished off the second tag and have put the details over on the Country View Crafts Project Blog.
This is just a sneak peek to whet your appetite and I hope you can join me at CVC to see more.


Thanks for stopping by and have a great week.

hugs Brenda xxx


UPDATED FROM CVC PROJECT BLOG


Hello it's Brenda here bringing you a tag using a tutorial I did on my blog a little while ago using the Tim Holtz Microglaze as a resist. To find it and maybe try it out press here.


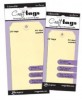
The original tag looked like this before and after the microglaze treatment. It was a mop up tag taken from a box of leftovers I keep...


... and here it has been blended with distress inks after the microglaze had been applied through a stencil.


Before I made up the tag I added some very light text stamping using walnut stain distress ink.


I gathered together the elements I thought would go with the design in my head ...


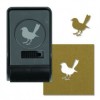
... but you will see I added a couple more when completing it. This is the tiny punched bird from Tim Holtz's range of new punches ....


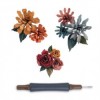
... and this is one of the tiny tattered flowers.


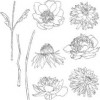
I painted and cut out the flower and stem using the flower garden set of stamps....


... and you can see the resist background, the number stencil worked really well.


Do you think I am moving to autumn mode already? Looks like it to me but I guess it won't be long.


Have a wonderful weekend and let us know if you try out the microglaze resist technique.

hugs Brenda xxx


Saturday, 22 August 2015

Microglaze resist tag 1

Capture Beautiful Dreams


This is one of the follow up tags from the tutorial I did using the distress microglaze as a resist - if you missed the tutorial you can find it HERE.
You may remember the tag began this life as a mop up from my spare box of bits ...


... and had the microglaze treatment through a stencil.


 It looked like this before I blended more distress inks over it.


To make up the tag I collected elements I wanted to put together, but as always they changed and got added to as you will see in the finished photo.


I also stenciled through the latticework stencil with iced spruce and tea dye before using a small splatter stamp with picket fence distress paint. It was then ready to make up the design.


I changed the mini tag and added the numbers and a star, these helped complete the balance and interest of the final layout.


The sentiment was made up using chit chat stickers and I added a stamped pen nib too.


I love this picture from the photo booth collection. just a ticket a mini paperclip again add more interest, texture and depth.


With the film strip and numbers and a piece from a framework die the composition and design was complete.


There's tag 2 coming up in a couple of days so keep your eyes peeled to see how I used another of the tag collection from the tutorial.

Have a great weekend and thanks for stopping by.

hugs Brenda xxx


Thursday, 20 August 2015

Destinations scrapping

Just a quickie from me today as I will be travelling home from holiday. Do you remember the album cover for the destinations challenge at AVJ and I said I was determined to make memory pages - well I have made a start and I have scrapped one using a photo and memorabilia from our weekend in Wales in July.


Using Tim Holtz correspondence papers and some of his chit-chat stickers, remnant rubs and cut ephemera I have now begun to record the places we visited.


It was a fabulous weekend meeting up with cousins from Cambridgeshire and cousins and their families in Pembrokeshire.


A simple page but I am pleased I have made a start.

Back to normal soon.

hugs Brenda xxx


Tuesday, 18 August 2015

Distress micro glaze resist tutorial

I've enjoyed finding out how the distress micro glaze works recently and suddenly just wondered if it could be used as a resist - and guess what? It can.

It took me some experimenting to get the effects I wanted and several tags ended up in the bin but I finally got something I liked

To begin I took a mop up tag .....


... and one of the round mini blenders (which fits nicely into the micro glaze pot) and pounced it lightly in the micro glaze tub and then pounced it through a stencil. I followed Tim's instructions and gently rubbed it with my fingers (whilst the stencil is still in place) and when that felt as though it had rubbed in I took the stencil away and gently rubbed a paper towel over it.


 I then took some distress inks and blended them over the tag and you can see it partially worked. We have got a distressed imprint of the stencil image in some parts but the lighter area on the left side looks as though the micro glaze got rubbed away by the paper towel. I obviously hadn't rubbed it in well enough with my finger.

Here's a second mop up ......


.. with blended inks over it and this time it worked better but I think it was because of the large area exposed on the stencil.


And this is the third and you can just see on the photo below where I had rubbed on the micro glaze only this time I rubbed over it with a paper towel whilst the stencil was still in place and again gently after I took it off.


This time after I blended distress inks over it I got a much better impression and was really pleased with the result. If you look really closely on the lower part of the tag you can still see some of the distress from the first layer before the micro glaze was added.


So micro glaze seals distress inks so that they won't react with water again, it allows you to create more layers keeping the original design and colour underneath it. Tim has a great video on you tube which you should watch where he experiments with stamping and different types of paper/card.

Please let me know if you experiment with this technique and let me come and see your results and have fun. I'm off to finish these tags.

hugs Brenda xxx

Sunday, 16 August 2015

Altered double wooden frame

This is a small double frame that I used for a recent workshop at my local craft store, The Art of Craft. We focussed on making the frame look shabby and creating the front and back panels as mixed media layers using gesso, acrylic paints, die-cuts, stamps and distress inks, embellishing the front with some shabby flowers.


The outside panels were layered with a coat of gesso, brighter colours of acrylic paints, die cuts added and then everything brayered over with white paint before stamping with black archival ink and then dipping in victorian velvet and dried marigold distress inks and then lastly dipped in some watery white acrylic paint.

I needed to keep the inside fairly simple a) as it was a morning only workshop and we had to get all of this made in three hours and b) I wanted this to close flat so embellishing and texture was out of the question. I added some vintage photos that are free for downloading off the internet.


For the inside backgrounds for the photos I blended distress inks over white card, sponged some white acrylic through a stencil and then spritzed it with water and flicked some watery vintage photo Di over it before drying

I also splattered some white acrylic paint and vintage photo over the frame.


I left this frame at the shop for display and made another whilst demoing and teaching adding photos of my children when they were little when I got home..


I changed the colour scheme as it's always good to show workshop participants how they can make changes to their projects as they are creating them.


I took photos of the fronts of everyone's finished frames which are superb. You can see the similarities and differences in their finished designs.


They all enjoyed the session getting messy with all the layers they were adding and I loved teaching such enthusiastic and creative ladies. I'm already thinking about the autumn workshops and what to teach.


Have a great Sunday and thanks for stopping by.

hugs Brenda xxx