Thursday, 22 January 2015

Visual Journal #4

Do you ever go onto Pinterest and suddenly realise you are looking at similar things that aren't necessarily what you would normally look at? Whilst looking at journal pages earlier this week I realised I was looking at quite a number that had circles in them. I know they are popular, but it's not a shape I have used much, and if I have it's just to print circles from little plastic pots over a journaling page. As they had caught my attention I wanted to have a play.


I started by gessoing the next two pages in my altered book, adhered some music score paper on the two pages and gessoed over the top of those. Love the textures it created as well as the interest for creating on.


I got out my box of journalling bits, found the plastic lids I have collected etc and using black gesso printed some circles in two sizes.
I decided to use distress paints to colour them in as I wanted to see how they looked layered up with colour knowing that dried distress paint is permanent on the page.


The colours I used are salty ocean, evergreen bough, mustard seed and festive berries. Wow is summer here with these colours?


The next step was to repeat the process using smaller circles and adding more colours to all of them. Did I tell you I was finger painting rather than using a brush. I was having such a great time - it took me back to being a teacher, when I was in the classroom.


For this part of the process I added some vintage photo distress paint and some white gesso. (Really I suppose I should have got the picket fence distress paint out, but the gesso was already sitting on my desk. I was also texturising the circles at this point dabbing my finger instead of rubbing and adding water to get more translucent colours.


Next I added the background using victorian velvet and tea dye distress stains. With a brush and using a baby wipe I blended them around the circles.


At this point looking at the pages I realised the circle forms were all too neat and perfectly formed, how to change them?  Get out your black pen and draw parts of circles round the lids you used. Works for me.


Then some very small text either in or across the circles, some tiny little black circles and some fine ink splatters. Some of the tiny circles that were not connected to the larger ones looked odd to me so I gently dabbed them with the gesso, dried and dabbed some of the distress inks over them, now they appear to be more in the background
At this point although the pages were almost dry they were beginning to warp quite a bit so I put them under a heavy box for a while.


Some walnut stained edges and chit chat stickers saying 
'Laugh forever and share a smile with friends' on the first page ....


... and some 'real' jouraling using a pen and handwriting -
'Using my journal is about developing my ideas - showing my thought processes and providing insights into my thinking without feeling constrained by others' expectations'.


To get a more aged look to the pages I added a coat of glue and seal with some vintage photo distress ink mixed in (see Tim's tag for January). One thing I learned is that if I am going to seal the pages I need to make sure my writing pen ink is WATERPROOF - but as Tim says 'embrace your imperfections', after all not only is this a visual journey it is a learning journey as well. 

If you would like to join the party please take a look at my original post HERE and then follow the link below to get the script to add to your blog post. Maybe you might like to make some circles.


This is not a challenge it is just for fun but it's a great way to see what others are making in their journals around the world whether it be an art journal, visual diary or sketchbook and whatever medium or style you choose.
An art diary, art journal or visual journal is a daily journal kept by artists, often containing both words and sketches, and occasionally including mixed media elements such as collages. (Wikipedia) Dina Wakely says 'Simply put, an art journal is a journal in which you combine art and words to express yourself. That’s it. It’s not complex, and there really aren't any rules for art journaling. It’s all about self-expression. Art journaling has a long-standing artistic tradition. Artists through the centuries have kept notebooks in which they sketched, practiced, experimented, and recorded themselves. Picasso and DaVinci were two other prolific sketchbook keepers. You are in good company!

Enjoy.

hugs Brenda xxx


Tuesday, 20 January 2015

Vintage textured tag

I've been busy at the Country View Crafts shop blog this week, this is my second post in three days, but then it's been a bit like London buses, none for ages then they all come together lol.

I have another textured tag with the background done in exactly the same way as the one I did last September and the one here and on the shop blog on Sunday.


There are more photos over at CVC Project Blog if you would like to find out more about how I made this tag.

Thanks for stopping by again today. I will see you again on Thursday with another double spread in my Visual Diary. If you haven't joined our blog collection there is no limit to it, it's just for fun.

hugs Brenda xxx


Updated with details from CVC

Whereas the last one was very much more of a feminine theme, this is for those of you who like to have ideas for more masculine tags and cards. Yes although this is a tag, why not use the ideas to make a card?


The background was made by swiping gesso over a size 10 tag, spreading it on like buttering bread. Heat dry.


Drip distress paints or distress stains down the tag so that it covers the background and dribbles through the cavities of the textured areas, misting with water of glimmer mists.


Decide and collext together all the pieces you want to add and I love to layer mine, collage style.


I took one of Tim's found relatives and cut him out but can you see what he is mounted on? Yes I peeled the backing off of the card and then stuck him onto it.


Once the paper layers had been stuck down, I placed the tag under a heavy box to flatten before adding the 3D embellishments.


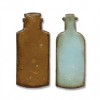
I used the tarnished silver technique for the movers and shapers chipboard bottle and the rusty cog is one I made for a tutorial on A Vintage Journey, you can find out how to make them HERE

.
Pop back again on Thursday when Chris will be sharing another of her fabulous inspirational projects.

Thanks for stopping by.

hugs Brenda xxx


Monday, 19 January 2015

Tag Monday at AVJ

We have a fabulous collection of tags on display at AVJ today and several of us took the opportunity to finish our January Tim tag. This is mine.


I have used Tim's design and his techniques as my inspiration for this tag and am really pleased with the way it turned out.  It's much bigger being a size 12 rather than a size 8 that he used. To get all the details see his original and the tutorial HERE.


To add to the chitchat stickers I used words and phrases from the Way with Words stamp set. Using black archival ink and manilla card, I then cut them up using them in the design around the photograph.


I used Tim's techniques to paint and glitter the alpha parts and splattered the background in the same way as he did.

   
Here are my family of children (one of the differences to Tim's original) and the date is January 1st 1927. It's tough being a child in the early 1900s so all the phrases and words are to give them encouragement and aspiration in their lives as they step out into a new year.


Thanks for stopping by, have a great week.

hugs Brenda xxx

Sunday, 18 January 2015

Thoughts, hopes and wishes.


My turn to post at the Country View Crafts Project blog today and I didn't schedule the post to go in time, so apologies for that.


This is a size 10 tag with a textured background, distress spray stains and with an altered mini canvas with a Tim Holtz portrait on. The circular embellishment in the bottom left hand corner uses a fragment adhered to a snippet of Tim's wallflower papers.

A few more photos can be see at the project blog.

hugs Brenda xx

Friday, 16 January 2015

Cityscape mixed media collage

There's a new challenge for January at the Crafty Individuals blog and the lovely Coco has chosen 'scenic stamping' so I interpreted that as a scene with stamps in. Jean has described it -

Basically the title suggests that you create some kind of a scene involving at least one of our CI products in the make.  The scene might be made using just one of our collage stamps, or might incorporate several of the items from an Elements plate, or might use several of our different stamps combined together - to tell a bit of a story.  I think it is a really good subject to choose, and gives lots of scope for experiment.

A picture was starting to emerge in my head with thoughts buzzing around in there too. It looked pretty similar to what I ended up with which is quite unusual for me.


I started with the idea of having a horizon line to create a cityscape scene of rooftops and making a collage with stamping and cut outs.


I painted the first layer with vintage photo distress ink as I imagined this mixing with a layer of gesso over the top. When I look back to this I realise that actually none of this is seen in the final piece.


But this all started to create the scene adding gesso as texture, a resist and adding lines above the horizon where I will stamp 359. I chose this stamp a) for the silhouette skyline shape and b) because I want to get to go into London more this year. I love the city but get up so rarely, so here's hoping.


I also added some stamped text (214) using coffee archival so that it would not merge with any further distress products.


In my own crazy head I began to see the lower portion as the River Thames as I added some torn old book paper with gesso and vintage photo DI. Ok what to do next?


So I decided that if there’s sky and water then there needs to be some blues. First I sprayed water and then broken china, salty ocean and weathered wood over the whole piece keeping the weathered wood to the sky area and the darker colours to the water area. I dipped the sky are in some broken china and dried it and then splattered water over all of it and dried again. 


This next bit I love, I used faded jeans distress stain and undid the spray piece using the tube to paint on the ink, cool eh? It's really beginning to look like a waterscape.


I found a thin ornate strip die which I stamped across some of the deep blue areas and then I stamped the Christmas city skyline without the Christmas tree. As this was stamped onto a textured area it didn’t take all the ink as a silhouette normally would but I love the impression it gave giving the buildings some depth to them. 
BY shading the non inked areas with a 4B pencil it gave some shadow effects too.


So now I needed a reflection and I tried reverse stamping with both archival and distress inks, but neither worked, so I stamped the image onto card, cut it out and then laid it upside down in the water drawing a rough outline. A watery wash of pumice stone, black soot and vintage photo inks filled in the watery effects.


I still wanted more so I drew some in building shapes, painted them and their reflections with the idea I would add a title and some collage pieces to it. I already knew what I wanted to call it. (Photo taken at night which is why it went somewhat blue).


I wasn'thappy with the painted building shapes so out came the collage scraps and built a line of new ones, I rather liked these much better and I added more reflections in the water.


The final collage was added using ticket ephemera from 307, 239 and 255 and the title using alphabetical strip die.


Finished......


.... and mounted in my collage journal.


You will find all the challenge guidelines on the CI blog and you have until the end of January to join in. You could be in with a chance of winning a free stamp, and you be able to obtain a cool 25% CI web discount if you enter.

That's it for today, thanks for stopping by and for giving me your support. I read every comment and am so grateful to receive them.

Take care.

hugs Brenda xxxx