Monday, 1 December 2014

A Nostalgic Christmas – Country View Crafts

When Astrid chose this fabulous theme for our new CVC challenge it took me right back to my childhood. We didn’t have a lot of money but our Mum always made sure Christmas was a special time of year with surprise presents, Santa sacks, a beautiful Christmas tree and wonderful cooking. I loved the winter when it snowed and I think those of us in the northern hemisphere long for snow on Christmas day. Other memories are dressing up, getting together with the neighbours, family visiting and sharing gifts. There is always one very special memory for me as a child at Christmas and that is laying in bed on Christmas Eve, excited and unable to sleep and hearing the sleigh bells as Father Christmas made his rounds. I always knew he was on his way. Do you remember that too?
P1190279
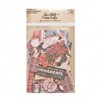
On to my project – no process steps today but it’s a simple collage card using Tim’s Christmas ephemera pack for my images and a stamped December calendar from his Calendar 2 set of stamps. It’s definitely got the nostalgic images for me.
P1190281
A snowy background which is tissue paper already printed with the design.
P1190282
Father Christmas in his sleigh - of course, carrying all his presents and I really loved him coming.
P1190283
Building a snowman, nothing could be better. We had coal fires so we always had to take a piece of his eyes.
P1190280
Thanks for stopping by to see what a nostalgic Christmas means to me.

hugs Brenda xxx


Sunday, 30 November 2014

November Tim tag

The penultimate Tim tag for 2014, I can’t believe where the year has gone and to think it’s December tomorrow.
It was great fun looking for a different embossing folder and die for this make as I don’t have the layered leaf that Tim used and although I have the insects and the snowflake I wanted to experiment with other things in my supplies.
P1190392
So I have gone for the French theme with the Eiffel Tower and a fleur de lys mover and shaper.
P1190373
I have more or less followed Tim’s process steps but I added some foil sheet both to the embossed tower, fleur de lys and the corrugated card using a splatter stamp for the sticky embossing powder.
P1190376
I also stamped on the corrugated card first which adds a little more interest.
P1190367
I used some tarnished brass distress paint on the word band and arrow.
I am so pleased I have managed to fit this in before the deadline and am linking to Tim’s post.
P1190391
Thanks Tim for another inspirational tag, looking forward to see what you share tomorrow.

hugs Brenda xxx

Friday, 28 November 2014

Birds of a Feather

Birds of a feather flock together
Those of similar taste congregate in groups

Hello everyone I am sharing a wall hanging today inspired by Tim’s papers, images and ephemera and the fact that he has a fabulous mixed-media team who create some wonderful pieces for inspiration. Chris has chosen this fabulous theme for our next challenge at A Vintage Journey and I decided to not go the Christmas route although you could do with robins and red cardinals. I have added some quick process steps below if you’d like to try the layered collage look.
P1190275
Use a piece of corrugated card and a piece of wallflower stash as the main background.
P1190259
Chop up some scraps ink edges and glue down.
P1190261
Scrape gesso thinly over.
P1190263
Add next level of collage pieces giving some strength of colour and starting the levels of dimension. Over that used dot fade  stencil and added texture paste through it using a palette knife. Add some random text stamping using black archival.
P1190266
Layer further collage elements and the focal image of birds from the wallflower stash which I added to a cabinet card. I also added a bird card from the Thrift Shop ephemera pack.
P1190270
At this point I die cut the letters using the alphabetical strip die and used this picture of these cheeky chappies who I thought fitted the theme perfectly and imagined they are best friends and very alike in their ways – hence birds of a feather flock together.
P1190271
Finally use some gesso, walnut stain distress stain and spiced marigold to add layers of watery inks and added some white splatters
P1190276
My bird wall hanging.
P1190272
Thanks for stopping by to take a look. I hope you like my Tim inspired piece of art and that you will join us this fortnight.

Have a wonderful weekend.

hugs Brenda xxx

Wednesday, 26 November 2014

Love Christmas

A found relative, some glitter, bits and bobs and a card is born.
Another of my red, white and kraft designs for this year, I seem to be on a roll, I just love these colours.
P1190241800
The supplies consist of mostly Tim Holtz products, his merriment papers, a gorgeous vintage photo from the occasions found relatives pack, the pediment die, festive berries glitter and the trellis framework.
P1190246small

A few more details can be found over on the Country View Crafts project blog if you have time to pop over.

I hope your week is going well, thanks for stopping by.

hugs Brenda xxx

Update - copied over from CVC


Hi everyone, it’s Brenda again with another Christmas card for you.
P1190241
This colour combination has really captured me this year and I have made several cards in this palette.
P1190242
The fabulous occasions found relatives pack by Tim Holtz has these gorgeous vintage photos and I have combined this one with the pediments die and the festive berries distress glitter. The clear domes are from my own supplies and have pieces of the merriment papers glued underneath.
P1190243
The love banner was made using a stamp and die from the framed silhouettes Framelits set and I stamped the word using my own small stick letter stamps. Christmas comes from the holiday words script thinlits dies using the stick it paper to adhere it to the card.
P1190245
The lamp post was cut last year and not used and the leaves are from the festive greenery strip die. The trellis framework die-cut creates some interest and texture in the background.
P1190246small
How are you doing with your Christmas cards? I still have quite a few to make so I am sure you will be seeing more of them from me before the big day.

Sunday, 23 November 2014

Sewn Snow Shoes

Did you know there is a challenge over at A Vintage Journey called ‘All Sewn Up’? Well I had such great fun designing and making my fabric journal I decided to use some new stamps in another sewing project.
P1190236

This Christmas card has the focal image stamped onto fabric which I then tried my hand at free sewing on the machine. Practice makes perfect but I am quite pleased with the effects.

P1190238

Sorry I got so wrapped up in using the sewing machine using the fabric and corrugated card I completely forgot to take any process photos. I had dipped the fabric in some distress inks to get the grungy colour on the fabric. I used the same inks on the corrugated card. I stamped the snowshoes using Tim’s stamps and did all the sewing through both layers of fabric and corrugated card. I finished off with a black pen to add the finer details.

P1190235

I hope the photos tell the story.

P1190237

Some lace, a painted snowflake charm and an offcut of paper folded and tucked in completed the card.

I am hosting the All Sewn Up challenge so I would love to see you over there with a project.

Thanks for stopping by.

hugs Brenda xxx

Thursday, 20 November 2014

A Jolly Christmas at Country View Crafts

I hope you are having a good week. I am sharing a Christmas card over at the Country View Crafts Project Blog and it was inspired by the Magpie day theme last week – use your scraps.
P1190227
I am feeling so happy making collage projects again, it almost seems as though I had lost my way craft wise this year, in fact I have spent a lot of time experimenting and playing with lots new ideas and styles, but it feels so good to be back.
P1190229
More details about this card can be found at the Country View Crafts project blog, so if you have a moment to spare it would be lovely to see you over there.

Thanks for stopping by.

hugs Brenda
 
Happiness lies in the joy of achievement and the thrill of creative effort.
Franklin D. Roosevelt

Update - copied over from CVC

HI everyone Brenda here and today I am sharing a Christmas card with you. The inspiration came from the current challenge at CVC challenge blog which is to use your scarps, so I decided to get the box of Christmas papers down and have a play. This is the result, a collage Christmas card.
P1190227small
I started with Tim Holtz postage stamp die and inserted a rectangle die so I could cut a frame.
P1190217
I used core’dinations paper and took out one of Tim’s found relatives to use with it.
P1190218
I used offcuts of paper to make my embellishments, stamped the word Christmas to go with the jingle flash card and punched the price tag from Tim’s merriment paper stash
P1190220
The music paper is from an old music score book (I buy them from the charity shops) and I found the tickets and lace border in my oddments drawer.
P1190223
I sanded the frame and cut down the gorgeous Santa photo to get it to fit….
P1190224
… and bit by bit the collage came together.
P1190230small
The snowflakes are die-cuts using the paper snowflakes thinlits dies and I added the beads that I found in my Christmas bits box. The top snowflake twirls are florist wire.
P1190231small P1190232small
To me the most important parts of putting a collage together are both the composition and the detail and here I white embossed the tickets, added stamped and cut out pen nib and a tiny circular tag with a weeny snowflake stamped on it.
P1190229small
I am so pleased to be getting Christmas cards done, but I still have a way to go.
 

Saturday, 15 November 2014

Magpie Day at Country View Challenges

It’s an extra surprise day with some blog candy thrown in at Country View Challenges and the theme today is ‘use your scraps’
I have a huge box of scrap papers that I keep in my room and the box just gets fuller and fuller, every now and again I go through it and throw some bits that I think I won’t use, but I never seem to really make a dent in it. So it has been lovely to take a few bits out and make some Christmas cards.
P1190176
I started by die-cutting the pieces from the Tim Holtz Retro Ornaments die and finding paper for the background.
P1190171
Having cut everything, I inked the edges ……
P1190174
….. stamped and cut out the sentiment, again inking the edges …….
P1190172
… and layered the background on another mount before adhering to the card.
P1190173
The philosophy here was that while all the bits were out and it is a fairly simple design, let’s make three rather than just one. In fact I have a bag of bits left over and I could probably get at least another four out of it, so when I have just a few spare moments I know what I will be doing.

Thanks for stopping by. I hope your weekend goes well.

hugs Brenda xxxx