I was so surprised and pleased that my Valentine tag was chosen as a winner at Frilly and Funkie and that gave me the chance to be a Guest Designer for their new challenge – Stencils and Texture.

So here is my multi-layered collage that includes both of those requirements, lots of it in fact :0).

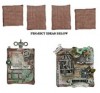
I began with a piece of white card, dictionary and music score paper and tore pieces of both and adhered to the card. I heat dried it and then added borders in both black and white to add some texture. I had already ‘planned’ the layout in my head so I knew where I wanted some of the borders to create part frames round the images. Once the borders were in place I painted a layer of gesso over everything to bring some conformity to all the pieces and heat dried it.

I stamped and painted my images with distress inks and then cut two pieces of paper roughly the same size so I could use them as markers for where the images would go, and then I didn’t have to keep handling them as I began to build the layers further.

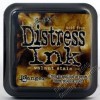
Next I began adding the block pieces of patterned papers’ cutting them to size and edging them all with walnut stain. I always like to do this as I feel it frames each piece and makes them stand out as part of the composition really well.

Once I was happy with the way the design was developing I began to add some tissue tape and then got out two of Tim’s masks and ‘painted’ decoart modelling paste through them, going over some of the patterned paper too.


I also used distress inks through one of Tim’s new masks – Lattice work …….

… and I used walnut crystal ink to splatter all over and drip over some of the textured areas.

The borders weren't stuck down fully so that I could tuck some other pieces beneath them if I wanted.


Then I glued in the images, adding more borders, lace and tape where I felt it was needed.

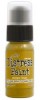
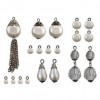
Now I started to gather metal trinkets to add as embellishments and I added a couple of little flowers from Linda’s shop. Once happy with where they were all going I lightly painted the metal pieces with gesso and stuck some of them together to layer up. I then adhered them into place and brushed treasure gold white fire over them all, this brings some conformity to them as they were all different metals.


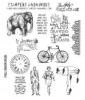
Finally I stamped some Artistic Outpost words and used one of my own chatty words, a button, ticket and a glass dome over the #35 to finish off.

I made this piece on white card so that I could start a collage journal. I did a lot of collage oil paintings when I was at college (many moons ago now) and a couple of years ago I did a Claudine Helmuth on-line course in learning more about how collage works. Last year doing a 2 day workshop with Finnabair really ignited my passion for it all over again, so I am going to keep my samples and notes to go with them all in one place.
Thanks again to the fabulous team at Frilly and Funkie for choosing my tag and enabling me to be a Guest Designer, I have really enjoyed creating this. The Artistic Outpost stamps, Tim’s masks and the lace all come from Linda's Funkie Junkie Boutique, if you haven’t explored it yet as somewhere to buy from I recommend you go take a look at the fabulous products and competitive prices.
hugs Brenda xx