Thursday, 13 August 2015

A Visual Journey #32

Inspired by Wendy Vecchi

Following the fabulous day we had with Wendy Vecchi on the 2nd August in London I was so inspired by her style I just had to interpret it into some journal pages. I don't have too much of Wendy's products so I have incorporated stamps and stencils from Tim and other places to get the effects I wanted


Having painted gesso over the pages and let it dry I dipped them in spun sugar, dried marigold, tattered rose and aged mahogany distress paints.


Then dipped them in a small amount of hickory smoke and gathered twigs distress inks.....


.... and then stamped one of Tim's stamps from the distress damask set in black archival, covered with black embossing powder and heat set. Used a stencil and vintage photo DI and Tim's chevron stencil using victorian velvet and hickory smoke to create the top border (WV style).'


I stamped using Wendy's 'fashion style and art' set and coloured in with rusty hinge and ripe persimmon distress markers and painted it with a small brush and water. 


For the other page I stamped her dress form from a 'form of art' set onto an off cut left from another project and then blended abandoned coral and victorian velvet over edging with walnut stain. 


Stamping the base from one of Tim's stamps and drawing a line up I was able to provide a stand for it. The sentiment is one of Wendy's.


Finally I added some text stamping in the background, stamped and cut spools (Tims), used a white posca pen to add some details on the stamped elements and a black posca to do faux stitching round the edges.


I really enjoyed making these pages, I'm not sure Wendy would consider them her style but it was she who inspired me to make them.


Thanks for stopping by today to share in my Visual Journey for 2015. My old altered book is really filling up and it's already amazing looking back over what I have created. If you have been following or joining in then I will add a linky again next month, it's just that it has been so busy over the summer I haven't had much time to visit or comment, but I am ,looking forward to getting back into that routine.

Enjoy the last few days of this week and look for inspiration all around you.

Take care.

hugs Brenda xxx

Start by doing what's necessary; then do what's possible; and suddenly you are doing the impossible.
Francis of Assisi


Monday, 10 August 2015

Here and Now tag with background tutorial

I am posting over at the Country View Crafts project Blog today and I am in full summer mode, maybe it's something to do with the challenge that is running over at Country View Challenges as well, it's really motivated me to be extra summery.
So here's my tempter for you and I hope you will be able to pop over and see my tag in more detail.


I expect many people have children off on school holidays and are even away enjoying a break, hopefully in sunshine. Wherever you are and whatever you are doing have a great week and maybe some special creative time as well.

Thanks for stopping by.

hugs Brenda xxx

The sea, once it casts its spell, holds one in its net of wonder forever.
Jacques Yves Cousteau


Updated - Details copied over from CVC
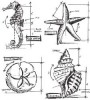
My tag today uses both the Tim Holtz nautical stamps and his mini sand and sea movers and shapers.


I took a tag that had been used to wipe up some gesso from a journal page and you might just see the textured impression it left behind. Over that I dipped the tag in mowed lawn and salty ocean distress sprays that were also left over from the greenery (see below).  I don't like to waste anything you know.


The colours were perfect for what I had in my head except I felt some white would make it more foamy for the sea so I gave the whole tag a covering of the distress micro glaze before dipping it into some watery picket fence distress paint. I got another layer creating more depth and although some of the paint stayed white, some of it mixed with the colour underneath - I guess I hadn't smoothed quite enough on in some areas. But I liked the look it produced.


The tag looked a little too green for my liking so I now dipped it in some mermaid lagoon distress ink which created yet another layer.


Next I gathered the elements together to make up the design. I had sprayed the greenery in the mowed lawn and salty ocean before dipping the tag in it (see above).


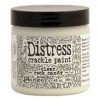
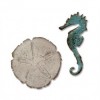
The seahorses were inked in different blues and then given a layer of rock candy crackle paint. When dry and the crackles had appeared I inked over them and gave then a splash of picket fence distress paint to make them look foamy too.


Once I had finished I found the greenery far too bright in contrast with the rest of the tag so I dabbed some of the picket fence distress paint on it as well. That helped it to blend in better.


I hope you are having some summer fun, thanks for taking peek at my tag today.

hugs Brenda xxx


Friday, 7 August 2015

Silhouette garden bird card for AVJ

Here we are in August and it's another new challenge over at A Vintage Journey and this month the lovely Anne has chosen 'Things with Wings' so what better than to take Tim's new bird die and use it to make Ken's birthday card. (He loved it by the way).

I die-cut the silhouette bird from a piece of distressed card left over from another project - you know the pieces that sit in a box because you don't want to throw anything away lol. Then grabbed all the brown distress inks plus antique linen and hickory smoke and went around it blending in the colours. I actually really liked him just like this. 


BUT I wanted to make him just a little bit more realistic so I took out Tim's micro glaze which I'd not used before and rubbed a little over the whole bird, buffed it off with a dry towel. I wanted to add some 'painting' so I used all the colours gathered above and with a water brush begin painting with distress inks .....


 ..... but the surface is now water resistant so the inks gathered in little droplets - as I kept painting I could see definition appear as well as texture and in fact I think it is the perfect addition to give me some realism without overdoing it. Hey presto the garden bird was born.


For the background I cut a piece of card and applied some antique linen distress paint through Tim's doily stencil and made sure it was fully dried.


Next I blended scattered straw over and misted with water then heat dried.


The next step was to use the blossom stencil and randomly add some of the image using dried marigold.


Next I used another stencil and my own blended mister of evergreen bough and stormy sky re-inkers, misting through in the top half and turning the stencil over and laying the wet side on the lower half to transfer the ink and obtain the negative pattern.


I stencilled the word 'wonderful' using the Christmas stencil and used some other stencils to add more interest.....


...... blended barn door round the edges and tea dye over the whole background ....


.... and finished with walnut stain edges and some flicks of water to distress it.


I die-cut birthday in brown card using the celebrate thinlits ....


 .... and added some mini branches.


I kept the embellishing very simple just some twine and a word charm smooshed over with alcohol inks.


Ken's birthday was last week, the day before we went up to London to meet with some of the lovely people attending the Wendy Vecchi workshop, we also had a gathering at home on the Friday night with family and friends.


I hope you will be able to come and join us at A Vintage Journey with a project this month and it's always well worth a visit for all the inspiration provided by my amazing teamies, they have so many ideas and ways to use the products and materials you probably already have on the shelves in your craft room.

Have a great August and I hope the sun is shining wherever you are.

Enjoy your creative endeavours. 

hugs Brenda xxx

Thursday, 6 August 2015

A Visual Journey #31

I am on another of my inspiration visits today off to another blog and wonderfully creative journal pages I found and pinned on Pinterest. This time it's to Living the Creative Life with Shelley R Chavis and a Documented Life project she did. I do urge you to pop over to Shelley's blog to see hers and how she made the pages and you will see what I took as inspiration to make my own. This is my version.


I began by spraying vibrant turquoise dylusions spray through a mask, turning it over to use the ink on the back as well on my pages and not wasting it. I painted in some random areas of lime green acrylic paint and stamped my bees using watering can archival ink.


I took a piece of left over card that has some mottled green inks on it and sprayed through two stencils using ocean pie and lemon zest dylusions inks, then cut them up and added to the pages.


I shadowed the coloured strips with a black inktense pencil and waterbrushed round and punched some circles and an oval to add more interest. I also used the inktense pencils to colour in the bees. I took Shelley's advice and did some doodle sewing around the edges using the sewing machine, it is definitely something I need to practice more.


Next I made a flower petal and butterfly for each page by running some card through an embossing folder, layering on oil pastels and dabbing over with festive berries/peacock feathers distress stains and spritzing them with water before heat blasting them. I ran my hickory smoke distress ink pad around the edges - I do love this new colour.


It was just a question of  gathering a few other bits to add to the pages, printing out a quote that I found, assembling the pages together  .....


... and adding them into my journal.


So there we have my pages made taking inspiration from Shelley - her pages are very different and beautiful so please pop over to see what she did and check out all her process steps. Thank you Shelley for inspiring me to get some bright colours out and challenging me to make something of my own but I can still see the Shelley influences. I love what I created, these pages are so different for me.


This post and the next few are scheduled as I am off to Lanzarote today with the family. I hope you are enjoying some quality time with people you love and also getting in some wonderful creative time too.

Take care and enjoy your own crafty endeavours.

hugs Brenda xxx