Wednesday, 11 March 2015

Wired Heart

This is my second piece for the current Country View Crafts Challenge where 'Anything Goes'. I thought I would share a little hanging I made when I attended Any Skinner's class at CHSI in Birmingham last month. The reason for choosing to share this here is that Susan will soon be getting DecoArt products in the shop, so those of you who already use this line of crafting paints and mediums might want to keep an eye open for them, I know I will be.


I am not sharing Andy's techniques because he does that brilliantly on a video made at CHA in January where he demonstrated this at the Stamependous booth. You can find the video HERE.


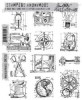
The base is made of chipboard and the rest of it, including the heart, is made from foamboard, so you can imagine this is so light to handle. The paints are from the new DecoArt media line and Andy's new stamps are produced by Stampendous

So watch this space as they say as there will be more mixed media work coming from me with these fabulous products and I will share some exciting news I've had here on Saturday.

I hope we will see you at the CVCC blog where there is a £20 voucher from Country View Crafts up for grabs for a lucky winner, please also pop over to see all the amazing inspiration coming out from the fabulous design team.

See you tomorrow with another double page of my Visual Journey diary for 2015.

hugs Brenda xxx


Sunday, 8 March 2015

Expedition tag - Country View Crafts

It's my turn again to post on the Country View Crafts Project Blog and I have a tag for you today made from one of those extra backgrounds I made when doing my February Tim tag. If you missed them you can see them all here.


More details can be found over at Country View Crafts, if you have a moment to spare I would love to see you there.

Have a happy Sunday and listen to your heArt.

hugs Brenda xxx


UPDATED FROM CVC

You know I love making tags and I follow the Tim Holtz monthly tags he makes. Here I have used one of the backgrounds I made when making my Tim tag for February.  The details of how to do it are clearly set out here on his blog


With the ephemera piece and colours I had used it had to be nautically themed and ships and sailors came to mind. 


I randomly stamped the compass from Tim’s mini blueprints 3 set and smudged over a small amount of gesso to blend them into the background.


I gathered up some pieces that I thought might go together and set about altering and designing. (You will see I didn't use them all and added others in as I was putting the tag together).


The ship is stamped from the Travel Ways set in blue archival ink and I used a black pen to highlight some of the lines.


I made a custom fastener using a snippet of distress ink card and remnant rubs ......


..... and I added it to the photo booth picture of a sailor.


The expedition tag was swiped over with aged mahogany distress paint which was then wiped off again using my finger to leave the red writing ....


.... and I daubed a little of the paint on the star and again wiped it off to give a slight red translucent effect.


Some tissue tape and another ephemera piece finish it off.

Thanks for taking a look today.

See you again soon.

hugs Brenda xxx


Friday, 6 March 2015

Birthday Celebrations at AVJ - Anything Tim

Today sees us celebrating our first birthday or anniversary at A Vintage Journey and we are celebrating in style. There are prizes galore, changes to our schedule and a new Creative Guide joining us - what more could we want? Well of course we would love you to join us too.

For my CG sample I have made a Correspondence book using Tim's new papers. Now you may well have seen the book I posted on Sunday for CVC, that was made from the off-cuts of this one and yesterdays journal pages uses up the last scraps.
This is a hard bound, hard spined book which will be one of the types I am teaching at my next workshop on the 30th March (details in my sidebar).


I'll show you some of the steps to preparing the boards.

Cut boards from mountboard and cover with tissue wrap. Put under heavy weighted books/box for a few hours or overnight to dry and flatten.


Daub with picket fence distress paint – heat dry.
Dab and spritz fired brick distress stain and spray a little gathered twigs distress spray stain, spritz with water and push the two boards together to distribute the colours on both. Heat dry.
Repeat with faded jeans distress spray stain and heat dry. The dampening and heat drying causes the boards to buckle a bit so put them back under heavy weights to flatten again.


Use picket fence distress stain and some white linen dylusions spray to mist over the colours and tone them down and blend them together more.


Sew pages together.
Adhere front and back end papers. Tear the front edges of the papers and ink them all round.


Put cover boards together with a spine and tape (I often use DIY gaffa type tapes.) 
On this occasion I used brown packing tape.


Glue pages in.


Cover the spine with tissue tapes and note a small piece of elastic added to the top of the spine.


I added a book plate tied to the arrow with rusty wire ........


..... a stamped postbox using the Classics #13 set ......


........ bits of idea-ology findings and ephemera .......


......... charms hanging down the spine. 
All the metal pieces were daubed with some antique linen distress paint and treasure copper rubbed over them.


Do you know - I might just make this into a Birthday book so I can keep a reminder of when I need to send cards out each month. Mmmmm birthday, correspondence, celebrations, wow what a day.

Because we are going monthly on our AVJ challenges there will be a monthly £20 voucher donated by our fabulous sponsors Country View Crafts and for today there are some very special birthday prizes to win as well. So please accept this invite to the party, we would love to see you there.

Have a wonderful weekend and here's a quote for you.

Don't just count your years, make your years count.
George Meredith

hugs Brenda xxx

Thursday, 5 March 2015

Visual Journey #10

Welcome to March and the continuation of my Visual Journey using an old altered book to work in. Since starting this visual journal I have experienced the greatest of freedom in expressing myself through my art and I am learning to free myself up from the constraints of designing for design teams and workshops. Don't get me wrong I love those activities as well and I am very motivated by challenges and time constraints but taking a little time to just go where the muse takes me is so refreshing.


These pages started with three distress stains - tea dye, bundle sage and brushed corduroy and I blended them over the page using an almost dry babywipe. Just before I started, the collage I made for Crafty Individuals last month came to mind where I had used a skyline and then that made me remember my Finnabair workshop where she taught us a layout using the same sort of idea, so I drew a pencil across two gessoed pages and blended the stains but in the end this ended up nothing like the Finnabair design I had in my head.


I decided to pick up my bits bag (leftover paper bits from other projects) and a wooden cutlery box where I keep leftover ephemera and embellishments and started to pull out items that would go together. I didn't have a theme in my head, I just wanted to see where I ended up.
As I was collecting bits together I decided to do some stamping in tea dye and vintage photo, then the distress damask came later using gathered twigs. I gave this a light spray of Americana acrylic sealer as I didn't want the stamping to smudge when I add the glued strips in the next step pf the process.


Here I have glued on strips of paper, torn pieces of tissue wrap and then used the tea dye distress stain dabber to make three large splats and a brush and walnut crystal ink to make fine splatters. Be warned the distress inks don't dry very well over the gesso when splattered.


I added the numbers 6 and 9 because they are the ages of my youngest grandchildren.


The 19th is my birthday, the number 13 is my lucky number and all the letters are in alphabetical order (well almost).


I finished with a few bits to give the pages meaning and tell the story, looking to keep an overall balance in the design.


The girl and quote was included in an order from somewhere many moons ago and I found it in one of my image boxes. Great quote too don't you think?


I seem to be at my happiest when creating collage pieces and in a vintage style.

A huge thank you to everyone who has been joining in and sharing wonderful pieces of journalling art. I look forward to seeing what you make in March, please link below if you would like to join the party and share your pages and ideas. This is just for fun and the opportunity to see how others approach their journalling. If you copy the link from here -
 into your blog post you will share everyone's work with your readers too.

Have fun and listen to your heArt.

hugs Brenda xxx


Tuesday, 3 March 2015

The Animal World at Crafty Individuals

I had great fun making these samples for the new animal challenge at Crafty Individuals and used the Alice Palace stamps.


The backgrounds were made by spraying distress inks over stencils and using them by printing them onto card and watercolour papers.


The images were stamped onto scrap pieces of inky leftovers, I love doing this it provides a great backing for these quirky images.


I added some collage bits and pieces to build the deigns and finish the compositions.


I you have some animal stamps why not join in the fun and do pop over during the month to see lots of inspirational pieces from the design team.

hugs Brenda xxxx