Sunday, 24 March 2013

Photo Inspiration at PanPastel UK

I found yet another new way (to me) to use PanPastels and thought I would make this into a tutorial soon as I can see it could be rather popular, that is if you haven't found this one out for yourself already.

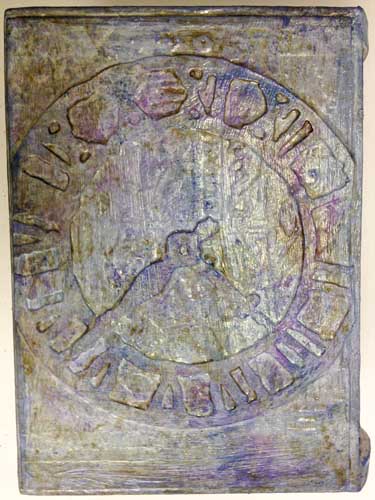
It is a version of the Tim Holtz enamelled stamping technique.


This is a Darkroom Door background stamp with magenta and yellow pans to get the shade I wanted for this  photo inspiration challenge.


I covered the dress with pastels then embossed using a script stamp and glitter EP.


To enter all you have to do is take something from it that inspired you from the photo on the PP challenge blog post for today, I am using that fabulous orange colour and the dark greens. If you enter you could be in with a chance of winning a trial set of pans.

To catch up - it became a very busy end of the week when the school where I am governor got the Ofsted call. Consequently everyone galvanised into action ensuring everything was ready for them. It seemed to go positively so I am awaiting the final judgement.

I hope you'll pop back later when I will be showing you another vintage piece using the new Time Traveller stamps from Mr TH himself.

See you soon.

hugs {brenda} x0x

Photobucket

Saturday, 23 March 2013

The voice of the sea

Simon Says Stamp and Show this week has been asking us to think about water and how we could represent it in our projects.


I made a tag where the background is a mixture of white acrylic paint and prussian blue decoart traditions paint, smooched together on the craft mat and the tag run through to get that lovely watery feel to it. Later I dipped in picket fence DS and water to acquire more depth.


Because this reminded me so much of the sea I used Crafty Individuals Seaside Treasures stamps and added sea themed embellishments.


The background for the sentiment is the wrinkle free distress technique using vintage photo, chipped sapphire and bundled sage DIs spritzed with blue patina perfect pearls mist.


The lady who has the voice of the sea is stamped from Crafty Individuals 'Beside the Seaside' plate, added to a little frame from eBay and covered with crackle accents - only it didn't crackle!!!!


And look what we woke up to this morning in Surrey. This is the view out of my workroom window with my conservatory below. This was most unexpected!!!


Have a wonderful weekend and I hope those of you further north in the UK are not being adversely affected by the blizzard conditions and snow drifts which seem to be causing much disruption.

Take care.

hugs {brenda} x0x

Photobucket

Thursday, 21 March 2013

Alice Palace at Crafty Individuals

Some more Alice Palace stamp cards from me today and these are new ones just released at the Crafty Individuals on-line store.

I love experimenting with the distress inks and images that are so far out of my comfort zone and these are all made with wrinkle free distress backgrounds.


I used a mixture of distress markers and Inktense watercolour pencils to colour the images in.


To finish I simply distressed the edges and mounted on some backing papers and onto white cards. no embellishments, I am going to let the images speak for themselves.


I love the bright colours  so different for me and they remind me of Spring coming, especially the Live, Lovely Life card.

Do pop over to the CI Blog to see lots of inspiration from the team using the whole range of CI stamps.

Thanks for visiting.

hugs {brenda} x0x

Challenges to have fun with -
Bloggers Challenge - Think Spring (Love lovely life card)
Stampotique - Spring (Love lovely life card)
Simon Says Stamp - Easter/ Spring

Photobucket

Tuesday, 19 March 2013

Speckled bunnies - Easter tag

Just wanted to post a little Easter tag today and to say thank you to lots of friends who have left me birthday wishes on Facebook or sent me cards. I have been spoilt with some gorgeous pressies too from my husband, family and close friends.


Anyway I wanted to share this tag as I have been playing with my PanPastels again and found another new technique to use, on here it is speckled bunnies, but I want to try this on eggs too, perfect for that I think.


A very easy effect to achieve - heat embossing powder on the image, have some pastels scraped into little containers ready and when the EP is molten sprinkle the PPs over the top and heat again so that they bake in. See I said it was easy.


I die-cut extra bunnies and popped them up at different levels.


Let me know if you try this technique I would love to come and see what you do.

Enjoy your day, we are out for a meal later which will finish my day perfectly.

Thanks for visiting and for so many lovely comments I receive,

hugs {brenda} x0x


Photobucket

Monday, 18 March 2013

Workshop make


Doing workshops are such great fun and last Saturday I had a group of lovely ladies who enjoyed getting very messy hands using lots of glue and paint. We altered one of those paper mache book boxes that has a drawer in it.

I took along the box we were making and some samples of possible other embossed backgrounds and colours they could use when they try it out for themselves another time.


 We managed to prep and paint the box in three and a bit hours and a few people stayed to finish off with another coat of sealer and some wax rubons.

These are some of the finished boxes made by the class.


The group learned a great deal about how to prepare card substrates for lots of layers of paints; the thickness of paints when wanting to add a coat or a wash and creating textures.

Thanks ladies you worked so hard and produced some magnificent results.

Quote for this week.
"If you hear a voice within you say 'you cannot paint', then by all means paint and that voice will be silenced.

Vincent Van Gogh

Have a creative week.

hugs {benda} x0x


Photobucket

Sunday, 17 March 2013

A journal type piece from me today for the new challenge at PanPastel UK.


I used my pritt stick technique with PPs over the top and added texture paste through a mask and let it dry.


There are numerous layers of PPs and acrylic paints finishing off with pans through some masks to get the journal background effect and promarkers over the top of all the layers on the bulrushes.


The quote I found on the internet.


We are sponsored by Your Creativity Store who kindly provide the winner with a trial set of PanPastels.

Hope your Sunday is good, have a great day.

hugs {brenda} x0x


Saturday, 16 March 2013

Family History and Vintage Fan

A new Tin Holtz die for me straight from the CHA and inspired by a burlap panel made by Jim Hankins I set about to design a piece where the vintage fan fitted in. Here's my antique room display.

To begin I covered a thick piece of greyboard 23 x 25 cms with hessian and stuck TH tissue tape round it to cover up the staples.


I had great fun designing this piece and originally I had used a photo from Claudine Hellmuth's collection that she sent to those of us who did her on-line collage course last year, but wondered why I was doing that when I have some fabulous old photos of my grandparents. My cousin has set up a family genealogy site that has even more so I have quite a few to choose from going back to my great, great, great grandparents.

                    
This is my Grandpa on my Mum's side, John Albert Victor Axon. I don't remember him very well, I think he kept out of our way when we went round to their house, but one memory sticks in my mind and that is sitting in my classroom by the window at primary school and watching his funeral go past. I was considered much too young to be allowed to attend.                                                                          I have added the years of his life written by hand and added to a cog case from an old clock.


 Do you like the writing desk? The old typewriter, pen nib and telephone. I made the little bottle of Quink ink using one of those very small corked bottles, black alcohol ink and a handmade label.


I think the fan worked really well. It was die cut four times, firstly in silver metallic card which has been embossed with the riveted metal embossing folder and then alcohol inked. The second time cut in black card, the base cut off and heat embossed with clear EP. The next two layers were cut from idealogy packaging and I cut the fan out twice again using alcohol inks on it including snow cap which gives that lovely mottled effect. You can see the shine on it when angled towards the light.


The vintage green backing panel was made in a William Morris style wallpaper.


This was so that I could join in the fabulous Frilly and Funkie challenge chosen by Jenny, which is such an original theme to choose. I used a Sizzix embossing folder to get the pattern I wanted and then added layers of different green and brown paints to get the worn vintage effect, finishing off with treasure gold highlights over the raised designs.


A tribute to Grandpa.


Supplies 
Dies - Vintage Fan, Cameo Frame
Metal embellishments
Tissue Tape
Wall panel made using Sizzix embossing folder
Distress inks - Rusty Hinge, Pine Needles. Peeled Paint, Frayed Burlap, Walnut Stain, Black Soot.
Alcohol Inks - Copper, Ginger, Pitch Black
Rock candy Crackle Paint
Treasure Gold
Plastic packaging for fan

Thank you to those of you who have commented or contacted me about my win at Simon Says Stamp and Show last week. I am very lucky not only to be drawn out of the hat for the $50 prize but was also chosen in the Top 3 with my Vintage Photo Wheel. A huge thank you to the team over at SSSS, it's always a privilege when you are chosen by your peers and is something very special. 

I hope you are having a good weekend, I shall be round to see what everyone is doing.

Take care.

hugs {brenda} x0x
Photobucket