Monday, 9 July 2018

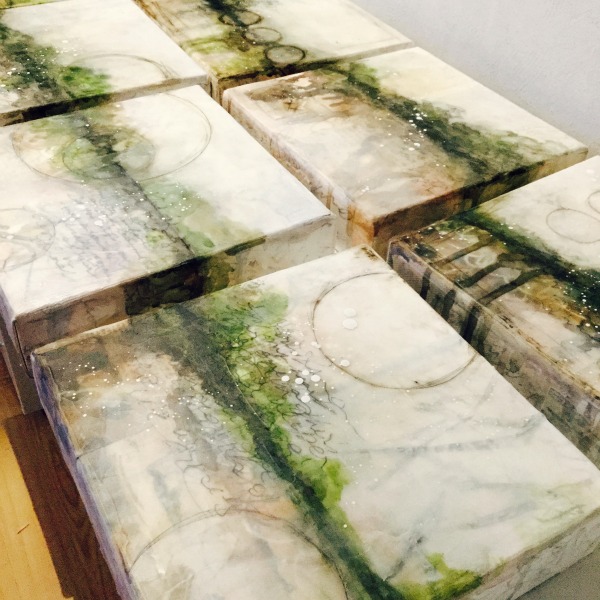
Faux encaustic tile - shabby vintage

I told you you'd be seeing more of this faux encaustic technique from me, I am still bitten by the bug.


Seal the substrate with white gesso and adhere some random pieces of text paper. Seal them with decoupage otherwise they will soak up the paint which will be added later.
Scrape white gesso over creating both high and low texture. Heat dry.


 Add some acrylic colours using a wet wipe to create a third, two thirds areas. I decided I wanted a defined line so I laid over a piece of paper to mask off the bottom area. I used pyrrole red, titan buff and titanium white


Use cobalt teal hue, diarylide yellow, pyrrole red, titan buff and titanium white for the lower section.


It was here I decided the pink line was too obtrusive so I blended some titan buff and titanium white across it and slightly into the top and lower sections to remove it.


I also decided this is where I would introduce some 'vinategeness' (is that a word?) to it.
To do this and spritz it with water and with a fine paintbrush drop in some raw umber and burnt sienna acrylic paint. (I repeated this several times to get the effect I wanted drying with my heat tool between each layer).


Now it's time to layer the first coat of decoart clear modeling paste with a palette knife and drop in some dry used tea leaves. Leave it to dry.


Next I wanted to try to 'carve' into the dry modeling paste. I drew three stars with a pencil, etched the shapes with a pokey tool and then blended a dark brown distress pen over them and rubbed away the excess to leave the stars outlined with the ink.


My first try at these - they look too dark so I got a fine brush and titanium white paint and coloured them in. I'm not too unhappy with them - I'm having to embrace the learning processes and outcomes that can be experimented with another time. In fact after I had taken this photo I decided to play with watery blues and white.


I blended in some more of the colours and then did asemic writing using a white uni-ball pen which turned out not to be permanent.


Now layer the second coat of decoart clear modeling paste and here I added the pink butterfly, laying it into the surface of the wet texture and slightly covering it. I left it to dry overnight.


I really liked how this was progressing and didn't want to add too much more to it, so I did some more white asemic writing, white splatters of titanium white and a little more brown edging and I also glued the coloured chipboard dots on ....


..... before scraping over the last layer of clear modeling paste and fixing the other embellishments into it.


I love the little heart frame with just a touch of random colour on it and the stars have a fabulous aura round them from the distress ink bleeding when the modeling paste was added.


The background looks as though it has depth even where there is no pattern underneath it.


 And the flowers just fitted perfectly.


I decided to make this into an easel card to put in my shop space. First paint a canvas board and add some white gesso, paint over a slightly dirty wash.


Add some white remnant rubs.


 Adhere an easel to the back. (I used the Tim Holtz die and mount board).

Now it's being packaged up for selling.


Thanks for stopping by.


Friday, 6 July 2018

Sentiment card for AVJ

I'm back with a vengeance at the Pack House filling it with cards and smaller things to sell rather than my bigger projects, so I have taken the opportunity today with the lovely Nikki's theme to make a card to put in.


I'm going journalling style today to make a background on which to add the sentiment.
Adhere old book papers and tissue tape to substrate.
Stencil with black media acrylic paint.
Add some stamping in black.
Scrape pale blue and white paint over the top.
Stamp with bottle tops.


Stencil with white modeling paste mixed with white gesso.
Raid the 'bits box' for scraps to tear down to size.


Assemble and add a sentiment.
This could be for a journal page or a card.


I used Small Talk stickers for my words.


We hope that you like the theme this month and can hopefully join us this over at A Vintage Journey getting all sentimental!


Thanks for stopping by.
Have a wonderful July.


Monday, 2 July 2018

Butterfly Tile - one layer faux encaustic

I have been really enjoying my faux encaustic technique and using it on different projects and in slightly different ways. If you didn't see my post a week ago Friday with a sea/fish themed media board, you can find it here.
The main constituent and product for creating this milky, textured finish is the DecoArt clear modeling paste. The steps on this tile gives a really simple, easy way to use it plus I had a fab playtime experimenting with different types of 'tissue' paper.


Greyboard sealed with a layer of gesso applied with a palette knife kept flat to the surface.
When dry second generation crackle stamp using watering can.
Spritz substrate blend in colours , spritz again, drip and let them move around and dry. Repeat until you are happy with the colour layers.


I went on to play with substrates for stamping on. Each image was stamped in black archival ink and I painted the colours on the reverse using DecoArt fluid media acrylics - See the topside below in #1.


1. American deli  paper - a good strong substrate for stamping in archival ink with no bleed through and great for painting on too, it took the watery paint well and remained a tough substrate.


2. Tim Holtz collage paper - this is more like the ordinary tissue paper. The black archival ink bled right the way through it leaving an imprinted image on my craft mat. It buckled when I painted it but I thought that added to the distress look.


3. Colourcraft abaca tissue paper is apparently like teabag paper and it does have that fabric feel to it. The ink didn't bleed but it didn't give such a crisp dark image either and watery paint was absorbed by the fabric like material very quickly and bled through onto the craft mat. It also bled over the image making it harder to see the design, however it performed differently using neat paint where it just sat in the space painted and left the image outline untouched on the other side.


I came back to the tile and created a few steps to get a composition and design I was happy with. 
Stamp with a small text image using black archival ink. 
Cut out the butterfly printed and painted on the deli paper and adhere it slightly to one side of the substrate. 
Find some words stamped, bought or computer generated (my preference), ink the edges and also glue down. Give them a light coat of decoupage glue to seal them.
Sand and distress the edges of the board blending in brown distress ink on the edges and on the sides of the tile. Spritz the edges with water to further distress the ink and heat dry.
Splatter a little watered down brown distress ink.


Now cover the board completely with the clear modeling paste and leave it overnight to dry. (See my original DecoArt post for this technique here and an under the sea media board here).


This photo shows the difference between the tile without the modeling paste and with. You will see that the distress ink moved because it reacts with water so the distressed edges changed and the splatters disappeared but I still love the effects it created. I'll just remember to splatter with paint next time lol.


You'll be seeing a few more of these tiles and similar technique layers over the next few weeks/months. Some of them, including this one, are being made into handbound sketch books / journals / notebooks

Hope you like this technique and please let me know if you try it and tell me where I can go see it.

See you again soon.

hugs Brenda xxx


Friday, 29 June 2018

Tag Friday for AVJ

It's Tag Friday over at A Vintage Journey where we have a fifth Friday in the month and fill it with tags of our choosing. No themes, no constraints just free time to play and experiment with whatever we choose.

At the last Ministry of Mixology I did a 'Make and Take' using a media board that Di at Tando Creative cut for me and this tag started it's life there. I didn't get any further than the first few layers of the background and so I have cut it down into a tag to use as a base for today's Tag Friday sample. You can see the M&T design on my blog post here.


Having stamped with Andy's Tech Traumer set onto greaseproof paper, I adhered it to the greyboard, added some tissue tape and then a random watery wash of cerulean blue and prussian blue.


Texture white gesso using the flat of a palette knife.
Add some black gesso stencilling.
Spray Amsterdam acrylics - burnt umber and greyish blue.

Collect collage elements together.


Distress numbers (they come in the kit), distress central label (see below), paint chipboard pieces with black acrylic and assemble the dial.


Adhere pieces onto the tag and distress the edges to finish.


I hope you can pop over to see the fabulous designs from the Creative Guides and go visit their blogs too.


Thanks for stopping by.

Enjoy your designing and creating.


Click image to enlarge. Right click press save.
Please give acknowledgement to this blog if you use the labels.
Thank you.


Monday, 25 June 2018

Experimenting with faux encaustics - DecoArt mediums

This was the panel board I made for the DecoArt Mixed Media blog and it went live in May - see it here. I have since been using this technique a lot and created a number of projects experimenting with different layers and inclusions.

Wanting to find out more about faux encaustics I read a number of articles and watched several videos. I'd really love to try the real thing but it needs space and equipment and I just don't have the room for it, but I love the effects it gives. So I thought I would give the faux method a try and experiment with some of the DecoArt mediums I have. Apparently pouring medium is good but, at the time of writing this I didn't have any. I just love the way the different layers have created real depth you have to hold it in your hands to get the feel of the texture and almost waxy finish.


I took a piece of painty card from my bits box and brushed on thickish layers of DecoArt media matte medium, heavy gel medium and clear modeling paste.


Now as my hubby would say I'm a 'want it yesterday' type of person. Now that's not to say I don't have any patience, because I do but when I'm in the moment I don't want to wait several days for things to dry thoroughly, so me - I get the heat gun out, but even with a little help it still needed to sit awhile so I got on with the project that I was inspired by. This is by Laly Mille and can be found here.


I followed her steps for encaustic inspired layering to see what I could produce, beginning with a media board sealed with gesso and some asemic writing done with a sharpie pen.


Then a grid created with a sketch and wash pencil and rubbed through with some matte medium. Don't forget I'm not exactly sure what Laly uses as she doesn't give a complete list, nor does she explain her techniques - so let's just run with it.


I left the project at this point and came back to it the next morning. The first thing I did was look at my tester sheet of the mediums. You can see from the photo below that the matte medium probably wasn't laid on thick enough and dried perfectly clear. The heavy gel medium dried shiny and doesn't have the look of wax (you can just see the reflection of the flash showing up white) whereas the clear modelling paste has that milky look which might work well for the waxy layer.


The next layer Laly used 'pastel and gel medium' so I interpreted that with my sakura chalk pastels rubbing the colours on in random areas and then 'painted' over them with the matte medium. I am in love with this 'new to me' technique for applying colour. By painting with the matte medium this should now give me a permanent layer.


Next out came the white gesso and I used a brush and my finger to apply this. The aim was to cover up some of the background and leave some exposed.


For the next layer I added some collage text papers with matte medium and sealed the whole board with it. I heat dried it and then tried a bit of an experiment of my own - I added some asemic writing using a white posca pen, blended a little gesso over the collaged areas and gave it a splattering of white gesso. I also blended ground espresso distress inks round the edges.


My intention was to next give it a coat of the clear modeling paste but before doing that I experimented again by trialling a thin coat of clear modelling paste tinted very slightly with titan buff media acrylic on a spare painty piece of card. Again I left this to dry overnight. I'm glad I did this as I think you can see from the photo the finish looks much too creamy and of course I thought afterwards the titan buff is opaque so really I need a translucent colour. (The top left hand corner didn't have any paste added to it).


So I continued with the thin clear coat on my board.

Wet.


Dry. Oh my gosh I'm in love.


You can't see immediately the differences the modeling paste has made but I think you will see the subtle changes on this next photo. The board on the right has that soft tone to it as if a misty mask has been placed over it. It looks and feels amazing in real life.


I went back to Laly's steps but I'm tweaking them slightly because I am going to add a second coat of paste so I added some tissue paper in the form of an old sewing pattern, some more white asemic writing, a key word and some carving, although that didn't work too well with the circle and crosses I thought I could add some more on top of the next layer. I also highlighted some of the white areas with a little more gesso rubbed over with my finger and more ground espresso distress inks along the edges.

Finally I finished with another quite thick layer of clear modeling paste and left it overnight to fully dry. Oh my gosh I was so pleased with the results.


 I can see the depth this medium has created ......


.... it doesn't have that real waxy feel to it but it didn't self level so it has a rippled textured surface and satin feel in keeping with a wax project.


I hope you like the experiment and what was achieved.


My thanks to Laly Malle for the inspiration and thank you for stopping by.