Thursday, 4 February 2016

Layering mixed media background for CVC

I am sharing a mixed media, layered background over at Country View Crafts project Blog today. It has lots of layers which I am loving at the moment, especially with my recipe workshops.


If you would like to see further details click the link above to be transported over. I will hopefully use this background soon and think I might even chop it into ATCs.

Have a great weekend.

hugs Brenda xxx


Updated from CVC project blog

Hi it's Brenda here with you today. 

I am sooo into journalling again at the moment I thought I would share a recipe to create a background with you that also fits with the new CVC challenge.


For the base layers I began with some of Tim's papers glued to my paper, stamped over it with red geranium archival ink and scraped a layer of gesso randomly over the page from top to bottom. I added some tissue tapes and then gave the page a light wash of colour using a babywipe and hansa yellow light with phthalo blue DecoArt media acrylic paints.


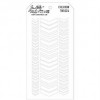
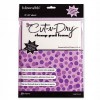
At this point I thought I would choose a travel theme to work with so for the next level of layers I stamped some clocks, postmarks and stamps using black archival. Next came another layer of gesso this time scraping across the page. Gesso seals, tones down colour and can add texture so is a very versatile medium to use. Then taking some cut 'n dry foam and a little raw umber paint on it I dabbed gently through the chevron stencil to create more interest.


 Now comes the top layers - stamp using some old collected plastic lids using gesso, just randomly and off the page and dry it. I stamped over the brown chevrons as I wanted to tone them down more (which comes in the next layer).


Then to finish with the top layers finger paint titan buff and titanium white into the circles to create more colour. This is where I stopped but when I come to use this page (and I might even chop it up to make ATCs) I have a base to work on where I could add stamped lines, doodling,some second generation text stamping.


Thanks for stopping by. I hope this inspires you to join the challenge over at Country View Challenges.

hug Brenda xxx


Monday, 1 February 2016

Make your own background for CVC

I love to make my own backgrounds for projects and card making and I'm also loving making little media boards, experimenting with layers, textures and colours. Today though for my background I am playing safe by repeating one I did before Christmas on a much larger board that went to my friend Alison for her Secret Santa gift - which can be seen here, you will see the similarities on my small one.

I began by sanding the edges of the board and stamping using Tim's classics #13 set. Postmarks always make me think of trips and holidays so I chose that as my theme.

 
I added some crackle paste through a stencil and let it dry.


Once dry and beautifully and finely crackled I dipped it in tea dye and iced spruce distress stain and then just played with layers using white acrylic paint, white linen ink spray, gathered twigs splattered using a new splatter tool I just got hold of in hobbycraft and spritzes of water......


.... and finally dried it and distressed the edges blending in ground espresso DI. So although I started off by thinking I was going to repeat a background I had already done, in fact, like always, I went off piste and mixed things up a bit - but that's what following your muse is all about isn't it?


The embellishment trail started by making some rusty looking signs using an embossing folder, decoart media fluid acrylics and some metallic lustres. I didn't record the steps because I was just having fun with the products and the layers until I was happy with the overall effects but I know I used quinacridone gold, raw umber, paynes grey, prussian blue, sap green and titan buff paints with champagne ice and iced espresso lustres.


I chose this guy as my focal image because he looks as though he is dressed ready to embark on a long journey, perhaps on one of those huge ocean going liners or even an aeroplane that was becoming more popular. He was excited to be off to explore foreign lands, perhaps as an archaeologist dreaming of finding a new pyramid in Egypt or maybe dreaming of starting work at the British Museum, hoping to assist, organise or even take part in excavating expeditions.


 I had this green metal frame sitting on my desk so decided it would add tremendously to the masculine feel and set about altering it.
I covered the frame in a light coat of gesso and then random patches of white crackle paste (I think I kept it a bit too thin as not much crackling went on - but something to learn from). You can see the final results below.


 When the crackle hadn't worked for me I decided to add some sand teture paste and used the media acrylics when it was dry to create this very textured rusty look.


I set about making the rest of the collage elements ....


.... and creating the collage itself.


The rusty adventure sign worked really well....


... as did the background.


Once assembled all I needed to do was add a rusty wire hanger and hey presto another vintage, weathered mixed media board was born.


So this is my sample for the newest challenge for Country View Challenges - just click the highlighted words and you will be transported there.

Have a fabulous month.

hugs Brenda xxx

Sunday, 31 January 2016

Mix It Up with Tim

 
For his tags of 2016 Tim is re-mixing two of his tag techniques from previous years to bring us new ways of using them. I am sure this will be a blast bringing together old and new ideas to create something completely different and to start us off he has given us chalkboard and industrious metal to work with.


So as Tim has mixed things up a bit so have I.


As you can see I changed the colours and I used pine needles distress paint for my industrial pieces but I also added a wash of black distress paint over the top to get that industrial patina look.


I also reversed the chalk and background colours making my coffee cup more in keeping with the real ones you might get in mine and Tim & Mario's favorite coffee shop. Still using chalks I even added a bit of green colouring to the cup and although not totally clear int his picture the tiny cog has been altered with alcohol ink and copper treasure gold.


The background is Tim's mesh stamp and produced with the chalkboard technique the same as the coffee cup.The word band was first coloured with pine needles distress paint and then antique linen (using Tim's technique for distressing the bands) and I also added some treasure copper to the edges.


I changed the normal string or ribbon for some hessian ribbon painted with the pine needles and black wash and then stapled on with the mini attacher.


Yay, having missed the last three tags at the end of 2015 due to the pressure of additional workloads I now find I am catching up and getting back into the swing of my own schedule at last. Thank goodness as I have so missed joining in. Thanks Tim for a great start to the new year with the technique remix and I am now going to go and link to the January post on your blog.


Have a great Sunday and I'll see you tomorrow with my DT sample for the beginning of the new challenge at Country View Challenges.

Happy crafting.

hugs Brenda xxx

Friday, 29 January 2016

It's Tag Friday at AVJ

It's Tag Friday at A Vintage Journey with an opportunity to create just for fun, that means no theme, no challenge requirements, just pure unadulterated play time. As I have been very focussed on workshop projects as well as DT samples this gave me time to go back to my roots with a vintage collage feel but also to add in some mixed media.


I started by gluing some of Tim's papers to a tag with matte medium and when it was dry I attacked it with the sewing machine.

To add to the layers I scraped over some gesso, dried it and then sprayed with antique linen, iced spruce and pumice stone distress sprays, but as we know gesso and distress inks don't like each other and although I sat drying the inks for a long while they remained wet in places so I decided to leave it overnight to see what happened. It still didn't fully dry so I dabbed it with kitchen roll to take any excess ink off and then sprayed it with DecoArt Americana matte spray and hey presto it worked and I just loved the effects.


 I next set about gathering papers and a photo booth pic to put together to get a vintage collage focus .....


.... and some other small elements to add to the collection.....


.... and with one of the small talk stickers it all went together beautifully.


Do pop over to the AVJ post today to see the variety of tags on show, it's a fabulous collection of styles and talent.

Have a wonderful weekend.

hugs Brenda xxx

Wednesday, 27 January 2016

Page 2 for Journaling Recipe 1

We had an amazing day at Pickwell farm on Saturday with 12 lovely ladies who came to see what my recipes for journalling are all about - in fact they enjoyed it so much we have put a date in for June to do recipes 3 and 4. How cool is that?
So today I thought I would show you some of the photos of finished pages done by the participants and also my page 2 using exactly the same recipe as the first pages I created which you can see HERE. Would you believe exactly the same steps but different choices for each one = deeper colours and a more vintage feel to it.


And these are some of the participants finished pages from the morning session - sadly not all of the photos were sharp enough to use but this certainly gives a flavour of their work and I was astounded at the fabulous outcomes. Well done everyone.


Thanks for stopping by today and taking a peek at what I have been up to.

I'll be back Friday with an AVJ Tag Friday sample.

hugs Brenda xxx