Tuesday, 28 October 2014

A Christmas Delivery – Crafty Individuals

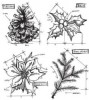
Jean and Malcolm at Crafty Individuals have brought out some new stamps for Christmas and I love this retro Vintage image, CI – 421, which can be found on their shop site HERE.

Originally I wanted this to be a Christmas card with a vintage feel to it and had the idea of making a vintage Christmas cabinet card, but it didn't suit the kraft background I was going to use, so I found this lovely blue paper in my stack of paper pads and this design evolved. The cabinet card did get used and you will see it coming up soon on another CI sample.

P1050782

I began by stamping the image onto sticky back canvas which has given it that old and faded look. I coloured with distress markers and a water brush and added some sparkle in the snowy places. The edges were blended with distress inks and I mounted it onto card and inked and distressed the edges again. Because the glitter was also rubbing off I gave it a very light spay of varnish.

P1050786

The flower was cut using the tattered poinsettia dis in white crinoline. I added the brad, stiffened it with spray starch, scrunched it and dried and then very, very lightly inked some of the petal points with walnut stain distress ink.

P1050787

the ‘joy’ is a wooden sentiment given the picket fence distress paint and glamour dust treatment – that is adding the glitter while the paint is still wet and left to dry.

P1050788

I used some of the bits from the courtyard framework die, stamping over with a text stamp, some pretty borders and a simple sentiment.
P1050791a

Have you managed to join in the Crafty Individuals October challenge yet – it is called Halloween madness or Christmas Frenzy. There are still a few days left to join in.


To enter put together your chosen project, which must include at least one Crafty Individuals product please, then post your Challenge project on your Blog, before the end of the month, and include a link back to the CI Blog.  Leave a link in the URL box displayed in the post. At the end of the month Gio will set about choosing five lucky participants, each of whom will win a CI rubber stamp of their choice, and don't forget that as per usual, once you have linked in your creation, you can also claim a lovely 25% discount code to use on anything you purchase from the CI Website, which will be valid until the 10th of November. Have fun.


hugs Brenda xxx


Sunday, 26 October 2014

Tattered Layered Snowflake

I have a card over on the Country View Crafts Project Blog today and have used the gorgeous new Layered Snowflake by Tim Holtz. It has been embossed, dipped in picket fence distress paint with glitter added to alter it and I love the kraft, red and white colour combination.
P1050894P1050895P1050897
It would be lovely if you could pop over to take a look and see the details of how I made it.

Thanks for stopping by here. Have a very happy Sunday.

hugs Brenda xxx


Update - copied over from CVC

HI everyone I hope you are having a happy Sunday. I am joining you today with a Christmas card that you could put together very easily but has a great deal of vintage charm.
P1050894a
I began by die-cutting Tim’s new layered snowflake die with embossing folder. It is fabulous for creating that wonderful texture on it.
I splodged it randomly with some picket fence distress paint.
P1050838
When it was dry I smeared some glue with my finger over the painted area and covered it with platinum glitter.
P1050839
The new Holiday Words thinlits give you fabulous greetings to add to your cards quite quickly and teamed with the ‘Stick It’ sheets work beautifully without any fuss in trying to adhere them to your design.
P1050843
The instructions on the packet are very clear. I cut a piece to the size I needed for my dies, removed one side of the protective paper and rubbed it onto the reverse side of the card I wanted to use.
P1050844
With my very thin dies I always use the sizzix magnetic platform as this keeps the dies in the place you want them to be and they don’t slide around. At this stage you die-cut in the normal way and have the Stick It paper underneath and not showing.
P1050893
It looked like this when I took the dies off the card.
P1050898
I gathered all the pieces I wanted to use in my design including papers from the Merriment set and making a shabby rose Jennie Atkinson style
P1050849
I painted an edge around my card ….
P1050850
… and assembled the card.
P1050895
Thanks for stopping by today and taking a peek at my shabby Christmas card and if you want to try making shabby shabby flowers take a look at Jennie’s blog HERE

Thursday, 23 October 2014

One layer thank you card no:1


My lovely ladies at the Art of Craft loved the workshop I did making one layer cards. This design used a focal B Line stamp, a text stamp, a border stamp and a sentiment stamp.
P1050803
We stamped the main image on the card and on rough paper to make a mask and that was all it needed to put this one together.
P1050804
We tried a wide border using a Tim Holtz stamp and used two colours of distress ink….
P1050806
… and distressed the edges to give it a more vintage look.
P1050805
The second card was made in exactly the same way ……
P1050807
… using a different border stamp.
P1050808P1050809

So where has this week gone? There's just not enough time to get everything done at the moment. I seem to be teaching 2 - 3 workshops and am so sorry I am still not getting round your blogs.

I hope you have had a good week and wish you a lovely weekend whatever you have planned.

hugs Brenda xxx

Monday, 20 October 2014

Cardinals Burlap Panel (1 of 4)

Saturday saw me leaving the house early to travel down to Southampton for my first time teaching at Pickwell Farm. If you like fresh from the ground produce and to ‘pick your own’ this is a great place to go. Alongside that it has an amazing craft section organised and run by Carolyn, she not only sells a wide range of craft items, she runs workshops herself and also invites others to teach there too. It is packed with so many goodies you would be amazed if you haven’t visited there.

Today I am sharing one of the four burlap panels I designed and also some photos from Saturday too.
P1180440
To start we covered all four panels in the same way but using different papers and masks to achieve different looks.
IMG_1508a
Everyone soon got busy creating and learning or re-visiting techniques.
P1180440a
We used coredinations papers, sanding, inking and painting to get some lovely textured effects.
IMG_1509a
Pam loves inking everything like me and soon got down to gathering all her greenery and blending both green and brown distress inks over the pieces.
IMG_1515a
Anne said she was very new to these products and techniques, but looked a real natural to me.
P1180435web
We added an altered muse token, glittery stars and used a black pen to get the more realistic markings on the birds.
IMG_1511a
It was also lovely to meet up with Von (on the left) as I haven’t see her for ages, at lunch time we mooched in the shop and had a good catch up.
IMG_1527a
As always it was amazing to see everyone's different versions at the end.
IMG_1530a
They did a brilliant job and they all looked so different.
IMG_1531a
Thank you Carolyn for having me and I’m already looking forward to my next visit in January when I will be teaching a vintage tag book.

Wishing you all a wonderful week ahead.

hugs Brenda xxx


Wednesday, 15 October 2014

Lynne Perrella Journal Pages

It's a fabulous week for me as I have the wonderful Jennie from Live the Dream staying for a few days and we are off to see Chris - My Corner of Heaven today.  We've shopped, done a workshop and crafted till late at night, what more could we want? (Photos to follow later)

I am sharing a double page spread from my journal using these fabulous Lynne Perella stamps

P1170024
Lots of gorgeous Dylusions sprays ......


........ a white posca pen for highlighting and doodling ......


.... and some faux bleaching. I also used  gesso in the early stages to give me a whitish area where I knew the face was going to go at the top. Those who attended my Dylusions workshop earlier in the year will recognise this design.

Right off to get ready for our visit today, I hope your week is going well and if you are near Southampton then maybe I will see you Saturday at Pickwell Farm where I will be teaching and sharing four mini Christmassy burlap panels (details on my sidebar). I am looking forward to seeing everyone.


Thanks for stopping by to take a peek at what I have been creating. Sorry I haven't visited you lately, workshops seem to have taken over my life at the moment, which is lovely, but I am missing seeing all your wonderful creations.
I will be back   .......   very soon.

hugs Brenda xxx

Sunday, 12 October 2014

Memories Box Workshop at Country View Crafts

Good morning everyone, I thought it would be fun to share some of the photos from the Memories Box workshop that we held on Thursday in Flitwick, Bedfordshire. If you pop over to the Country View Crafts Project Blog you will see quite a few of the project and the wonderful group of ladies who came for the day.

P1180091a

This is my sample made for the workshop, constructing the whole thing from card, mountboard and papers.

IMG_1434a

We had a fabulous group of lovely ladies and we hire this amazing venue which has so much space and is very light and airy – perfect for a days crafting.

IMG_1457a

We provide plenty of refreshments during the day.

IMG_1442a

Susan (CVC owner) comes along as well and Chris popped in to see how we were doing.
People come along way too, Carshalton and Basingstoke as well as Bedford, Milton Keynes and near Luton.

IMG_1470a

Thank you Sandra Lyn, Sue, Henrietta, Catherine, Diane, Jane, Lynda, Nikki and Chris for a fabulous day.

I am now looking forward to the next one on the 27th November when we will be making a Winter Wonderland Shadow Box. Details can be found on my side-bar and on Country View Crafts shop website.


Maybe I will see you there.

Happy Sunday.


hugs Brenda xxxx

Wednesday, 8 October 2014

Distress Spray Stains at Country View Crafts

Did you know that Susan has the brand new distress spray stains in the shop? I have been having a play and made another Christmas card using the sprays for the background.


All the process steps can be found at Country View Crafts project blog today. It would be lovely if you could pop over and take a look.

I hope your week is going well.

Thanks for stopping by.

hugs Brenda xxx