Friday, 1 April 2016

Spring at Country View Crafts #1

Yay Spring has sprung and this is the second of my posts with that theme today and this one is for the Country View Challenge called Spring. If you missed the earlier one which is my sample for A Vintage Journey, then scroll back one when you've finished here or click the link
.
This time I have a canvas board for you made with DecoArt products.


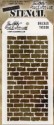
Using one of my 5 x 7 canvas boards I created texture using decoart white modeling paste and a Tim's bricked stencil and left it to dry.
Whist it was doing so I began thinking about the colours I would use.
I love collecting images on Pinterest and have a colour palette board so I looked for colours to use and these looked perfect especially as though they have a slight vintage hue to them.

http://www.hillcitybride.com/2012/04/the-perfect-palatte/

I die-cut the window and window box from mount board and set about creating crackle using the decoart white crackle paste. I began by giving the surface a coat of matte medium and a thin coat of the crackle paste hoping for a fine crackle to appear. You can see I did get some in places but maybe I should have painted it a little thicker to get more. I rubbed in sap green and titanium white paint and rubbed it away with a babywipe, then I sanded it and blended in ground espresso DI.


Next I painted a piece of card using media acrylic paints ....


... and stamped three butterflies using vermillion archival ink and cut them out. You will see though that I only used one in the end.


Then I continued with the background and used a collection of media paints to daub, spritz with water and drip until I was happy with the result.


 I even used a fine brush and added some vintage photo along the gaps in the bricks.


To finish it off I wiped on some transparent crackle glaze and left it to dry. At this point as it was such a beautiful Easter Friday we went for a long walk with the family on Ash Ranges.


When I got back the crackle glaze had dried so I rubbed in English Red Oxide antiquing cream, let it dry a bit and rubbed over with a damp babywipe to leave the cracks showing through.


I must have either not laid enough down in some places or overworked it as some of the areas didn't crackle at all. The result is a shiny surface where the glaze is so I gave the whole surface a coat of matte varnish.


 Now to collect and alter the embellishments - the single butterfly


A word band painted and most of it rubbed away to leave coloured lettering and some die-cut birds.


Some spring greenery and chloe stem ....


.... and an old prima flower that got a few spritzes of misters.


You can just make out the checked pattern paper that the flower was made out of.


 And everything collected together that I thought I would use. Can you see a snippet of wallflower stash paper behind the windows?


This is what it looked like.


The flower centre was originally a pear gem, it still is but I used the paints to colour it up.


The butterfly perched on the window - is he waiting to fly after the birds?


I hope you like my ode to Spring, I for one are certainly looking forward to the warmer weather.


Have a good April, time to get those gardens cleared and ready for the summer bedding. In the times you are unable to get out why not get creating and join us for the Spring challenge? You never know you might be the next winner of a £20 voucher from Country View Crafts or one of our top 3, but please pop over to the challenge blog to see our new teamies and all the inspiration we have for you.

Take care and listen to your heART.

hugs Brenda xxxxx


DecoArt products and other supplies I have used are available at Country View Crafts

Spring is in the Air at AVJ

This month the lovely Sandy has chosen our theme over at A Vintage Journey . It's been fabulous looking at the new growth peeking through in the garden. I so love this time of year and I hope we will begin to get a bit more sunshine now the clocks have changed.

Sandy describes the new challenge -
Leave those winter blues behind. Make anything that says SPRING using pastel colours. It is your choice, a card, canvas, 3D or a tag, etc. but remember it should be in one of the vintage; shabby; mixed media; art journalling; industrial or steampunk styles that we favour.


Thank you for all the lovely comments on my hangings last month, I enjoyed making them and knowing that you liked them too has spurred me on to create another with a new technique using the DecoArt media range of acrylic paints. Following on from the weathered boards last time I have created some scratched board and added elements that definitely give me the feel that Spring is in the air.

I haven't gone very pastel with my project as it is the emergence of the first green buds and leaves that get me excited, so I have tried to echo that in this piece. Firstly I mixed green gold and the most tiniest amount of Prussian blue with white tinting base and painted the card, then heat dried it.


Next I stippled and spritzed paynes grey and burnt umber around the edges, keeping it a watery mix and quite light in colour.


I used Andy Skinner's scratch stamp with watering can archival ink all over it ......


I created some real scratches with a wire scratch brush and added a few remnant rubs.


I added random washes of quinacridone gold before heat drying and repeated with watery paynes grey, dried again .......


and finished with some hansa yellow light to bring some additional spring colour into it.


The die-cut flowers were dipped in sap green and orange to create colour contrasts, then dipped in yellow iron oxide and distress blended and dipped with abandoned coral .


The postage stamp frame was cut in black mount board and given a stippled finish using black gesso. When it was dry I lightly blended some iced espresso metallic lustre over it then spritzed with primary yellow media mister and again when dry spritzed with the back media mister. I finished with a light rub of champagne ice metallic lustre and this gave me the dark green, textured metallic look for the frame.


The circular disk (again cut from mountboard to give it some sturdiness) was given two coats of sap green media paint and then I used a palette knife to spread white crackle paste over it. This created some fine crackles and when it was fully dry I gave it a coat of transparent yellow iron oxide and quinacridone gold washes. Finally I sanded the edges and blended ground espresso DI round.


The little butterflies were diecut from a piece of painted card stamped with text using tiger lily archival ink and also edged with ground espresso. But if you look at the finished piece you will see how they changed as I added more paints to them.


Once I had put this altogether I decided to add the Spring banner, it needed something else to finish it off.


I hope you will be able to join us on this new leg of the journey and for those who enter there is a chance of winning a £20 voucher to Country View Crafts on-line store.

Enjoy April as the sun begins to warm the land in the northern hemisphere.

I shall be back again in a few hours with my DT sample for Country View Challenges, hope you can join me again, but in the meantime please visit the new AVJ challenge to see all the wonderful inspiration from the other Creative Guides.

hugs Brenda 


“You can cut all the flowers but you cannot keep Spring from coming.” 
― Pablo Neruda

Wednesday, 30 March 2016

Tim tag for March

12 tags of 2016 - March

This is Tim's tag for this month and I'm just getting in under the wire, so pleased I found a few hours yesterday afternoon to get my one done.


I followed both of the remix techniques but used different dies and found my own design which I actually really like. 


Following Tim's steps - see HERE to see all the details, I created the top layer and used two movers and shapers dies.


Then onto the media layer (see details from Tim's blog HERE) - I had die-cut the tag once but it didn't quite give me enough of the trellis to fit under the top layer, so I turned my tag over and found I could re-cut to extend it further - great find.


Here you can see how much extra trellis I managed to get - it was enough for what I wanted.


I carried on with the process steps using the new distress crayons and oh boy this technique is fabulous.


And then I added the embellishments. This is the best photograph of the tag showing it in it's truest colours and catching some of the brown (yes would you believe brown?) foiling. Having used a small talk saying I altered the wordband to reflect the same colours, black background - archival ink - and white lettering - picket fence distress paint. The photobooth lady was raised on thick foam pads and I used alcohol inks on the mirrored star.


Yay, I got it done and what a fabulous remix - thank's Tim, I just need to pop over and link it up.


Products
Mixed media thinlits
Ranger foil sheets
Wordband
Distress crayons set 2
Distress crayons set 3
Movers and shapers ticket die
Mirrored star
Ground espresso distress spray
Tarnisged brass distress spray
Ground espresso DI
Trimmings
Small talk
Photobooth strips


I hope you had a wonderful Easter weekend, we had a family outing to the local Indian restaurant Friday night, a fairly quiet Saturday, Sunday was the Easter egg hunt in the garden for the girls ....


... with a family meal later and nine of us this time.

Saturday night and most of Sunday storm Katie raged, wrecking her havoc everywhere but we kept up the family tradition of having a BBQ ...


.... but ate indoors, again the family together. So all in all a busy but wonderful time.

See you back here on Friday with two post as A Vintage Journey and Country View Crafts will be starting new challenges.

Enjoy your week.

hugs Brenda xxx

Monday, 28 March 2016

Canvas board recycled for CVC

Bank Holiday Monday here in the UK and the last day of the long Easter weekend, but what a fabulous few days it has been - Easter egg hunt, chocolate and family around - what could be better?


I am sharing this project over at the Country View Crafts project Blog and have recycled a canvas board. All the full details are on the CVC page, particularly how I created the background but having got a colourful mixed media backdrop I decided to add elements so I could enter the Creative Carte Blanche Creative Adventure - Triple Trouble - to use metal. corrugated card and lace.

Starting with the metals - some were gessoed and painted with decoart media acrylics, others were given the rusting treatment again using decoart media acrylics.


Here we have lace, wooden pieces and a corrugated heart.


The arch piece has a transfer waiting to be finished but I rubbed too hard and spoiled it so had to turn over and started again.


I layered up the pieces then added the final embellishments and the pretty girl on the arch.


Really rather pleased with this and reminds me of Finnabair's style. I will put an easel on the back and use it as one of my special cards.


Thanks for stopping by. I hope you are having a fabulous Easter weekend, even with the horrible rain and high winds we managed  a break in the clouds yesterday afternoon which was enough to do the Easter egg hunt and later had dinner with all the family - 9 of us this time.

Take care and enjoy the week ahead.

hugs Brenda xxx


Update - copied over from CVC

HI Everyone, Brenda here. For today's make I took a canvas board I had made for another project and set about altering it. I really liked it like this but the finished article was not something I thought I would use so I took off the embellishments and set to work.


I took out my distress crayons and started smudging colours over the top ...


.... and then blended over picket fence distress paint and spritzed it with water.


I added more coloured crayons as well as white ...


... then dipped it into spritzed picket fence paint again before drying it and blending over squeezed lemonade, evergreen bough, mustard seed and picked raspberry distress inks.


Now it's completely changed we are ready to rock and roll.
Starting with the metals - some were gessoed and painted with decoart media acrylics, others were given the rusting treatment again using decoart media acrylics.


Here we have lace, wooden pieces and a corrugated heart.


The arch piece has a transfer waiting to be finished but I rubbed too hard and spoiled it so had to turn over and started again.


I layered up the pieces and began adhering them to the board using matte medium.


The sprayed with some misters and a glitz spray from my supplies.


Then added the final embellishments and the pretty girl on the arch.


Really rather pleased with this and reminds me of Finnabair's style. I will put an easel on the back and use it as one of my special cards.