Thursday, 14 May 2015

Visual Journey #20

"I want to be improbable and beautiful afraid of nothing as if I had wings".

This is another foray into bright colours and colouring in - in fact painting with DecoArt media acrylics.

I began with the stamping using PaperArtsy Eclectica stamps by Darcy and black archival ink. To create the background I used cobalt blue hue, dairylide yellow and a touch of phthalo green-blue with lots of water and a babywipe.


Using an old credit card and white gesso I dragged the white down the pages to create more interest and added some small text stamping in random places.


Out came the very small brushes and a palette of cadmium red hue, titan buff, cadmium orange hue and diarylide yellow to paint in all the flower shapes.


The ones on the left page were painted with quinacridone magenta. I also painted in some more grasses in different browns to make it look a little more realistic.

After using a black pen to bring back some of the outline and sharpen the edges  I used the credit card and white gesso again and then I splattered some watery titan buff over it.


At this point I did think about using a white pen and adding highlights and maybe a border around the pages and even splashes of brown paint but I have learnt that I can go too far sometimes and overdo things so I decided to leave it right here. I'm happy.

I hope you have been able to journal this week and hopefully add your creations to my Visual Journey link below.

If you would like to share the collection you will find the code to add to you post here -


... and I look forward to sharing in your pages through the linky below.

Take care and thanks for stopping by.

hugs Brenda xxx

No bird soars too high if he soars with his own wings.
William Blake


Monday, 11 May 2015

Rusty Clock - DecoArt techniques - Board 3

This is board three in a series showing a brand new technique - flat rust, devised by myself, which can be used on both large substrates (ie card, chipboard etc) and on smaller pieces like this die-cut clock.  I am having such great fun experimenting with the decoart media range to create ways of making backgrounds and ideas for using in mixed media art work.


This flat rust technique could be applied to any die-cut you wanted and you can see the metallic effect and rusty areas on it.


The ATC base technique I am calling 'weathered painted relief' and I think this looks a bit like a chipped and rusty circuit board, but that's because I used one of the new Andy Skinner stamps. I want to try it out with different stamps and colours to see what other effects it gives me.


On the cabinet card I used layers of the acrylic paints and the transparent crackle glaze bit I must have done something wrong somewhere because it wasn't very successful, but that didn't stop me using it.


I forgot to take more photos as I was waiting for layers to dry, but I gave it a wash of titan buff to reveal what cracks did appear (and most of those have been covered up by the ATC) and I gave it a wash of quinacridone gold and then baked it with the heat gun to create little bubbles. So I still got some texture on it.


I am really looking forward to teaching these techniques next month for Country View Crafts - the details are on my side bar.


Thanks for stopping by and for the lovely comments both here on my blog and on face Book with these techniques.

Take care.

hugs Brenda xxxx

Saturday, 9 May 2015

Tag for Crafty Individuals

It's May, a new challenge has started at Crafty Individuals and the theme is about music.
I have interpreted this in my own way (as I do ....) and taken a play on the word 'song' in the caption used on my tag.


Process steps -
Blend distress inks old paper, evergreen bough and weathered wood with a blending tool and mist with stormy sky and peeled paint mix in a mister. Blend the edges with frayed burlap - spritz and flick with water and heat dry.


Stamp CI 430 with stormy sky and frayed burlap and heat dry. I love the distressed pattern and collage effects of this stamp, it's perfect for creating backgrounds.


Stamp various stamps from the collection CI 329 and also add some stamped card collage pieces.


I also added some drawn lines between the mini tag and the birds to make it look as though they are holding it between them. Add a bow ........


..... and sentiment or quote to finish it off.


I hope you can join us in the challenge this month. Jean is always very generous with her prizes and discounts so pop over to the Crafty Individuals blog to see what Jean has in store for this challenge.

hugs Brenda xxx

Thursday, 7 May 2015

Visual Journey #19

These pages were inspired somehow by song lyrics - and I don't even like this song but it got stuck in my head during the making process.


I have been using oil pastels quite a bit recently and they live in a drawer full of other tins of artists colour supplies - for some reason I picked up my aquatone solid watercolor sticks and decided to have a play. I also had on my desk a wooden board with nine holes in so I used it as a stencil and coloured in the circles with the watercolours. When they were complete I 'painted' each one with matt medium and left them to dry overnight.


Step 2 was to create  wash background using stormy sky and weathered wood distress stains, spritzing them with water and letting then blend over the pages. The circles remained untouched by the colours as I was able to wipe the stains away easily.


I gathered some stencils with holes in and used some white acrylic paint to get a variety of sizes over the page. In many ways I wish I had used gesso as this acrylic doesn't have much pigment and blended into the page more than I wanted.


As I had the drawer open with tins of colour in I picked up my Inktense pencils and crayoned in different coloured auras around each circle and used a Paintbrush and water to blend and deepen them.


The white came in next with the posca pen .....


 ... and I added some stencilling ........

.... and some black and white stamping and stencilling to the circles .......


.... before finishing off with handwritten lyrics and a printed line from the song.


I hope it doesn't leave you with the tune spinning around in your head lol.

Thank you to everyone who leaves a comment and to those who join me in this amazing journey, I just love popping round and seeing how you are expressing yourself and sharing in your journals.

Here is the code for sharing the May collection on your blog, should you wish to ......


.... and I look forward to seeing pages from your visual journey over the next month. The link for you to join me is below.

Have a great end to the week .

hugs Brenda xxxx


Monday, 4 May 2015

Small book London themed

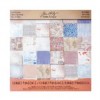
When I went to meet Paula Cheney in Windsor last month I took her a little gift I had made. Knowing she was spending a few days in London and a few in Paris I used Tim's Correspondence and French Industrial papers to make her a little scrapbook cum journal to keep some of her mementoes in.


This is my contribution over at the Country View Crafts Project blog today and there are more photos for you to see over there.


I hope you have a great week.


hugs Brenda xxx


Products used in making the book


Friday, 1 May 2015

Spring Coloured Butterfly for AVJ

Foreword 15th April - here I am sitting looking out into my back garden pondering what I can make for this new challenge chosen by the lovely Astrid - Spring Colours. It is a sunny Spring day, the sun is shining, the birds are visiting the feeders and there is an odd colourful butterfly or two winging their way around the shrubs and trees. The pretty pink blossom from the flowering cherry tree is just finishing and the white blossom on the plum tree has just emerged. In the garden next door I can see yellow button and yellow forsythia shrubs and a tub of orange flowers ...... mmm could this be my Spring colour palette?


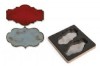
Taking a piece of black foamboard I cut Tim's cameo frame. When I did this I found the edging to the frame came away and I could place the main part of the frame in the outside piece leaving a gap between them - so this became my substrate to work with. I sealed both pieces with DecoArt black gesso.
On the inner piece I painted rock candy clear crackle paint and on the outer frame I rubbed some candle wax and dabbed picket fence distress paint over it.


 Whilst the frames were drying I die-cut Tim's layered butterfly and ran it through the embossing folder. I wanted to play more with tbe mixed media butterfly effects I had achieved on my Destination Inspiration collection of three - see here. After choosing the colours I wanted to work with  - mustard seed, victorian velvet, spun sugar, picket fence and dried marigold (chosen from my ponderings above) I began by taking a box of oil pastels and colouring over the raised areas with white, creamy pink and yellow.


Next I spritzed the butterfly with water and daubed on mustard seed, victorian velvet, spun sugar, picket fence and dried marigold distress stains and heat dried it.


Lastly I splattered some ripe persimmon, abandoned coral and picked raspberry distress inks over and spritzed with water again, finishing with a paintbrush and touching in some of the colours to get the contrasts I wanted. I also inked the edges with walnut stain.


The inside frame dried with lots of lovely cracks. I firstly gave it a wash of picket fence distress stain wiping off the excess and then I daubed walnut stain and brushed corduroy stains over it and baked them in with a heat gun.


 When the outer frame was dry I heated it to warm the candle wax up and gently rubbed with some kitchen toll to reveal the black underneath and then I daubed both walnut stain and brushed corduaroy stains over this and baked them in.


The whole piece was finished with some embellishments and a backing which had been dipped in the ripe persimmon, abandoned coral and picked raspberry distress inks.


For the title I used Tim's big chat words


Rather different again from my usual and its one of those projects where the photos really don't do it justice - but I enjoyed the experimenting.

We would love to see you over at A Vintage Journey for this month's challenge and do pop over to see all the amazing inspirational projects from the very talented Creative Guides.

Enjoy your weekend whatever you have planned.

hugs Brenda xxxx