Saturday, 23 August 2025

Silhouette Framed

 Every Adventure is Worthwhile 

I enjoyed making my last CVC August frame project and thought I'd try another one to go to 'Men In Sheds' for their fundraising fayre. If you've not heard of Men's sheds before, it's an association where men can meet for connection, conversation and creation and also to make, repair and repurpose mostly wooden items, supporting projects in their local communities. It also helps to improve wellbeing, reduce loneliness and combat social isolation. Since retiring this has given hubby a great place to hang out and develop his love of woodworking.

I used another piece of the woodblocks hubby had cut me, prepped it and layered with the Frenchic chalk paint. The last bar one layer I added the most minute amount of the scottish salmon paint and mixed it in the the fresco paint. When it was dry I rubbed over some vaseline, randomly, and painted the last white layer. I left it to dry but not mature. I warmed it slightly with my heat gun and then rubbed over the surface with some kitchen paper so it revealed some pink areas underneath, then I lightly sanded to smooth the revealed areas and the sandpaper also exposed some more of the underneath layer.

I used a Tim stamp to produce a fabulous pattern, stamped the words to add and punched a black bird to add as my silhouette. 

To finish I used some paper from Tim's correspondence pad for the background in the frame, found a stamped star in my bits box and die-cut a border using tim's provincial embosslit using white card then rubbed a black soot distress ink pad lightly over it, spritzed with water, dried then brayered white chalk paint over the protrusions.

I kept this one quite clean and simple and finished off with some tissue/washi tapes giving me extra words.


Supplies

TH stamp - Classics #3, Nature's Wonder CMS343

Frenchic Chalk Wall Paint

PaperArtsy - Fresco Finish Paint - Scottish Salmon

TH Punch (very old) Bird

TH Paper pad - Correspondence

Saturday, 9 August 2025

Silhouette Butterfly frame

 Dare To Dream Frame

The theme for August at CVC Challenge is Silhouettes and at the time of making this project (back in June lol), hubby was busy making wooden things to sell at a school summer fayre linked to 'Men in Sheds' where he loves to go to get some woodworking time and of course there's always a lot of chat going on with the other members over a cup of tea.

I wanted to help and support the fundraising so I got him to simply cut me some blocks of wood and set about creating the design for one of them which needed prepping with a layer of white gesso and then a layer of Yorkshire Rose Frenchic Paint. When dry I stamped the butterfly collage stamp and embossed it with black embossing powder. When it was cool I painted in the gaps.


So what to do next?  I adhered a Tim hardware head to the top and tied rafia round it. I didn't feel this would be sold on it's own. Hmm!  Ping! Let's add it to a frame. 


I found a piece from the wallflower paper pad which became the background.


I stamped some words and added a few flowers and curly moss. 


Eh Finito.
I hope someone will want to buy if for a couple of pounds.

Please come over to Facebook and join the Country View Crafts Challenges group if you haven't already and share a silhouette project with us.


xx


Supplies

TH stamps - Botanic Collage CMS447, Simple Sayings CMS155,

TH - Idea-ology Hardware Heads

TH paper pad - Wallflower

TH - Distress Ink - Walnut Stain

Ranger - Embossing Powder Black 

Frenchic - Chalk Wall Paint Yorkshire Rose

Rafia and flowers from my supplies


Wednesday, 23 July 2025

In my garden - shabby panel

 In My Garden

The Great Outdoors CVC #2 July

Well I'm out and about in my garden for the second challenge for July at Country View Crafts and I've created another shabby panel. I also seem to have gone somewhat French (see later info in the post about this!) - that came about because Tim has some bee images that have been labelled in French, so I clicked with it and brought out a bit of school learnt French, but checked it on Google as well :0)

So in my garden I have bees and that was true when my Olive tree was flowering a few weeks ago - there were bumblebees buzzing away and flitting like mad from flower to flower. It surprised me because the flowers are so, so small! I have lots of flowers and bushes, I have raspberries, blueberries, tomatoes, courgettes, cucumber, runner beans, sweetcorn, roses, dahlias, fuchsias, hydrangeas and more - and I love it. I've also had lots of blackfly and slugs and snails, caterpillars, but very few butterflies and ladybirds sadly. 

Finished Panel

So the time to create this panel took longer than I had anticipated but read on and you'll find out why,


Process steps

Two pieces of paper adhered to card and brayered with white acrylic paint to tone it down.

Texture paste scraped through Tim's stencil for texture and left to dry. Water spritzed over the stencilling and walnut stain distress ink mixed with water on craft mat puddled through using a paint brush. Neat ink then painted over a few of the stencilled shapes to give variations of tones. Any puddled colour was splattered over, but most of it soaked in and can't really be seen.

Pieces for the focal point layers were collected together, much of it in bags as leftovers from previous projects. I keep lots of the bits and pieces to use for collages and toppers. The only things I had to do were stamp the bees (on leftover background) and create the text pieces on the computer. I also gathered a butterfly rub-on and embossed on vellum to add to the specimen slide.

The bees are stamped with an old Tim Holtz stamp mounted on wood. It was fabulous using it again and to give it an outing.

I layered up all the elements and lost the butterfly duh! But found a little one in the field notes snippets I could replace it with. Buuuuutttt .... I wasn't happy with it, there were imbalances - like the left side is so dark whilst the other side is very light, to me that took away from the focus of the bees and garden. So I had to have a play.........


This was what appeared. I got rid of the black flowers, added from the wildflowers dies and also added a ladybird peeking out at the bottom. Although there is a depth imbalance on either side now, I think I can live with that because now the whole piece is lighter and looks more like a garden.


Here you can see the contrasts and differences. I'm happy.


NEXT DAY
Is it a Bee or is it a Wasp?

I hadn't glued anything down before I went to bed and today everything changed!!! (Typically Me!!).
I brayered over the brown stencil texture to lighten it more, 
I didn't like the yellow on the bees (or wasps?).
Because I think this is more likely to be a wasp the French text seemed inappropriate so I made some in English.
I also stamped the panel mount with text from the Entomology set.
I added some snippets.
Now I'm even happier.


xx


Supplies

TH Sizzix dies - Specimen, Entomology, Wildflowers

TH Stampers Anonymous stamp - an old wooden stamp of a bee?, Entomology CMS328

TH Mediums - Collage Medium Matte

Th Distress inks - Walnut Stain, Wild Honey, Scattered Straw

TH Snippets - Field Notes, Curator

TH Small Talk stickers

White acrylic paint, White Gesso

Background papers and text - Tim Holtz and my own

Friday, 11 July 2025

Butterfly panel - watercolouring with distress inks

 Butterfly Metamorphosis

The Great Outdoors CVC #1 July

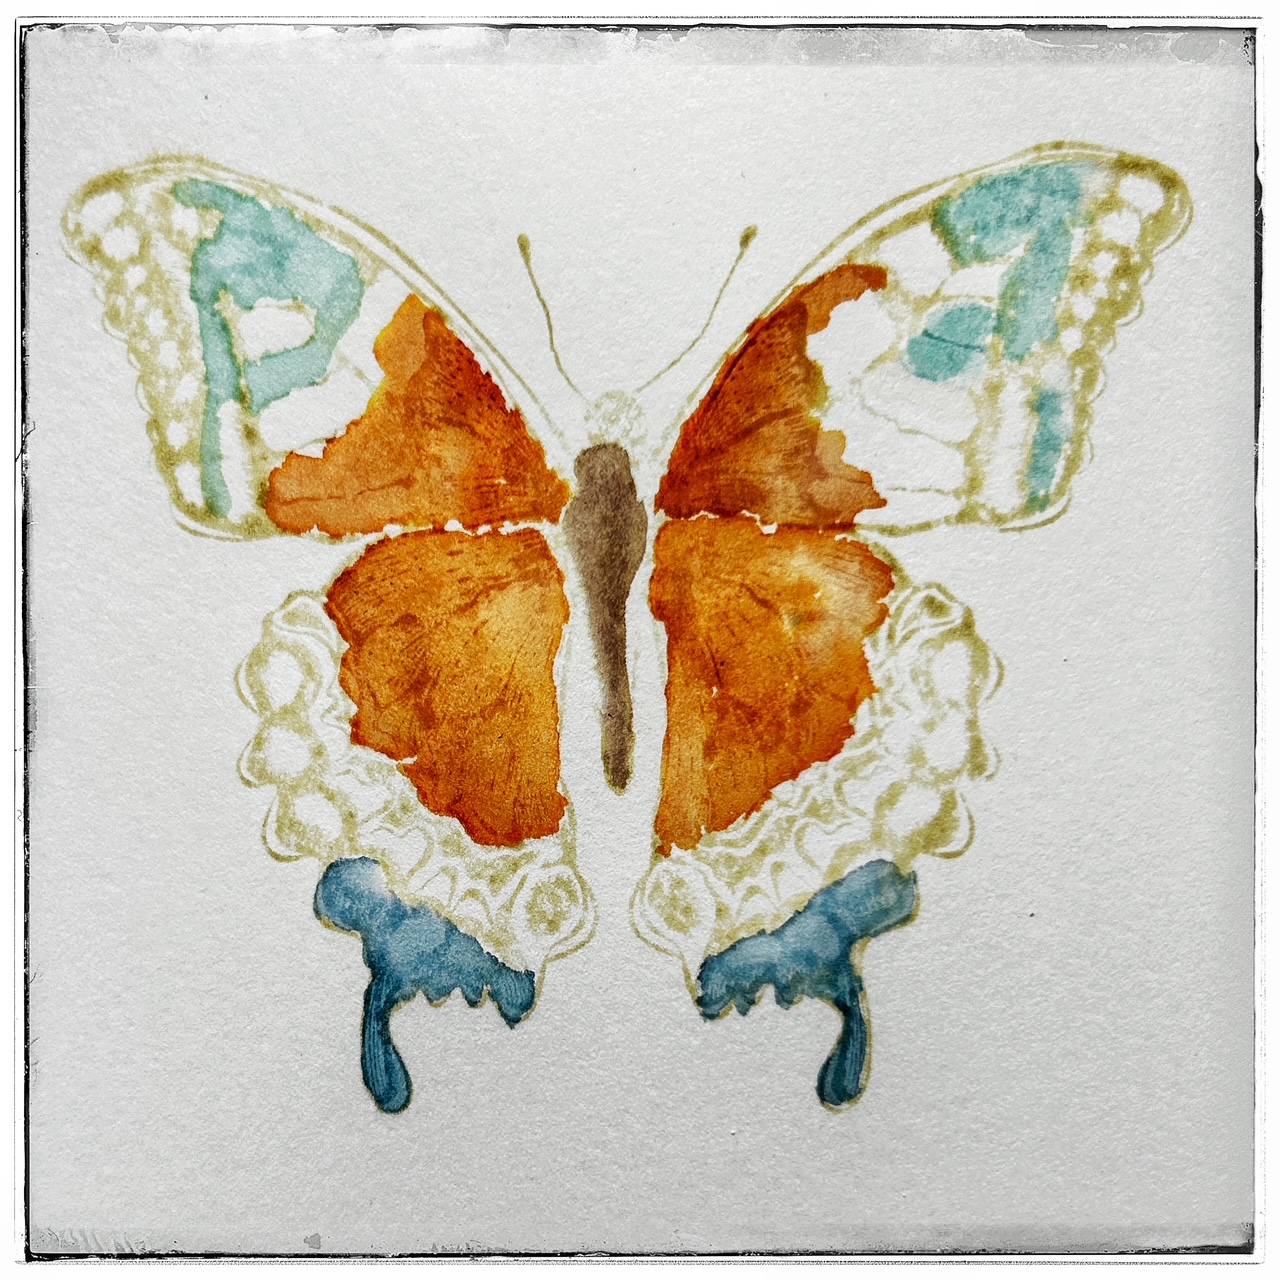
I'm doing a workshop at CVC headquarters this month with a theme of butterflies, bees and moths and it's focussed on creating sketchbook pages. I had created so many pieces to add, that I am completely zoned in on butterflies again and I wanted to create a butterfly painting by watercolouring using distress inks, but rather than draw and paint I decided to use one of Tim's butterflies being used in the workshop but use it in a completely different way.

To begin I stamped it in antique linen so that I could use the shape but not the pattern.

I used salvaged patina, rusty hinge, ground espresso and uncharted mariner with a fine round brush.
I cut out the butterfly .....
.... and blended ground espresso round it.
The orange edges in the wings looked very sharp against the blues so I blended them using white charcoal pencil.
Then used a white posca pen and black drawing pen to add final details.


xx


Supplies

TH Distress inks - Antique Linen, Salvaged Patina, Rusty Hinge, Ground Espresso and Uncharted Mariner,

TH Butterfly stamp - Perspective CMS213, 

White charcoal pencil,   white posca pen,   black ink pen fine 

TH - Collage Strips, Snippets, Remnant Rubs, Mummy Cloth.

Gesso


Monday, 7 July 2025

Are you an Artist or a Crafter? What is a Sketchbook? Do people who make crafty projects keep a sketchbook?

Who is a craft artist?

To me it is someone who creates handmade projects using a whole variety of substrates and media to bring something beautifully creative and artistic to the finished product. Do you love to design and make individual and imaginative works of art to show on social media, sell to people, to give away to your friends or just to keep for yourself? Well, a sketchbook is a fantastic place to keep lots of trials, experiments and practice pieces and is used by many of us who are not just pure artists (in the sense of those who are learning formal art), but also those of us who consider ourselves to be crafty individuals who are also artistic.

A sketchbook is called a sketchbook because it was specifically designed for sketching which generally refers to making rough, unfinished drawings or quick studies, but the term "sketchbook" implies a space for experimentation, practice, and the development of ideas, rather than finished, polished artwork. I have many such books that I have been calling journals but actually I keep many of my mixed media designs in them, crafty, vintage and shabby panels and sketches or paintings that I have created over the years. Why have I called them journals? Well, I really don’t know, but maybe it’s because I didn’t see myself as an 'artist', many people think that craft, in the sense of papercrafts and similar projects, is not art. If they’re not, then what are they?

Here's a Google AI overview answer to my question ‘Can papercraft and similar projects be called art?

Yes, papercraft and similar projects can be considered art. The distinction between "art" and "craft" is subjective and often blurred, but many papercraft forms involve creative expression, aesthetic appeal, and skilled execution, which are all characteristics associated with art. 

Recently a very good friend told me I should not be calling some of my sketches 'doodles', they are sketches or drawings she said and told me that I shouldn’t shy away of seeing myself as an artist. So, you know what? She is absolutely right! I think so many of us crafty artists feel the same. As I said in the opening paragraph we are people who create handmade projects using a whole variety of substrates and media to bring something beautifully creative and artistic to the finished product, therefore we are artists.


With that in mind I have started a sketchbook to bring together lots of ideas, ‘practice’ pieces in drawing, painting and collage using all the materials and tools that I use in my day to day creative craft and arty sessions in my studio (actually it’s a small bedroom lol).

If you are interested in keeping a crafty/artistic sketchbook that will contain some of your trials, some finished pieces and some collections of other media like die-cuts, stamped and coloured images with other snippets then maybe my ‘Creative Sketchbooking’ workshop is for you. The day will be packed with 6 mini projects that will be linked together with practice and learning opportunities to include a little sketching, some tracing and what I call painterly water colouring which is using acrylic paints in the same ways that we can use watercolour paints.  Along with the die-cuts, snippets and colour swatches these will all come together under the theme of Butterflies, Bees and Moths to bring 2 x A4 pages to sketchbook life.

Some people like to stamp...


Some people like to draw ...


Some people like to play with colour ...


Some people like to create collage, and use snippets, design and get involved with details, use die-cuts ....


There is something for everyone. 

The workshop is on Thursday 17th July (One space only) and Friday 18th July 2025 (several spaces available) and can be booked online at Country View Crafts . It will be held at Country View Crafts headquarters which is –

Country View Crafts
Country View
6 Wrestlingworth Road
Potton
Sandy
Bedfordshire
SG19 2DP
United Kingdom

Susan is the owner and has this amazing online and physical shop where she sells a huge variety of products from a large number of different brands. She is a one-man band running her business but her customer service is second to none and on many occasions orders that have been placed before 3 pm have arrived on my doorstep the very next morning. (Thanks to Royal Mail as well).

Workshops are actually held in her shop, normally the maximum is 12 and she provides a free lunch.

If you are interested I am a teacher by trade, I no longer teach in education, I am retired, but I love doing workshops. I pack the day full so that it caters for those who are less confident and experienced to those who are more confident and accomplished, wherever possible there are opportunities for you to personalise the content and further develop your own ideas and reflect on your own creative journey and interests. I am there to help, support and advise to the best of my abilities and many of my workshop participants are returners who keep coming back to enjoy making the projects I bring. Why not come along for the day to see what we offer and have some fun and learning as well.


Social media links –

Me - https://www.facebook.com/Bumblebutterfly/

My Blog - http://www.bumblebeesandbutterflies.com/

Me - https://www.instagram.com/bumblebutterfly/

Country View Crafts Shop – https://www.countryviewcrafts.co.uk/index.asp

Country View Crafts Workshops - https://www.facebook.com/groups/380480706160675

Wednesday, 25 June 2025

Distressed vintage travel wallet

 Travel Wallet

Travel CVC June #2

Meet George Roberts who has a long journey to school every day. This means him having to rise at 6 and catch the 7.05 train from Springfield Street Railway Station in Windsor, to London, as he needs to be there by 8 am. He alights at Paddington Station and walks 10 mins to Paddington Technical College where he is studying engineering.

George buys his ticket every day which costs him 2 shillings. He has to be back at Paddington to get the 4.50 train home or get an evening ticket if he wants to stay later. He sometimes does that so he can socialise with friends he has made.

He keeps his tickets with a travel identity card provided by the Springfield Street Railway Company and distributed by the Post Office. If he is asked for it by the train conductor, he must show it as the certificate allows him to travel on School Day Tickets.

The wallet is a TH file folder covered with two different pieces of TH papers (one front and one middle). The story is told with the found relative photo, ephemera and stamps, I like to create additions myself if I can't find what I want in my supplies and here I did with his name, identity card label and Paddington station label.


This is my second June project for Country View Crafts 'Travel' FaceBook challenge. If you've popped over from there thankyou for your support.


xx


Supplies

TH - Idea-ology -  Found Relatives, Ephemera, Die-Cuts Layers Urban, Snippets, Number Strips, Layer Frames, Paper Strips, Paper Pad French Industrial, 

TH - Stamps - Travel Ways - CMS 162, Air Travel CMS102, Correspondence CMS225, Tidbits CMS488, Field Notes CMS396, 

Tissue/Washi Tape - my supplies

Identity Card label Name of Station, Names for George - made by me.