Showing posts with label flowers. Show all posts

Wednesday, 3 June 2026

Nature in June with Floral Outline by Tim Holtz

 Stamping and masking

The new Country View Challenge for June is 'Nature' and I decided to use the Tim Holtz Floral Outline stamp set.


1. Take a TH patterned panel and stamp flower with permanent ink.


2. Use the distress watercolour pencils to colour in the design. 


3. I also painted in one of my palette and swatch colour cards ro add to my book pages.


4. Stamp image onto masking paper and lay on top of the original.


5. Stamp some text in random areas.


Pull ephemera elements together .....


..... and trial the composition. I chose a piece of patterned paper by Tim Holtz for the background.


xx


Supplies

Tim Holtz Ephemera panel from paper stash pads and page from 8x8 paper pink palette collection

Tim Holtz - Distress Watercolour Pencils - Abandoned Coral, Dried Marigold, Forest Moss, Bundled Sage, Scattered Straw, Gathered Twigs, Speckled Egg, Iced Spruce, Picket Fence.

Tim Holtz stamps - Floral Outlines CMS430, Ledger Script CMS241, Field NotesCMS396

Tim Holtz - Sizzix- - dies - Brushstroke Flowers mini.

Distress inks - Spun Sugar, Abandoned Coral, Ground Espresso, Bundled Sage, Fired Brick

Miscellaneous - masking paper, my own swatch and palette record cards, paint brushes

Monday, 24 March 2025

Flowers CVC March #2

 Building fanciful flowers from dies

This project produced these imaginary flowers by using a die-fest of flower shapes and putting them together to create these beautiful layered designs on a shabby, distressed board.


Start with the board and sand the edges and top of the panel, brush off dust and give a coat of decou-page mixed with a little water (not too runny, like thin cream). Leave to dry.

Brush a first coat of white chalk paint keeping it thinner in some places. Dry. I realised when I'd taken the photo I didn't get any white paint into the crevices, so I found an old thin brush and added some.

Give a coat of pink chalky finish paint. I used both colours of pink and had the white tin handy to mix them on the panel itself. Dry.

Add a little vaseline as a resist to the next layer.

Paint a coat of white and dry.

Spritz the board and rub with a paper towel to get the distressed pink to show through. I think I needed to make the vaseline a little thicker in places but I sanded the edges to create more distressed areas.

Take a brown distress ink and blending tool and rub the ink into all the edges and crevices.

Take a baby wipe to wipe away a lot of the ink and show the distressed edges. You can always go back in with the blending tool if it looks too clean.
To finish the distressing I spritzed some walnut stain distress ink with water on my mat and dipped the board in it and dried the areas.

Onto the flowers.

Cut card and create distress ink backgrounds.
Choose the die sets you want to use.
Choose some plain card to go with the distress pieces and cut out a random selection of the large and small flowers.
Enjoy some time layering up different shapes and colours/patterns to create your imaginary flowers. 
Add some shaping to the petals and add some 3d foam shapes to add dimension to the finished blooms. I also had some small punches handy to complete one of the centres.


Create dimension.


Use the same process to get some leaves.
Adhere your pieces to the board, find a sentiment and add some ribbon or string to the top to hang it by.
These photos were taken out in the daylight, here you can see the real colours better. Thank goodness Spring is arriving.


xx


Supplies

TH Sizzix dies - Wildflower Stems 1, Wildflower Stems 2, Blossom, Brushstroke Flowers 4.

TH papers.- a dusky pink and a dark lilac mauve.

TH Distress Inks - Tea Dye, Dried Marigold, Antique Linen, Ground Espresso, Tattered Rose, Walnut Stain, Victorian Velvet, Cracked Pistachio, Peeled Paint, Rustic Wilderness, Wilted Violet, Lost Shadow,

TH Word Chips

PaperArtsy Fresco Finish paints - Snowflake, Rose, Blah Mange 

(I used a DIY chalky finish paint from a company on line that I bought in a large tin).

Monday, 10 March 2025

Flowers CVC March #1

 Floral Outlines with pressed grasses

A card for the Country View Crafts Challenge for March. Combining both Tim Holtz and Alson Bomber stamps was a dream. They both design stamp sets that I love but for different reasons. Tim has vintage and natural images and Alison uses her own drawings and sketches of nature and botanicals etc for her sets.

Take card, paint over a layer of white paint, leave to dry.  Dip in puddles of green and pink distress inks to create a lightly coloured distress background.

Use the grass stamp to create more depth for the focal point.

On another piece of card stamp the floral outline in brown distress ink and watercolour with distress inks.            Cut around the image.

Stamp the words on white card with archival ink and dabble some inks around the words.

Put the card together.

Here I ran into a time consuming problem.I wanted to add more to the stamped images.

I first diecut some white leaves, blended with the green inks randomly over them but they didn't look right, I stamped and fussy cut some of the pressed grasses stamps, I wasn't happy with those either so I stamped the floral outline twice more and watercoloured them and cut off some of the leaves and buds - so much better.


xx


Supplies

TH Stamps - Floral Outlines CMS430

Alison Bomber stamps - PaperArtsy EAB40 Pressed Grasses, EAB1 (words)

TH Distress Inks - Age Mahogany, Saltwater Taffy, Worn Lipstick. Rustic Wilderness, Bundled Sage, Forest Moss Ground Espresso

Ranger Archival Ink - Coffee

Thursday, 11 April 2024

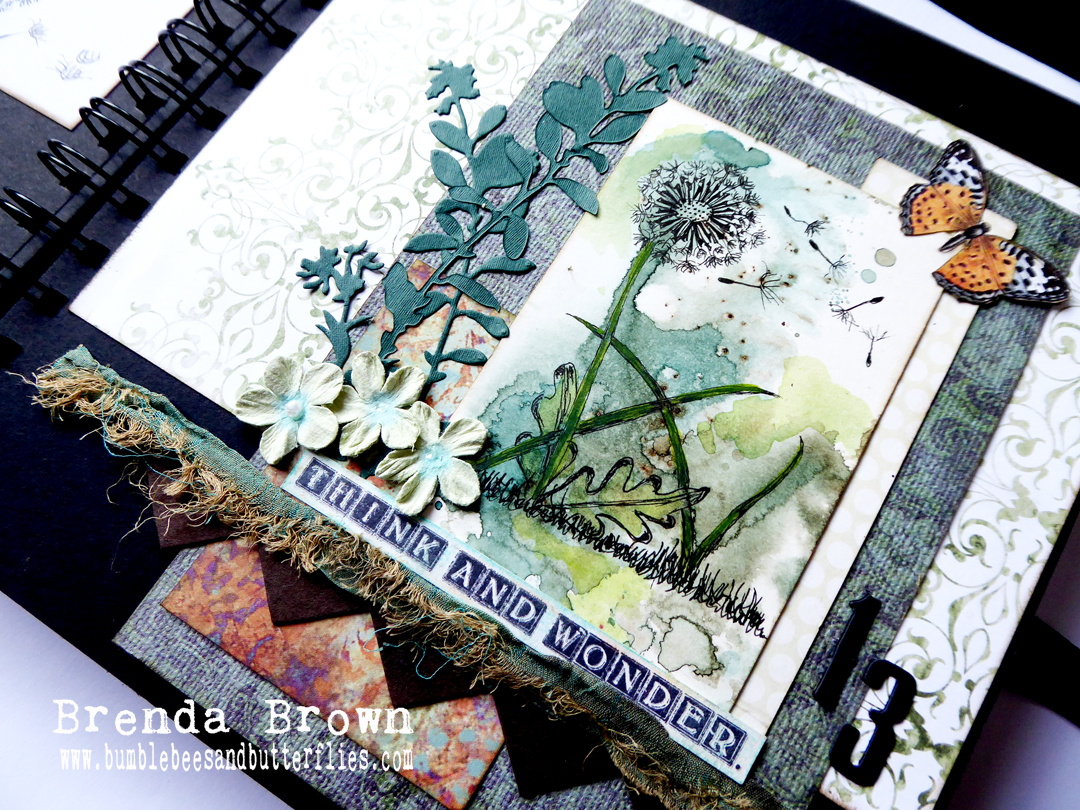
Flower Collage Dandelion Seed Head

 Hand Drawn Flower displayed with collage

Workshop Country View Crafts 2023 Deconstruct - Reconstruct


I am playing catch up keeping a record here of the samples I created for my workshop last year.


This is Flower Collage 1, it is actually a Dandelion seed head (clock).

We started  by looking at photos of the Dandelion clock and carefully unpicked the structure of the flower drawing each piece of it individually.


I then sketched and inked up the picture....


... and made a distress ink background and drew it again and painted in the leaves using the distress inks.


Finally I created the collage around it and displayed it in a black paper art book.


I have several more of these to come as I made lots of samples to give the participants a variety of collages as inspiration for putting theirs together.


xxx