Sue C is asking us to use stencils for our new challenge this month and rather than make a project I thought I would show a technique that you can use for many different things.
We often see the word ‘masterboard’ being used but what does it mean? there are lots of interpretations over the internet but for me it is to make a large piece of art that can then be cut up and used for other smaller projects. So I have been having fun making masterboards that I will use for front and back covers of journals and notebooks.
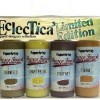
This is one of the masterboards I have made for journal covers and here is another and the process steps for making it using PaperArtsy Fresco Finish paints and Grungepaste, Distress Stains and a Tim Holtz stencil.
Cut your card/greyboard to size and cover with paint. I used Fresco Finish Toad Hall which is opaque and covers really well. I like to keep this layer dark so that it shows through the stencilling later.
Next add your stencil layer, here I used Grungepaste and the Tim Holtz Latticework stencil, using a palette knife to spread the paste but an old credit card would do too.
I applied random bits over the board and washed my stencil and palette knife straight away so the paste didn’t gunge up any of the stencil and prevent it from working properly next time I want to use it.
I then chose some lighter opaque colours and applied them with foam, when they were dry I then applied some translucent colours to change the colouring of the base I was working on.
At this point I decided I wanted some extra colour on the stencilled parts so I used my finger and a little water to blend colours in random places finishing with some Snowflake to highlight some of the areas.
Next came the fun part and be warned this does take a little time and you have to decide along the way when enough is enough (I find that soooooo hard to do).
Splat some DS at the top, along the side or even in the middle of your board, mist it with water and then lift and angle it to watch it run. See it meander through the cracks of the stencilled areas and pop out the other side, mist it again if necessary and then heat dry. Do this repeatedly with other colours and in different places until you have achieved your desired look and remember to dry between each colour you add.
Hep presto your artsy masterboard which can now become a background for your journal cover. I really love the effects you can achieve with different colours and stencils. In fact I taught this as a class last week and look at the fabulous effects the students got for their journal covers.
Joan’s little journal cover worked beautifully for a garden theme.
Val B’s cover has a beautiful metallic glow to it due to the paints she chose to use and I love the mix of industrial clock and dragonfly.
Val C’s cover is a gorgeous mix of beautiful warm colours and I love the stencil she chose for her road trip theme.
I hope you have a great week and maybe we will see you over at Country View Challenges using a stencil in some way throughout July.
Take care.
hugs Brenda xxx


