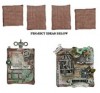
Showing posts with label burlap/hessian. Show all posts

Thursday, 19 May 2016

Shabby vintage burlap panel

Ok so I've started getting back into designing and making at last, would you believe prior to making this small burlap panel on Sunday I had only made one project since before I went on holiday and that was five and a half weeks ago, eek how did that happen?


I found the panel in one of my ikea box units and the background had already been done with what looks like white gesso, torn TH paper with a gesso wash and some crackle paint through Tim's stars stencil.


The small star echoes the background and is an altered gem using decoart media paints and the vintage photograph is a free download I keep on my PC ....


 .... I used alcohol ink on a fragment to help make the face the focal point of the project.


 The quote is stamped from Simple Sayings ....


..... and hemp string tied round to add more interest.
 

I almost forgot the torn snippet of the brown card vintage lace.


Yay, I'm back in the saddle and starting to get the bug back again.


Thanks for staying with me and for popping by.

hugs hugs Brenda xxxx

Monday, 20 October 2014

Cardinals Burlap Panel (1 of 4)

Saturday saw me leaving the house early to travel down to Southampton for my first time teaching at Pickwell Farm. If you like fresh from the ground produce and to ‘pick your own’ this is a great place to go. Alongside that it has an amazing craft section organised and run by Carolyn, she not only sells a wide range of craft items, she runs workshops herself and also invites others to teach there too. It is packed with so many goodies you would be amazed if you haven’t visited there.

Today I am sharing one of the four burlap panels I designed and also some photos from Saturday too.
P1180440
To start we covered all four panels in the same way but using different papers and masks to achieve different looks.
IMG_1508a
Everyone soon got busy creating and learning or re-visiting techniques.
P1180440a
We used coredinations papers, sanding, inking and painting to get some lovely textured effects.
IMG_1509a
Pam loves inking everything like me and soon got down to gathering all her greenery and blending both green and brown distress inks over the pieces.
IMG_1515a
Anne said she was very new to these products and techniques, but looked a real natural to me.
P1180435web
We added an altered muse token, glittery stars and used a black pen to get the more realistic markings on the birds.
IMG_1511a
It was also lovely to meet up with Von (on the left) as I haven’t see her for ages, at lunch time we mooched in the shop and had a good catch up.
IMG_1527a
As always it was amazing to see everyone's different versions at the end.
IMG_1530a
They did a brilliant job and they all looked so different.
IMG_1531a
Thank you Carolyn for having me and I’m already looking forward to my next visit in January when I will be teaching a vintage tag book.

Wishing you all a wonderful week ahead.

hugs Brenda xxx


Wednesday, 24 September 2014

Eternal Beauty Burlap Panel

With all the focus lately on autumn I have been inspired to stay in that mode and have used one of the small idea-ology burlap panels and kept with a nature inspired theme. These panels are just a little larger than an ATC and there are times when I love creating on smaller substrates just to stretch my creativity and imagination in a different way. I guess we are all like that.
P1180663
I love the effects of the background and it is a technique I will be teaching at Pickwell Farm in October when we will make four of these panels in a Christmassy theme. (See my classes schedule for details).
P1180664
You know how I love using the film strip on my projects, this time I have added small flowers from the wallflower paper stash where I also cut the Parcel Post label.
P1180666
I used remnant rubs on the enamelled tag and edged it with archival ink. Wanting to ‘package’ up the feel of autumn I added linen ribbon and some petaloo flowers.
P1180667
A piece just for me today, no DT, no workshop, just for me yay.

Another mid week and it’s flying fast. I have a governor’s meeting today so I need to get prepared for that and Friday I am teaching again at The Art of Craft, this time a colourful canvas. So here's wishing you a happy Wednesday, a great end to the week and a huge thank you for stopping by.

hugs Brenda xxx

Monday, 7 July 2014

Burlap Panel – vintage fun

A small offering from me today but a burlap panel that worked out better than I imagined in my head. I am adding this to Linda Ledbetter's Compendium of Curiosities Challenge #6 which is all about using Tim's burlap panels. You can find Tim's version on P.37 of his book, but this is my version using texture paste, stamps and distress paints.
P1170464
I started with the panel, some texture paste and picket fence distress paint and I stamped a small text stamp lightly over the top. I also edged with walnut stain distress ink.
P1170452
I gathered and made the elements I wanted to use including the knife, fork and spoon from Tim’s Nature Walk set of stamps. The little feather is a spellbinders die that Astrid let me die-cut when she came down to stay and go to Ally Pally last year – thank you Astrid.
P1170453
The chipboard shape is one from a Maya Road set I have and I distress painted it with antiqued bronze, dried it and then some frayed burlap, dried it and then mottled picket fence using the dabber and a babywipe.
P1170460
The cutlery set were stamped in black archival on silver card, cut out and tied with some distressed ribbon…..
P1170462
…. and I finished by using some letter gross grain type ribbon, chit chat stickers and label letters to create the saying.
P1170468

Thanks Anita for the heads up for the CC3C, I had it in mind but not got round to adding it.

I expect we will be seeing some of the planes coming in for Farnborough Air Show next week, I live virtually under the flight path and it’s an incredible feeling watching and hearing the jets going over the house, especially when they have engines at full blast – you can almost feel the heat from them. I am looking forward to going to the show on the 19th July  -  anyone else going at all?

Have a great creative week and hopefully we will see some more sunshine in the UK.

hugs Brenda xx

Friday, 13 June 2014

Things with Wings at A Vintage Journey

I was really happy when I saw that S@andy was hosting this challenge as it meant I could show you two of four burlap panels I designed for my workshop I taught last month for Country View Crafts (who are the fabulous sponsor for all our AVJ challenges).
dragonfly burlap panel
Preparing and making the panels
- Tear dictionary paper and adhere to the panels and heat dry
- With palette knife spread some grungepaste randomly in central panel and over the top and bottom as well and heat dry.
- Leave to cool and finish drying and start to prepare the butterflies, dragonfly, flower and bird (see below).
- When grungepaste is dry on the panels give them a wash of picket fence distress paint, creating additional depth and a key for the remnant rubs.
- Stamp images onto white tissue paper with black archival and with paintbrush and water draw a line around images and tear carefully.
- Adhere images to panels using matte medium.
- Add some remnant rubs, industrious sticker trims, chatty words and text stamp.
- Adhere the card and acetate details into place and leave to dry.
butterfly burlap panel
Making the acetate embellishments –
· Stamp dragonfly onto acetate with black archival ink and leave to dry.
· Wrinkle free a piece of card using dragonfly wing colours and stamp the dragonfly and cut out wings and head only.
· If the acetate dragonfly is dry, cut out the wings and drip alcohol inks on the reverse side.
· Stamp butterflies on acetate with rose madder archival ink and leave to dry.
· Cut out the butterflies when dry.
· Using alcohol inks drip colours onto reverse of butterflies.
· Edge them with black alcohol marker (i.e. promarkers).
- heat the wings carefully with a heat gun and without burning yourselves shape the wings so that they look as if the dragonfly and butterflies are going to take flight.
P1160150butterfly burlap panel
butterfly burlap panel
You can see how the heated and reformed acetate adds so much dimension to the wings.
 
We look forward to seeing you over at A Vintage Journey with your take on the challenge. Please remember you don’t have to use Tim Holtz products, use whatever you have in your craft room but do tell us what the inspiration is from Tim Holtz in your project. It’s a great way to join in a Tim Holtz challenge without having to buy lots of new supplies.
 
hugs Brenda xx


Friday, 21 February 2014

A vintage burlap panel

It’s my turn to post over at the Country View Crafts Updates blog and I chose to use one of those little burlap panels from Tim Holtz.

P1150872
I have used lots of distress products, Idea-Ology …….
P1150868
… and some rusting powder.
P1150867


I would love it if you had the time to pop over to see how I put this one together.

The sun is shining, we have clear blue skies, what a wonderful morning to wake up to and the weekend starts here.
Have fun.


I have updated this post to include all the details - just trying to keep my blog a diary of all my projects.


I have used one of the smallest burlap panels from the shop, they actually come in a pack of 4 containing two x 8cm square panels and two - 9x7 cm panels.


I started by gathering together the elements I thought I would use ......


.... and altering them to suit the vintage feel I wanted to create. The mini tag was distressed and stamped with a small piece of tissue tape added to it. This became the base for the photo.
This frame was stamped with antique linen distress paint using a Tim Holtz stamp.


I also used distress paints on the burlap panel and some walnut stain distress ink when the paints were dry.


I added tissue tape .....


.... and some gesso through the splatter mask.....


.... and then began assembling the pieces onto the panel. 


I used stamps, die-cuts and Idea-Ology together. The label letters created the word ink.


I added some beads and a rusty bell to the side and I also used rusting powder on the spinner and pen nib.
To finish off I used the chit-chat words to tell the story. Who are You?

Have a great weekend and see you back here on Monday with Sue.

Brenda xx