I am sharing my second DT project for today, this one is for Country View Crafts and if you haven't seen my monochromatic canvas board for a Vintage Journey just scroll down one or click here to be transported, but please pop back to this post again afterwards.

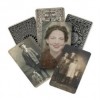
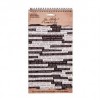
It's time to use up some paper supplies that are on the shelf and that just seem to sit there just waiting for an opportunity to be used. I had picked up the Prima Engraver pad the other day and really wanted to get out some of the lovely papers to use (and didn't!!!!!), but with a circles theme I knew these clocks would fit the bill.


I began with a mop up tag which had been dipped in left over raw umber, titanium white and titan buff media acrylic paints and I added a couple of more layers by dipping it in watery gathered twigs DI and then walnut stain. Having got my colour scheme and background I set about choosing the paper I thought would go with it.

The clocks and tapes were cut out from another paper from the same pack and the circle of numbers die-cut and mounted on a mount board circle I found in my die-cuts box,

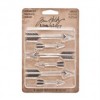
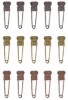
Beginning to think of embellishments I chose a metal clock and altered it a bit with drips of medium grey V6 paint and then gently rubbed on some champagne ice metallic lustre.

The clocks and tapes were cut out from another paper from the same pack and the circle of numbers die-cut and mounted on a mount board circle I found in my die-cuts box,
Beginning to think of embellishments I chose a metal clock and altered it a bit with drips of medium grey V6 paint and then gently rubbed on some champagne ice metallic lustre.
I used some champagne ice on a spinner and started layering up the pieces.
adding a birthday sentiment as well. I really should use papers more often to make cards, they can be really quite quick to make once you've got the design together.

I hope you'll join us this month at Country View Challenges with the circles theme and please pop over to the challenge blog to see what other inspirational projects there are on show.
You won't find me home today as I am off to Coventry to take part in the 'Dare to Create' workshops with the amazing Andy Skinner and Tracy Weinzapfel and looking forward to making projects, learning new techniques and being with lots of like minded people, many of whom are already friends. I'll show you what I make sometime when I get back.
In the meantime have a great weekend and a happy July.
hugs Brenda xxx
adding a birthday sentiment as well. I really should use papers more often to make cards, they can be really quite quick to make once you've got the design together.
I hope you'll join us this month at Country View Challenges with the circles theme and please pop over to the challenge blog to see what other inspirational projects there are on show.
You won't find me home today as I am off to Coventry to take part in the 'Dare to Create' workshops with the amazing Andy Skinner and Tracy Weinzapfel and looking forward to making projects, learning new techniques and being with lots of like minded people, many of whom are already friends. I'll show you what I make sometime when I get back.
In the meantime have a great weekend and a happy July.
hugs Brenda xxx