Friday, 8 July 2016

Infusions and a stencil

I have been playing with reverse mono printing with stencils using infusions and a stencil.


All the details are over on the Country View Crafts project blog and there I show you how I created this artsy looking background.

*******************************

It's the Farnborough air show next week. The planes have all been coming in and validating ready for the trade days first and then the public days next weekend. This was the brand new Airbus A350 on it's descent route to land on the airfield and it came right over the roof and garden.


 We are just so lucky to see the planes coming in and it's something I love watching. I've got loads more photos on the iphone and the camera, I just need to upload them to the PC so I can use them, so you might see some more later.

For now have a great weekend, ours will be quiet but the noise will start again on Monday and I will be out in the garden when I can.

Take care.

hugs Brenda xxx


Updated and added from Country View Crafts


Hi Brenda here. I love reverse mono printing with stencils so I thought I would experiment with some of the infusions and a stencil.


I used Daler Rowney mixed media paper and a stencil from Country View Crafts.
Place the stencil on the paper and spritz over it with a water mister.


Take the infusions and sprinkle them over the stencil and spritz again with water. (Next time I might try spritzing with tattered angels sprays).


Remove the stencil and place the wet side down on the paper beside the print you'd already made. 


Rub over the back with dry paper towel and lift to reveal the reverse print.


Take a clean piece of paper, spritz with water and lay the wet side of the stencil down again and rub and you will get another lighter print ......


..... repeat to see if you can get another one.


This is what I got. It may be I can use some of these for card making.


At the end of my experiments I had used several pieces of paper and cut out eight backgrounds to make cards. I inked the edges with shabby shutters, broken china and ground espresso distress inks.


I then took Tim's butterfly duo die and cut butterflies and embossed them. I painted them with water and some diarylide yellow media acrylic and when dry added watery abandoned coral distress ink and dried again then rubbed dried marigold and ground espresso distress ink pads over the top. I stamped the sentiment from Tim's perspective set, inked the edges with shabby shutters, broken china and ground espresso distress inks and coloured the word with a broken china distress marker.


Just before I took the photos I pinned a small key onto the bow with a small yellow pin I had in the drawer. This is one finished, I also have most of the elements to now make up the other seven for my box.


Thanks for stopping by and I hope you like these artsy background and if you try this technique do let me know, I would love to see what you make.


Wednesday, 6 July 2016

Dare to Create

Just popping in to share one of the projects I made last weekend at the Dare to Crate retreat in Coventry with the amazing Andy Skinner and Tracy Weinzapfel. These two are just so funny together and kept us entertained all weekend with their banter and jokes and kept us occupied with their fabulous projects.


This is one of those book boxes where the spine pulls out as a tray to hold bits and pieces. You can imagine Andy's background was much darker and grungier but I seem to be in summer colour mode and kept mine lighter and love the mixes and blends I got.


Hephaestus is the Greek god of blacksmiths, craftsmen, artisans, sculptors, metals, metallurgy, fire and volcanoes and of course this is Andy's interpretation of him.


Here is a side view and you can see I carried the tones of the colours onto the spine which is actually finely crackled but the photo doesn't pick it up.


The back is painted, stamped and stencilled .......


... and here you can see some of the fabulous texture we created.


Huge thanks to Andy for a fabulous weekend and teaching us the techniques he used to create this box. I love my version of it.


Just before I go I thought I would share the mug I won as a giveaway ..........


Hope you are having a happy and creative week.

hugs Brenda xxx

Monday, 4 July 2016

Pen and ink over gesso

I had this idea that I wanted to do some pen and ink drawings over gesso and decided to revisit the dandelions and seed head drawings I did earlier in the year - (here) and this is what I came up with.


I took a Tando Creative media board and scraped gesso over it with a palette knife and let it dry - I did help it along a little bit with a heat gun 'cos when I when I get an idea I want to get going on it - impatient me????? I then took a thin sharpie pen and set about drawing, I was really pleased how well the sharpie drew over the textured surface.

I took a small text stamp and black archival and stamped over the bottom of the image and even added a little of my own writing to help out the balance of it.

Now came the test - will it cope with water being spritzed all over it? Yay, yep it was absolutely fine and having mixed my own custom colours of DecoArt media paint I just dripped them into the water and they spread around beautifully. In some cases I spritzed a little more and dabbed away with a dry paper towel as well.

I wanted the edges to be vintaged and create a frame around the board so I sanded all round and then blended ground espresso distress ink along all four sides. I flicked on a little water to distress it more before heat drying. 


I finished by painting the stems very lightly and dried it off. When full dry I sprayed with Americana gloss spray.

The frame is one from Ikea which has deep sides and for some reason (I don't know why!!!!) I decided to turn it back to front to add the media board so it sits in the recess with the glass over it and the little metal retainers are on show. You know what I really quite like it.


I think I might try some more and make a set of them.

Thanks for stopping by, have a great week and wishing all my American friends a great 4th of July.

hugs Brenda xxx

Friday, 1 July 2016

Have fun with circles for Country View Challenges

I am sharing my second DT project for today, this one is for Country View Crafts and if you haven't seen my monochromatic canvas board for a Vintage Journey just scroll down one or click here to be transported, but please pop back to this post again afterwards.


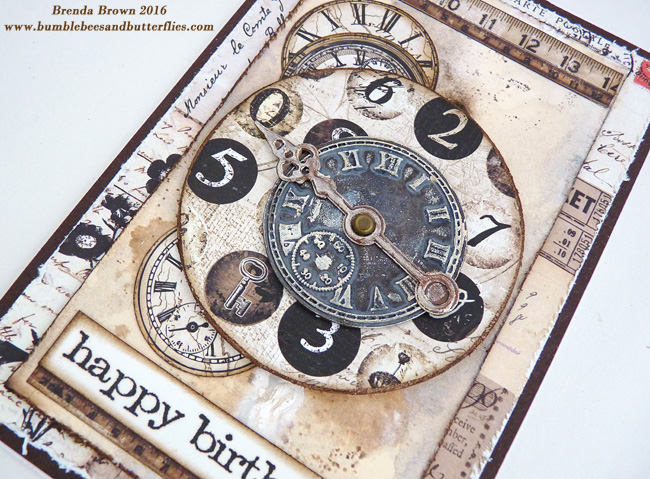
It's time to use up some paper supplies that are on the shelf and that just seem to sit there just waiting for an opportunity to be used. I had picked up the Prima Engraver pad the other day and really wanted to get out some of the lovely papers to use (and didn't!!!!!), but with a circles theme I knew these clocks would fit the bill.


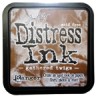
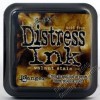
I began with a mop up tag which had been dipped in left over raw umber, titanium white and titan buff media acrylic paints and I added a couple of more layers by dipping it in watery gathered twigs DI and then walnut stain. Having got my colour scheme and background I set about choosing the paper I thought would go with it.


The clocks and tapes were cut out from another paper from the same pack and the circle of numbers die-cut and mounted on a mount board circle I found in my die-cuts box,


Beginning to think of embellishments I chose a metal clock and altered it a bit with drips of medium grey V6 paint and then gently rubbed on some champagne ice metallic lustre.


I used some champagne ice on a spinner and started layering up the pieces.
 adding a birthday sentiment as well. I really should use papers more often to make cards, they can be really quite quick to make once you've got the design together.


I hope you'll join us this month at Country View Challenges with the circles theme and please pop over to the challenge blog to see what other inspirational projects there are on show.

You won't find me home today as I am off to Coventry to take part in the 'Dare to Create' workshops with the amazing Andy Skinner and Tracy Weinzapfel and looking forward to making projects, learning new techniques and being with lots of like minded people, many of whom are already friends. I'll show you what I make sometime when I get back.
In the meantime have a great weekend and a happy July.

hugs Brenda xxx


AVJ - Monochromatic and ombre mixed media

Welcome to another first Friday in the month and now it's July we can truly say half the year has gone and we are now swapping our longer days for longer nights. But the crafting doesn't stop and we have a fabulous challenge at A Vintage Journey where the very talented Tracy is our host and she is looking for monochromatic projects this month. She says - 
'I love monochromatic themes in artwork; I love the balanced look it gives to a design. If you ever struggle with knowing what colours to use this should be right up your street, one colour alone or hues of one colour (plus black and/or white) - simple! Please just check that your entry is vintage; shabby; mixed-media; art journaling; industrial or steampunk to be in with a chance of being a winner or Pinworthy mention.'


I have made a canvas board piece with a mixed media background and ombre effect in my monochromatic and neutral colour scheme and loved playing with the layers of paints to create the effects.


Process steps
1. Take a small media board stamp numbers and text in black archival ink then spread modeling paste across it and add in some gel beads and fragments. Take a piece of card, place over the inclusions and press them gently into the paste.


2. Adhere some torn paper.


3. With a palette knife scrape white gesso over the board leaving elements below randomly exposed.


4. Take raw umber, titan buff and titanium white media acrylics and a babywipe and paint thin layers of the paints ombre style - ie light to dark.


5. Using the left over paints dip the canvas in the colours one by one, allow them to move around on the surface and dry each layer in turn. Take a little translucent white and splatter.


6. Dip the canvas again this time in gathered twigs and walnut stain distress inks and dry. Also use a pipette and dribble walnut crystal ink across the textured band and allow it to dribble down the page, spritz a little water in place to help it move about.


7. Gather some collage elements and a lost relative photo - I cut it down to give me a good image but also maximise the space I had to work with. I painted and altered the metal bits and used chit chat stickers for my message. The hessian and string add that more rustic look.


I hope you will be inspired by this fabulous challenge theme and amazing inspirational projects from the Creative Guides. Do pop over and take a look if you have a moment and of course if you join in you could be in with a chance of winning a $25 voucher from the amazing Funkie Junkie Boutique.


This is my first post for today, I have another coming up for Country View Crafts in a few hours.

Have a fabulous weekend and a hopefully warm (hot???) month of July.

hugs Brenda xxxx


The sky is like a monochromatic contemporary painting, drawing me in its illusion of depth, pulling me up.

John Green