Monday, 23 November 2015

Poinsettia Blueprint

Good morning - I'm joining you with a Christmas card for Country View Crafts Project Blog that you can make quite quickly and add to your box. I am pleased to say I am getting a few done now and glad I have started as things seem to be getting manic with project deadlines and family life.


You can find all the details over at CVC and more photos to see how it came together.

Take care and have a great week.

hugs Brenda xxxx


Updated from CVC


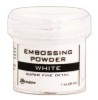
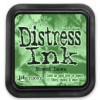
The background was stamped using the sentiments from seasons silhouettes with embossing ink and heated with a sparkly white embossing powder. This was then selectively dipped in festive berries and mowed lawn distress inks.


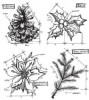
Stamp the poinsettia twice cutting them out without the leaves on one. Dip the smaller part in festive berries, fired brick and abandoned coral distress inks. Put them together having blended the edges with your favourite brown distress ink then add a small amount of pinflair or collal glue gel to the middle and stick in some dried natural seeds to make them look like the berry centre.
I then dipped the lower piece in in pine needles and twisted citron and I just love the colour combination and blending that occurred.


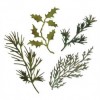
Die-cut holiday greens holly using green paper and also dip that in twisted citron to get shade variations on the leaves and edge with ground espresso.


The banner was simply dipped several times in festive berries drying between each dip and seasonal chit chat words added.


I put it all together with some natural fibre behind the poinsettia.


I hope you like the brighter colours for me and a fairly simple card to make and get in the post.


Enjoy getting all your Christmas cards made, it won't be long till the big day now.

Thanks for stopping by.

hugs Brenda xxxx



Saturday, 21 November 2015

Snowflake Joy Recipe Christmas Card Series #3


Fill your Christmas Card Box - Pt 3

Three more cards for the Christmas box using designer paper and a few simple embellishments to create a sweet but quick card. The focus for this one was using older dies and stamps and a paper pad to have a ready made background.


Ingredients
Paper pack - Trimcraft Silent Night
Dies - spellbinders rectangles and ornate trim, movers and shapers oval, snowflake.
Stamps - Framelits Holiday Joy, Letter to Santa
Distress inks - ground espresso, bundled sage
Archival ink - watering can


Method
Cut background card and belly band border ink edges with ground espresso. Cut oval stamp with greenery and joy
Die-cut frame, ornate trim and snowflake from gold card .....


.... and assemble. I used small foam pads on the frame and thicker ones on the joy oval to create dimension and interest. I even experimented with turning the card on the side, it worked well although I couldn't fit the ornate trim on.


Some of my close friends are not into the vintage, grungy styles I like and this was a refreshing change to make for them. Three more for the box and minimum postage - yay. 


I hope you are enjoying the quick card series, please let me know if you use any as inspiration.

Take care.

hugs Brenda xxx


Tuesday, 17 November 2015

Recipe Christmas Card Series #2

Fill your Christmas Card Box - Pt 2

As I am on a mission to get my Christmas cards made earlier this year and not be chasing my tail in December I have been making myself duplicates and I am intending to create cards that will be easy to post trying to keep costs down.


Ingredients
Distress inks - weathered wood, stormy sky, ground espresso, iced spruce
Archival ink - potting dsoil
Embossing powder -  weathered white antiquities
Stamp sets - mini holidays, handwritten holidays 2, christmas magic
Dies - movers & shapers oval
Miscellaneous - ivory stamping card, kraft card. hessian, jute ribbon, tim holtz mini star punch, glitter card

Method
Cut craft card to size, stamp and white emboss.

Cut pennant and mono print the stars mask with the blue dostress inks and dry. Lay the mask back over the stars and blend the groud espresso lightly over them in plaves, mist with water, remove the maask and dry.


Create the sentiment by stamping some card for the background and diecut the ovals. Then stamp the sentiment over the top.


I made three of these at the same time and for a morning's work designing as well as making it helped to increase the numbers in my Christmas card box.


If you use this card for inspiration please link to me and let me know where I can come and see it.


Happy Christmas card making.

hugs Brenda xxx

Friday, 13 November 2015

Recipe Christmas Card Series #1

Fill your Christmas Card Box - Pt 1

Each year I end up making some cards under pressure and at the very last moment to fulfil my card list. Although this year I have agreed with some more distant friends that we will send on-line cards I still like to send out hand made cards to closer friends. So I thought I would really get making and do a series on my blog of fairly easy cards to make that you might like to use for inspiration and I will give you the low down on what I have used as well as the process steps (or method) and as I was watching the great British bake off when I started it ended up being called the recipe Christmas card series.
So here is my first sample


Ingredients
Stamp Sets
letter to santa, weathered winter, simple sayings
Distress Inks
cracked pistachio, mermaid lagoon, grand espresso
Distress Markers
faded jeans, pumice stone, stormy sky, bundled sage
Embellishing
gold thread, gold pearls/gems, snowflake charm, gold treasure gold


Method
Stamp text across the card.


Dip card in distress inks


Stamp snowflakes using distress markers to get a variety of colours on the stamp and a light misting of water.


Ink the edges of the card, add a gold pearl and gems, tie some gold thread around the card with a snowflake charm attached and add a sentiment.


I've made two of these as I was making them and have now got my box well and truly started.


After a very busy week and weekend I have been able to take stock and get myself into a couple of larger projects this week, they will end up on my blog at some point before Christmas.

Listen to your heART and thanks for stopping by.

hugs Brenda xxx

Tuesday, 10 November 2015

Ministry of Mixology 2015

It has been a very busy week and weekend for me with prepping a workshop project and teaching in Bedfordshire on Saturday and then after I had finished I was able to drive on up to Coventry and meet up with some of my wonderful AVJ sisters at The Ministry of Mixology retreat. 


This amazing event was organised by Di and Tony from Tando Creative and featured the extremely talented Andy Skinner and Michelle Webb as tutors. I also spent 2 hours demoing on Saturday evening before Jennie (Live the Dream) and I could get to the bar for something to eat and sadly we didn't get any photos of this to share. But I was able to meet up with Alison (Words and Pictures), Anne (Redanne) and Julie (Juliz Design Post) as well and spend time with all of them during the workshop on the Sunday. It was so relaxing to then be the other side of the table.


We made covers for a notebook using DecoArt media line acrylic paints and mediums .....


.... and Andy's Industrial Elements.


Each of the cogs, nuts, bolts and screws are from the kit and made of chipboard, but you wouldn't think that to look at them here would you?


Andy was also very generous with give-aways during the day and you can see here a fabulous stencil set that I won from the DecoArt range. Thanks Andy.


I was so busy enjoying myself I didn't take any photos, but here are a couple Julie's husband too of us AVJ teamies.


Off to get some planning done for my next workshops.

Have a great week.

hugs Brenda xxx


Update - I've just nicked this from Andy's FB page - I'm sure he won't mind xxx


Friday, 6 November 2015

Oh Christmas tree for AVJ

Hi Everyone, it's November (eek how did that happen???????) and it's a new challenge at A Vintage Journey with a very unusual but brilliant theme from Nikki. She has called it
'Baby you're a firework' 
and she has described it for us - "Fireworks are a big part of celebrations at this time of the year. Be inspired by them to create a Tim style project; think distress glitter, bold colours, ink and paint splats and fun. Go on, light up that night sky".  Well when thinking about what I could do for this I had some new goodies arrive and in the box was Tim's new 'Sparkle' embossing folder, it immediately reminded me of fireworks and as I am in a mission to get my Christmas cards done I was off making four of them.


Playing with a mix of brushos and distress inks and Tim's new woodlands dies and the sparkle embossing folder I created what was going to be a quick and easy card (so I thought!) that can be sent through the post. However, as always with my 'overthinking' this became a longer project than anticipated. I just can't leave things looking unfinished to me and have to keep playing adding more and more details until I am satisfied with it.


So to begin I embossed a piece of card and painted it with gesso, dried it and mixed brushos and distress inks to get that lovely blended watery look. (1)
I inked the edges with broken china and ground espresso and sanded back the twinkles until they were white again. (This is how I thought I was going to leave them). (2)


Having diecut the tree from dark green card I painted areas with decoart ice crystal glitter paint and when that was dried I added some glossy accents in places and sprinkled on clear rock candy glitter.


When dry I adhered the tree to the card and used watery ground espresso, pine needles and forest moss distress inks to paint in the gaps in the tree. Although you can still see the twinkles through you get a more defined colour to the tree.


It was at this point I felt it need something else (see how I have to add the details?) so I mixed some crystal glamour dust with white gesso and painted on some glistening snow to the tree also adding some to the bottom of the panel to give the effect of snowy ground.


I then used a quickie glue pen to add some glamour dust to most of the top sparkles really making them twinkle. Now things were coming together, but I walked away from it and did something else before coming back the next day.


I wanted to create a couple of borders to go behind the panel, one is Tim's tattered lace strip die the other is the waste from the trellis frameworks die which I dipped in broken china and vintage photo distress inks before stamping Tim's ledger stamp in watering can archival ink.


To provide an embellishment I die cut the snowflake on the edge die using old glitter card I found in the cupboard......


.... but it was rather plain and as I looked around for something to 'pretty' it up I was reminded of the work that Annamarie (of Annamarie Designs) does which looked beautiful on her stand at Ally Pally in September. I had bought some of the natural accents and combined it with a bow and tiny punched flowers. I also added some watery distress ink to it all to make it look a bit more grungy.


With the waste from the glitter card I punched some little stars using Tim's small star punch, edged them with ground espresso and adhered them to the panel. (here I go again adding more detail again!!!!).


Anyway once assembled I am really quite pleased with the overall effects and have made four of these that can be sent out at Christmas - I just hope the snowflake embellishment holds up in the post.


So there's my firework link, sparkles in the background with a wintry tree in the foreground and lots of glitter and bold colours in the background too.


Thanks for joining me today I hope we will see you over at a Vintage Journey and remember the theme is not about fireworks per se, it is more about using inks etc with splats and splashes on your project. With glitter and that twinkle pattern I think I have lit up the night sky.

We look forward to seeing your linkup at the AVJ blog and how you interpret Nikki's fab theme.

Have a great month before the chaos, I mean fun really starts.

hugs Brenda xxx