Hi Everyone, it's November (eek how did that happen???????) and it's a new challenge at A Vintage Journey with a very unusual but brilliant theme from Nikki. She has called it
'Baby you're a firework'
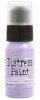
and she has described it for us - "Fireworks are a big part of celebrations at this time of the year. Be inspired by them to create a Tim style project; think distress glitter, bold colours, ink and paint splats and fun. Go on, light up that night sky". Well when thinking about what I could do for this I had some new goodies arrive and in the box was Tim's new 'Sparkle' embossing folder, it immediately reminded me of fireworks and as I am in a mission to get my Christmas cards done I was off making four of them.

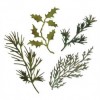
Playing with a mix of brushos and distress inks and Tim's new woodlands dies and the sparkle embossing folder I created what was going to be a quick and easy card (so I thought!) that can be sent through the post. However, as always with my 'overthinking' this became a longer project than anticipated. I just can't leave things looking unfinished to me and have to keep playing adding more and more details until I am satisfied with it.
'Baby you're a firework'
and she has described it for us - "Fireworks are a big part of celebrations at this time of the year. Be inspired by them to create a Tim style project; think distress glitter, bold colours, ink and paint splats and fun. Go on, light up that night sky". Well when thinking about what I could do for this I had some new goodies arrive and in the box was Tim's new 'Sparkle' embossing folder, it immediately reminded me of fireworks and as I am in a mission to get my Christmas cards done I was off making four of them.
Playing with a mix of brushos and distress inks and Tim's new woodlands dies and the sparkle embossing folder I created what was going to be a quick and easy card (so I thought!) that can be sent through the post. However, as always with my 'overthinking' this became a longer project than anticipated. I just can't leave things looking unfinished to me and have to keep playing adding more and more details until I am satisfied with it.

So to begin I embossed a piece of card and painted it with gesso, dried it and mixed brushos and distress inks to get that lovely blended watery look. (1)
I inked the edges with broken china and ground espresso and sanded back the twinkles until they were white again. (This is how I thought I was going to leave them). (2)

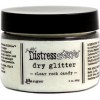
Having diecut the tree from dark green card I painted areas with decoart ice crystal glitter paint and when that was dried I added some glossy accents in places and sprinkled on clear rock candy glitter.

When dry I adhered the tree to the card and used watery ground espresso, pine needles and forest moss distress inks to paint in the gaps in the tree. Although you can still see the twinkles through you get a more defined colour to the tree.

It was at this point I felt it need something else (see how I have to add the details?) so I mixed some crystal glamour dust with white gesso and painted on some glistening snow to the tree also adding some to the bottom of the panel to give the effect of snowy ground.

I then used a quickie glue pen to add some glamour dust to most of the top sparkles really making them twinkle. Now things were coming together, but I walked away from it and did something else before coming back the next day.

I wanted to create a couple of borders to go behind the panel, one is Tim's tattered lace strip die the other is the waste from the trellis frameworks die which I dipped in broken china and vintage photo distress inks before stamping Tim's ledger stamp in watering can archival ink.

To provide an embellishment I die cut the snowflake on the edge die using old glitter card I found in the cupboard......

.... but it was rather plain and as I looked around for something to 'pretty' it up I was reminded of the work that Annamarie (of Annamarie Designs) does which looked beautiful on her stand at Ally Pally in September. I had bought some of the natural accents and combined it with a bow and tiny punched flowers. I also added some watery distress ink to it all to make it look a bit more grungy.

With the waste from the glitter card I punched some little stars using Tim's small star punch, edged them with ground espresso and adhered them to the panel. (here I go again adding more detail again!!!!).

It was at this point I felt it need something else (see how I have to add the details?) so I mixed some crystal glamour dust with white gesso and painted on some glistening snow to the tree also adding some to the bottom of the panel to give the effect of snowy ground.
I then used a quickie glue pen to add some glamour dust to most of the top sparkles really making them twinkle. Now things were coming together, but I walked away from it and did something else before coming back the next day.
I wanted to create a couple of borders to go behind the panel, one is Tim's tattered lace strip die the other is the waste from the trellis frameworks die which I dipped in broken china and vintage photo distress inks before stamping Tim's ledger stamp in watering can archival ink.
To provide an embellishment I die cut the snowflake on the edge die using old glitter card I found in the cupboard......
.... but it was rather plain and as I looked around for something to 'pretty' it up I was reminded of the work that Annamarie (of Annamarie Designs) does which looked beautiful on her stand at Ally Pally in September. I had bought some of the natural accents and combined it with a bow and tiny punched flowers. I also added some watery distress ink to it all to make it look a bit more grungy.
With the waste from the glitter card I punched some little stars using Tim's small star punch, edged them with ground espresso and adhered them to the panel. (here I go again adding more detail again!!!!).
Anyway once assembled I am really quite pleased with the overall effects and have made four of these that can be sent out at Christmas - I just hope the snowflake embellishment holds up in the post.


So there's my firework link, sparkles in the background with a wintry tree in the foreground and lots of glitter and bold colours in the background too.
Thanks for joining me today I hope we will see you over at a Vintage Journey and remember the theme is not about fireworks per se, it is more about using inks etc with splats and splashes on your project. With glitter and that twinkle pattern I think I have lit up the night sky.
We look forward to seeing your linkup at the AVJ blog and how you interpret Nikki's fab theme.
Have a great month before the chaos, I mean fun really starts.
hugs Brenda xxx