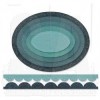
I'm so excited to be sharing this project today. The lovely Eileen Hull asked me if I would like to make a journal using her new die - Me? Journals? - of course I would. In fact I've made two but let me share the first one with you. The inspiration for this came whilst planning a trip to Boston, Massachusetts, this is going to be my travel journal whilst I am over there. I can't wait.
Her Creative Team have been sharing their fantastic designs this month and I'm very happy to be sharing mine alongside them. THIS is a link to one of Eileen's posts where she has gathered some of them together.

Her Creative Team have been sharing their fantastic designs this month and I'm very happy to be sharing mine alongside them. THIS is a link to one of Eileen's posts where she has gathered some of them together.

Use these steps to create both the front and back covers.
1. Using a palette knife scrape white gesso across both of the covers.

2. Roughly plan where your collages will go, mix ephemera and snippets of left over scrapbook papers to achieve the layered look and then use a stencil to add some texture in the blank spaces.


3. Whilst that is drying mix some fluid acrylics with water to make watery washes - I love using the DecoArt media range as the colour pigment is amazing and goes such a long way, sometimes I only need a pin prick size of paint to create a wash. Try a mixing grid if you want to keep a record of the colours you used. It is impossible to tell you the amounts I added but I will try drop by drop until I get the desired tones and shades.

4. For the next step drip the watery paint, spritz with water and dry each layer until you are happy with the background.


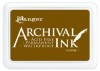
5. Add some texture stamping - use a sponge with the paint to dab onto the stamp for some images and use coffee archival ink for others.

6. Use distress crayons or similar to add more colour and emphasise the stencilled words. Then using the black side of some blending foam gently rub a couple of layers of white gesso over the stencilling to highlight the words again.


7. Use the DecoArt Vintage Decou-page to adhere the chosen patterned papers and ephemera making a collage background as the base for the photo on your front cover and make a smaller one on the back. Seal the papers and the covers by covering the surface with the same antique glue. It dries very quickly.

8. Mix some white gesso with water to make a watery wash and dabble some of it over the collage to unify it and create a lighter background for the image to sit on.

9. Adhere the images and the quote chip. This is going to be a working journal/album so keep the embellishments fairly flat and few of them, you won’t want them getting knocked off as you and other people handle it.


10. Buy Midori inserts or make your own for the inside pages. I used a mix of both and made my own kraft covers for the ones I made. These are 11 cms wide and 21 cms long. Add some pockets, tabs and labels to get you started and ready to take your journal away with you and fill with all your wonderful experiences so that this becomes packed with amazing memories.
Three notebooks, the first is a Midori look alike bought online, the second is handmade for keeping ephemera collected on my trip and the third is also handmade with plain papers given a bit of decoration on which to put photographs.

Here are the first pages before I start the journal.

Section 1 the diary started and ready to be filled in .....

Section 2 clippings/ephemera pages ready to be used.


Section 3 photographs - I found an old till roll and just tore it up and added some tissue tape and paper snippets.


.... I also created a layer that stretches right across the journal to fit over the top of the pockets, keeping to the same style.

Here is that layer with the flaps extended.

Wow well done if you've managed to stay with me for such a long post, but there was so much to document.
If you are as excited as me about the new die coming out it's great to say it is being shipped in America and we are awaiting deliveries here in the UK. Country View Crafts have it on their website for pre-order and are expecting their delivery later this month and it's such an excellent price too.
I must also give you a heads up that I will be using the die when teaching my next workshop for Country View Crafts.
Thanks so much for stopping by today. I hope you have been enjoying a wonderful easter weekend.
hugs Brenda xxx
Thank you Susi for the nudge - I have added this to Art Journal Journey and their Magical Mystery Tour.