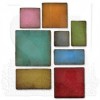
This was my second piece for the DecoArt Mixed Media Design Team and this time I felt like going all pink and girly but with contrasting rusty elements. You may have seen it over the DecoArt Media blog but I like to keep a record of all my makes on here so I am sharing the full version.
I love collecting
little embellishments whether they are made from glass, acrylic, metal, wood or
card they enhance any project and add atmosphere and help tell the story behind
it. I also like printers trays, collecting small items of vintage ephemera, curios
and old collectibles that represent a moment in time in someone’s life. So I
thought I would combine my love of these things and make a mosaic frame using
small pieces gathered from all sorts of places, some of which are modern in
that they are easy to buy on-line from those auction type sites etc, but given
the rusting treatment they can all combine to look aged and timeworn found
trinkets.
I also need to tell
you that I am an intuitive artist and throughout this project (and most of the
others I make) I instinctively changed course and added in more layers than I
had perhaps intended. I have highlighted these to you and if you follow these
process steps I am sure you will do the same. Enjoy and have fun.
Instructions:
Step 1. Begin
by cutting two of the mosaic frames and a back board the same size from mount
board.
Step. 2 Cut another
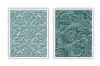
mosaic frame the same size from card and run through an embossing folder. I
used the flourish as I could run it through twice once top and again on the
bottom to create the embossed design.
Step 3. Use texture
sand paste and a palette
knife randomly around the edge of the frame and a little around the boxed areas.
Heat dry or leave to dry naturally. Add some transparent crackle glaze
randomly around the frame and also leave to dry naturally.
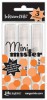
Step 4 Make up a mister of titan
buff acrylic paint (I used 15 drops of paint in the Ranger mini mister) and
another of quinacridone magenta (10 drops of paint) and use them with dabs of
yellow iron oxide on a brush and a water spritzer to create mottled pastel
colours over the frame and dry. At this point I could see my crackle glaze
layers had been too thin in most places so I brushed on some more and again
left it to dry. Repeat this colouring up in this step again as required.
Step
5. Mix small amounts of the quinacridone magenta and yellow iron oxide
separately on your mat with water and use a brush and a water spritzer to let
the deeper colours mix and dribble through the crevices of the embossed design.
Step 6. Create a more
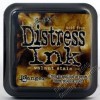
vintage look by dipping small areas into a watery walnut stain distress ink
wash on your craft mat, let it move around and dab away areas that need
removing before drying with a heat gun. Use the inky wash on a small brush and
add bits by hand if you need more control over it.
Step 7. Whilst you
are waiting during drying times gather your metal embellishments and give them
a thin coat of white gesso
Step 8. Next paint
your metal pieces with raw umber and medium grey V6, blending in places. When
dry give a few areas a coat of paynes grey and when that’s dry paint it all
with quinacridone gold. I always end up ‘playing’ with the layers and here I
added a little finger rubbed translucent white and then a wash of quinacridone
gold over that.
Step 9. Add a pin
prick mixes of quinacridone gold and raw umber together to just add some colour
to the other embellishments and alter them.
Rub in a little
quinacridone gold and dribble some in the holes of this number plaque.
Step 10. Finish this
monocle with some remnant rubs.
Step 11. Colour up
the little bottle with a thicker wash of quinacridone gold and rub walnut stain
distress ink into the cork stopper.
Step 12. Also colour
the sides of the glass dome and sides of the base with a little quinacridone
wash to vintage it up and adhere a photo to the base. I love adding vintage
photos as they are often the focus of the story behind the project.
Step 13. Rub a little
translucent white acrylic paint over the typed token to make the word stand
out.
Step 14. Add a sticker
and epoxy overlay to the cash key.
Step15. Finish the
frame but adding some dabs of watery qiunacridonr gold in the boxes, spritzing
with water and heat drying and also adding some remnant rubs.
Step16. Cut a small
easel die cut in mount board and adhere to the back of the frame to allow it to
stand.
The full product list can be found on the DecoArt Mixed Media blog and those Country View Crafts sell are listed below.
Thanks for stopping by.
hugs Brenda xxx