I am often asked what is the difference between the DecoArt crackle mediums so I thought I would take the four that I use most and give you an explanation of each one. Each of my coffee cups on this media board have been crackled with one of the four and the board itself and the saucer are a double up (see below). So four products and five outcomes. This was a brilliant opportunity to have fun with crackle so thank you Evelyn for the fabulous theme, which is the new challenge over at Country View Crafts Challenge Blog.

Crackle Paint
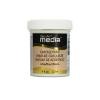
Fast-drying Crackle Paint crackles as it dries naturally to create an eggshell pattern in just one step. Apply with a soft brush over a sealed surface and as the paint dries, it will begin to crack, showing the base colour underneath. The size of the cracks are governed by the thickness of the application - ie the thinner the paint is applied the smaller the cracks and the thicker the application the larger the cracks. White Crackle Paint is tintable and can be coloured with up to 20% of the media fluid acrylics or can also be painted. It is also available in black.

1. Base colour - Raw Umber. White Crackle Paint

1. Base colour - Raw Umber. White Crackle Paint
Crackle Glaze
Clear Crackle Glaze is a fast-drying, acid-free topcoat that will crackle as it dries to create an eggshell pattern in one step. It should be applied over painted, sealed surfaces, its clear finish allows details and colours to show through and it is self-levelling. Apply with a soft brush and again the the size of the cracks is governed by the thickness of the application. Once dry, the cracks can be antiqued with Media Antiquing Creams, apply your chosen colour, let it dry and then wipe back with a soft damp cloth. You can also stamp over it.


2. Base colour - Medium Grey Value 6. Clear Crackle Glaze
Antiquing Cream - white
Antiquing Cream - white
Crackle Paste
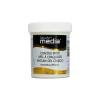
Dimensional Crackle Paste is a white paste that creates an eggshell cracking pattern as it air dries. It can be used alone or as a stencil paste. It can also be used with a palette knife to build texture, and will give bigger cracks with thicker application and shows the base colour underneath. Media Crackle Paste can be tinted with up to 20% Media Fluid Acrylics or painted with them.


3. Base colour - Paynes Grey. White Crackle Paste through a cracked stencil
Weathered Wood crackle medium
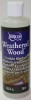
Weathered Wood is from the DecoArt Americana range Apply this medium after base coating with the colour you want to appear through the cracks. Top with the final coat of paint and it will crackle almost immediately as it dries to create an eggshell pattern, giving a vintage, distressed finish. DecoArt advise that you let this product dry naturally but I have had good results by drying it with my heat gun and heat drying the top coat of paint too. You can also change the way the cracks appear by painting the top coat in different directions. Take a look at Andy Skinner's video here.


4. Base colour - Dark Grey Value 3. Weathered Wood Crackle Medium
Top Coat - Titanium White
Mega Crackle
Mega Crackle is achieved by combining two DecoArt mediums, weathered wood and white crackle paint. Really large cracks can be achieved with this technique as can be seen on this media canvas board and yes it works on canvas too. See how it is achieved by watching Andy's video here.


Here they are all together.

I distressed the cups .....

.... found a quote I like and typed it out on media paint distressed card (this saying could definitely be me lol) ......

.... and stamped and stencilled and sealed the background with ultra matte varnish .....

...... and finally completed the project.

I hope you will be able to stop by the Country View Crafts challenge blog to take a look at the fabulous projects from the rest of the team and maybe enter one yourself.
For now have a fabulous week with whatever you have planned.
hugs Brenda xxx
Products for this project
Mega Crackle
Mega Crackle is achieved by combining two DecoArt mediums, weathered wood and white crackle paint. Really large cracks can be achieved with this technique as can be seen on this media canvas board and yes it works on canvas too. See how it is achieved by watching Andy's video here.

I used the same technique on the saucer too.

I distressed the cups .....
.... found a quote I like and typed it out on media paint distressed card (this saying could definitely be me lol) ......
.... and stamped and stencilled and sealed the background with ultra matte varnish .....
...... and finally completed the project.
I hope you will be able to stop by the Country View Crafts challenge blog to take a look at the fabulous projects from the rest of the team and maybe enter one yourself.
For now have a fabulous week with whatever you have planned.
hugs Brenda xxx
Products for this project