Sunday, 26 July 2015

Summer canvas workshop for CVC

Happy Sunday everyone, I hope your weekend has been going well. Today I have posted some photos of the Summer Canvas workshop over at Country View Crafts Project Blog. I had the most amazing session with 19 fabulous ladies who made the day special and very rewarding. I would love it if you could pop over to see what we were up to.

I have split the long photo we took of everyone and there are more over at CVC. 
But we have .....

Hazel, Nikki, Jane, cathryn, Lynda and Chris .....


Me, Gillian, Kate, Carol and Kathy ....


Ann, Anne, Diane and Heather ......


Jacqui, Margaret and Sue.


See you again on Tuesday when I will be slipping my July Tim tag under the wire.

hugs Brenda xxxx

Thursday, 23 July 2015

A Visual Journey #29

For all my friends


After gessoing the pages and leaving them to dry I stamped CI 063 Friends in Paris stamp and again on a piece of card using black archival ink. Over the top I rubbed in some of the Tim Holtz distress micro glaze - I wanted to keep an area around the image without colour on it. I also stamped CI 430 Baroque Splatter Script in cornflower blue archival.


I splodged distress inks on my craft mat and dipped the pages in forgetting that DIs and gesso don't complement each other and that the DI doesn't want to dry even when baked with a heat gun. So I did the same with some distress paints and had more success.


You will see where the glaze is neither the inks or the paints stayed I had to wipe them off as they just beaded up and lay on the resistant surface.


To add to the Parisian feel I added texture paste mixed with tarnished bronze distress paint through a fleur de lys stencil and let it dry.


I added a couple of small collage pieces and added white texture paste around them and over the fleur de lys.


Before I added the last layers I dripped some glimmer mist and distress sprays in the textured areas.


Gosh only another couple of weeks and I will be off on holiday and I'm so looking forward to some quality family time round the pool and eating out in the evenings, can't wait.

Have a great end to the week and thanks for stopping by today.

hugs Brenda xxx


Tuesday, 21 July 2015

Rusty patina effect using Tim Holtz products


When I posted my June Tim Tag with the rusty patina tarnished trophy I promised a tutorial as to how I achieved the effect using Tim Holtz products. So here goes.


This was inspired by Kate from Lindy's Stamp Gang and her faux verdigris or patina background  - I used her method but swapped in Tim's products. This technique enabled me to use up some of a forest moss distress stain that has gone dark brown with perfect bronze perfect pearls and a drop of water in a mister. 

Spray card with mister of home made glimmer mist making the card really quite wet (the card I use seems to have a coating to it and will withstand lots of wet and painty layers). Add some salt crystals and heat dry slightly.


Spray with gathered twigs distress stain.


Drip in some drops of evergreen bough distress paint and spritz blobs with your home made mister.


Repeat with blck soot distress paint and dab on some kitchen toll to lift some of it if it is too intense.


Spritz more home made mister and dry.


This is from ther first piece I made for the cup above.


This is the piece I made for the tutorial - you can see you will never recreate exactly the same again. This one has much more of a 'bloom' to it created by the misting of the evergreen bough distress paint.


Next I wanted to try to achieve a silver/galvanised effect so I followed the same steps but used the brushed pewter distress spray stain and spritzed with water adding more brushed pewter and a little weathered wood spray stain with drops of  evergreen bough and hickory smoke and when partially dried I added a quick spray of brushed pewter again.
This is what it looks finishing off drying with the salt granules still in it.


Next I wanted to try rusted tin. A spray of hickory smoke which has a decidedly mauve hue to it when wet but dries to a lovely gun metal grey.


Added a spray of pumice stone but the darn thing has turned green - grrrrr so annoying when that happens. So I blotted off as much as I could and dried it.
Next came some random sprayed brushed pewter and some black soot, dried partially with then another spray of brushed pewter


I wanted to add some rust so I sprayed firstly with walnut stain, the colour didn't stay very well so I repeated with vintage photo and its as if the brushed pewter absorbs the other colours - it really looks much greyer than this in real life.


So having found this photo of a rusty tin watering can ....


.... I got out the distress paints, walnut stain, gathered twigs and vintage photo and stippled it on in areas but still not the effects I wanted so I grabbed the gesso, took a small amount and sprayed vintage photo into it then stippled that over the top of the distress paints and whilst still wet sprayed more vintage photo over it - as I was drying it I noticed how it lost its brightness and became dull so I sprayed again and left it to dry naturally, but that didn't work either.


After several layers of stippled distress paint and stains and then sprays of rusty hinge and vintage photo I desperately wanted to capture this 'wet' look which highlights the deeper rusty colours ...


so I spayed once more with rusty hinge and whilst wet I also sprayed  a gloss varnish, dried and repeated with vintage photo. Now there is much more of a silvery/galvanised shine as well as a deep, vibrant and rusty effect.


So now here is my rusty watering can, I feel a tag or card coming on.


 I hope you can make sense of all the products and stages with this tutorial, it shows what didn't work as well as what did and that's all part of the experimenting, trialling and achieving what you want (or not lol).

Enjoy your crafty endeavours.

hugs Brenda xxx


Saturday, 18 July 2015

Don't forget to fly with DecoArt fluid media background

I've said it before but I love old photos and especially the photo booth pictures. When I saw this lady I immediately thought of Amelia Earheart, it's the leather jacket she is wearing - perfect for those  daring adventures during the pioneering days of flight.


Using the DecoArt fluid acrylics and Tim Holtz ideaology I have a tag over at the Country View Crafts Project Blog.


It would be lovely if you could pop over and see the tag in it's entirety and how it was made.


Thanks for stopping by. I thought I would add this quote as it seems to be me again at the moment.


I love deadlines. I like the whooshing sound they make as they fly by.
Douglas Adams

Have a great weekend.

hugs Brenda xxx


Updated to add the detail from CVC

I love using the photo booth pictures and this beautiful lady made me immediately think of Amelia Earheart, I think mainly because of the leather jacket she seems to be wearing - perfect for those  daring adventures during the pioneering days of flight.


I am using the DecoArt media range today and particularly these gorgeous fluid acrylics. They are highly pigmented and formulated to deliver professional artist performance at all skill levels and at an affordable price. Fluid Acrylics are flexible, intermixable, durable, and permanent.


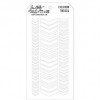
I began by covering the tag with media gesso and then when dry added some small spots of paint on my craft mat and took the Tim Holtz chevron stencil and a small piece of blending foam.


I already had an idea for a layout so I kept my design in two places only.


I could see I needed a pop of colour so using a splatter stamp and cadmium orange hue stamped some small random areas.


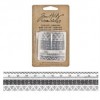
Next some strips of tissue tape ...


.... and bring in some watery colour for the background, I use a babywipe to apply it.


Add texture with some patterned and text stamps using black archival ink.


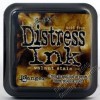
Add somne more to the design if needed, including remnant rubs and splatter with walnut stain distress ink.


Finish by adding the focal photo and embellishments to complete the tag.


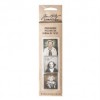
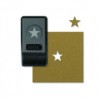
Lots of Idea-Ology and the fabulous new punches from Tim Holtz.


Thanks for stopping by .....


.... I hope you are inspired to fly with your art this weekend.

hugs Brenda xxx