Sunday, 23 November 2014

Sewn Snow Shoes

Did you know there is a challenge over at A Vintage Journey called ‘All Sewn Up’? Well I had such great fun designing and making my fabric journal I decided to use some new stamps in another sewing project.
P1190236

This Christmas card has the focal image stamped onto fabric which I then tried my hand at free sewing on the machine. Practice makes perfect but I am quite pleased with the effects.

P1190238

Sorry I got so wrapped up in using the sewing machine using the fabric and corrugated card I completely forgot to take any process photos. I had dipped the fabric in some distress inks to get the grungy colour on the fabric. I used the same inks on the corrugated card. I stamped the snowshoes using Tim’s stamps and did all the sewing through both layers of fabric and corrugated card. I finished off with a black pen to add the finer details.

P1190235

I hope the photos tell the story.

P1190237

Some lace, a painted snowflake charm and an offcut of paper folded and tucked in completed the card.

I am hosting the All Sewn Up challenge so I would love to see you over there with a project.

Thanks for stopping by.

hugs Brenda xxx

Thursday, 20 November 2014

A Jolly Christmas at Country View Crafts

I hope you are having a good week. I am sharing a Christmas card over at the Country View Crafts Project Blog and it was inspired by the Magpie day theme last week – use your scraps.
P1190227
I am feeling so happy making collage projects again, it almost seems as though I had lost my way craft wise this year, in fact I have spent a lot of time experimenting and playing with lots new ideas and styles, but it feels so good to be back.
P1190229
More details about this card can be found at the Country View Crafts project blog, so if you have a moment to spare it would be lovely to see you over there.

Thanks for stopping by.

hugs Brenda
 
Happiness lies in the joy of achievement and the thrill of creative effort.
Franklin D. Roosevelt

Update - copied over from CVC

HI everyone Brenda here and today I am sharing a Christmas card with you. The inspiration came from the current challenge at CVC challenge blog which is to use your scarps, so I decided to get the box of Christmas papers down and have a play. This is the result, a collage Christmas card.
P1190227small
I started with Tim Holtz postage stamp die and inserted a rectangle die so I could cut a frame.
P1190217
I used core’dinations paper and took out one of Tim’s found relatives to use with it.
P1190218
I used offcuts of paper to make my embellishments, stamped the word Christmas to go with the jingle flash card and punched the price tag from Tim’s merriment paper stash
P1190220
The music paper is from an old music score book (I buy them from the charity shops) and I found the tickets and lace border in my oddments drawer.
P1190223
I sanded the frame and cut down the gorgeous Santa photo to get it to fit….
P1190224
… and bit by bit the collage came together.
P1190230small
The snowflakes are die-cuts using the paper snowflakes thinlits dies and I added the beads that I found in my Christmas bits box. The top snowflake twirls are florist wire.
P1190231small P1190232small
To me the most important parts of putting a collage together are both the composition and the detail and here I white embossed the tickets, added stamped and cut out pen nib and a tiny circular tag with a weeny snowflake stamped on it.
P1190229small
I am so pleased to be getting Christmas cards done, but I still have a way to go.
 

Saturday, 15 November 2014

Magpie Day at Country View Challenges

It’s an extra surprise day with some blog candy thrown in at Country View Challenges and the theme today is ‘use your scraps’
I have a huge box of scrap papers that I keep in my room and the box just gets fuller and fuller, every now and again I go through it and throw some bits that I think I won’t use, but I never seem to really make a dent in it. So it has been lovely to take a few bits out and make some Christmas cards.
P1190176
I started by die-cutting the pieces from the Tim Holtz Retro Ornaments die and finding paper for the background.
P1190171
Having cut everything, I inked the edges ……
P1190174
….. stamped and cut out the sentiment, again inking the edges …….
P1190172
… and layered the background on another mount before adhering to the card.
P1190173
The philosophy here was that while all the bits were out and it is a fairly simple design, let’s make three rather than just one. In fact I have a bag of bits left over and I could probably get at least another four out of it, so when I have just a few spare moments I know what I will be doing.

Thanks for stopping by. I hope your weekend goes well.

hugs Brenda xxxx

Friday, 14 November 2014

All Sewn Up

Our latest challenge at AVJ starts today and we have an open sewing theme for you. I am hosting and my brief for you is  -

This is simple - a sewing inspired creation, any style as long as you tell us what the Tim influence is in your project, it could be that you have used a Tim technique, some of Tim's products, maybe you will case one of his tags but make it sewing based, you choose . Be adventurous and make whatever you like, it doesn't  have to include real sewing but must be focused within that theme.

I have chosen to use fabric to make journal covers and have used Tim inspired layers using distress inks, stencil, and stamp – and also some images from Tim’s Eclectic elements fabric range, ideaology, paper from Tim’s wallflower stash and his wonderful layered butterfly die. I also got out the sewing machine, but I definitely need more practice using it lol.
P1190161

Background
I started with Tim’s monoprint technique using his layering stencils and distress sprays on plain cotton fabric but after several layers I decided I didn't like the result. So I got out another piece of fabric and started again.
P1190050

2nd go
I daubed over some thin layers of gesso with a palette knife and dried them. Next I dipped the fabric in puddles of watery distress ink  and dried that layer. Then I added the harlequin pattern using Tim’s stencil with a mixture of evergreen bough and salty ocean distress paint ……
P1190051 P1190053 P1190054
……and then grabbed the extra large flourish (from the fabulous flourishes set) and stamped with white gesso. Once dry I started to spray stains over but I was unhappy with the colour choices, so into the sink and under cool water I squeezed all the colour out. So I was ready to start again but with the same piece as it was back to neutral.
P1190055 P1190060 P1190061

3rd background
This time I decided I would go the vintage route and chose stormy sky, brushed corduroy, gathered twigs and walnut stain distress stains, squidging them onto my mat and spritzed them with water I used a babywipe to gently blend the colours over randomly. As I was drying it with the heat gun I was turning the fabric over to heat both sides and this is when I noticed that I actually preferred the reverse side. I decided though that I would add some sponged gesso to lighten and brighten the front again and then stamp with black gesso.
P1190065 P1190069 P1190070
It was at this point something amazing happened, I splattered the background with drops of walnut stain distress stain, but they looked too dark, so I spritzed them with water and rubbed them in a bit and before my eyes I began to get distinct water marks, large versions of the spritz and flick technique, so cool.
P1190071
I was much happier with this piece.

Butterfly
I took some fabric and spray starched it, making it stiffer than it was, then dipped it in some distress stains, drying it off. I ran it through the die-cutter with the layered butterfly die and through the matching embossing folder. It created the embossed texture and with some light swipes of rose madder archival, the fabulous patterns showed up. To finish it I edged it with walnut stain distress ink.
P1190153

Inside covers
I took a piece of canvas roll cut two covers to the size I wanted, sprayed with tattered rose and antique linen distress stains and also used some blue skies glimmer mist. The age spots were a stroke of luck as I keep a box for spraying in and the canvas picked up some bits of other colours that has been sprayed in the box on previous occasions. I misted it all with water to blend the colours together and heat dried. I stamped using black archival and the distress damask stamps, a text stamp and blended broken china distress ink through the harlequin mask to provide continuity with the front covers.
P1190142

Creating the collage on the front cover
I cut the fabric background in half and pinned each part to another piece of the canvas roll. I layered a collage design using images cut from the eclectic elements range of fabrics, a piece of wallflower paper and some cheesecloth. These were all sewn on using my machine (please excuse the sewing, I haven’t used the sewing machine like this for ages and am right out of practice).
P1190140
I then added some other embellishments sewing them on by hand.
P1190148
… a rusted button and washer ….
P1190149
… a rusted pen nib……
P1190150
…. a wishbone with tissue tape behind it …..
P1190137
.. a stamped title ….
P1190156
… and the gorgeous layered butterfly.

The back cover
P1190157
I simply sewed on some card and paper butterflies.
P1190158

To complete the covers I layered up the fabric over the canvas, a layer of stiffened fabric to help keep the shape and an inside cover of canvas with some of Tim’s trimmings to create the tie.
P1190156
Some eyelets and rings and some pages sprayed with distress stains finished it all off.
P1190159 P1190160
Now what shall I use it for ………………..?????
P1190152
Phew, it was rather a long process but I am really pleased with the finished outcomes, the lovely soft and pliable covers feel lovely in the hands and because they are flexible they will stretch over embellished pages easily.

Thanks for sharing in my project today. I hope you like the fabric journal and maybe you will be inspired to try one for yourself.

Do take a trip over to the Vintage Journey Challenge blog and take a look at all the incredible samples that the Creative Guides have made to inspire you. I am sure you will find something to get you making and if you enter with a Tim inspired project you stand a chance of winning a £10 voucher from Country View Crafts.

Have a great weekend.

hugs Brenda xxx

Tuesday, 11 November 2014

Bumblebee for Country View Crafts

I wanted to create something for the other half of my blog title as I had made my butterfly box for the first sample in this month’s challenge at CVC. Have you had a chance to join in yet? Don’t forget there’s a great voucher to be won from Country View Crafts shop
P1180934
I started with Tim’s monoprint technique using the honeycomb stencil and mustard seed, spiced marmalade and black soot distress paints. and created the hexagonal patterned background. There was alot of paint left on my mat so I spritzed a tag with water and I wiped the paint up on it and got a completely different effect to make a tag another day.
P1180925
Dry the paint and then blend scattered straw, dried marmalade, tea dye and pumice stone Dis over. Distress and edge the tag with walnut stain, add some light texture stamping and some remnant rubs and/or label letters to create text.
P1180927
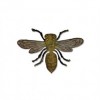
The bee was created using Tim’s layered bee die. I started with foil tape over card and die-cut and embossed the bee and then I had great fun. First of all I used rusting powder to create a dark and textured base and I added some alcohol inks in the gaps and blended over treasure gold.
P1180921
I then began to layer distress paints, sanding in places to knock back the colours. I was beginning to see a bee emerge but knew it needed something else.
P1180923
So I sanded back the wings more to try and get them to look shiny as if they were translucent and also sanded the body and took the black soot and mustard seed distress paint dabbers and rubbed them over to get more bee like colours. Now I was happier with it, in fact those wings look as though they have got pollen all over them.
P1180929
I gathered together other bits I wanted to use, altering the charm and word band with paints and coffee archival ink.
P1180930
And put it all together.
P1180935
Don’t you just love how the bee really looks to be resting, but wings at the ready to take off.
P1180940
Thanks to Trace for the theme this month, I love playing with bees and butterflies images and thanks to you too for staying with me at the moment.

Enjoy

hugs Brenda xxx