Tuesday, 11 November 2014

Bumblebee for Country View Crafts

I wanted to create something for the other half of my blog title as I had made my butterfly box for the first sample in this month’s challenge at CVC. Have you had a chance to join in yet? Don’t forget there’s a great voucher to be won from Country View Crafts shop
P1180934
I started with Tim’s monoprint technique using the honeycomb stencil and mustard seed, spiced marmalade and black soot distress paints. and created the hexagonal patterned background. There was alot of paint left on my mat so I spritzed a tag with water and I wiped the paint up on it and got a completely different effect to make a tag another day.
P1180925
Dry the paint and then blend scattered straw, dried marmalade, tea dye and pumice stone Dis over. Distress and edge the tag with walnut stain, add some light texture stamping and some remnant rubs and/or label letters to create text.
P1180927
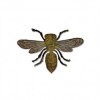
The bee was created using Tim’s layered bee die. I started with foil tape over card and die-cut and embossed the bee and then I had great fun. First of all I used rusting powder to create a dark and textured base and I added some alcohol inks in the gaps and blended over treasure gold.
P1180921
I then began to layer distress paints, sanding in places to knock back the colours. I was beginning to see a bee emerge but knew it needed something else.
P1180923
So I sanded back the wings more to try and get them to look shiny as if they were translucent and also sanded the body and took the black soot and mustard seed distress paint dabbers and rubbed them over to get more bee like colours. Now I was happier with it, in fact those wings look as though they have got pollen all over them.
P1180929
I gathered together other bits I wanted to use, altering the charm and word band with paints and coffee archival ink.
P1180930
And put it all together.
P1180935
Don’t you just love how the bee really looks to be resting, but wings at the ready to take off.
P1180940
Thanks to Trace for the theme this month, I love playing with bees and butterflies images and thanks to you too for staying with me at the moment.

Enjoy

hugs Brenda xxx


Tuesday, 4 November 2014

Smile with one layer no:4


Hi Everyone - just a short post from me today. This is another one of my Art of Craft workshop one layer cards, made for a 5” x 5” card.
P1050810
This is a very simple recipe for making the card.
  • Lay low tack masking tape across the middle.
  • Blend two or three distress inks over the card. Remove masking tape.
  • Stamp sentiment, flower and butterfly.
P1050811
  • Water bleach flower petals. Wrinkle free distress and splatter paint.
  • Ink edges with walnut stain.
P1050812
Done.

Before I go I thought I would share some photos of Wisley Gardens taken last week, These textures and colours are amazing.


Thanks for stopping by.

Stay creative.

hugs Brenda xxx

Saturday, 1 November 2014

A box of butterflies

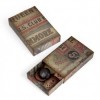
It’s the 1st November and a new challenge is starting at Country View Crafts Challenges, chosen by our lovely Trace the theme is bugs, bees and butterflies. True to my blog title and a special love of mine, I chose butterflies and decided I needed somewhere to keep some butterfly embellishments.
P1050940
Process steps
1. Die-cut matchbox die in kraft card and give a rough coat of gesso.
P1050907
2. Adhere torn strips of butterfly names taken from an observer book of butterflies.
P1050908
3. Use the speckled mask to layer on some texture paste.Whilst drying I stamped the box part and made it up. The text is from the Tim Holtz Papillon set of stamps.
P1050910
4. Next drip some gathered twigs distress stain on the cover …
P1050912
5. ….. then daub some gesso over it again and when dry cover with a layer of watery pva glue to seal it.
P1050914
6. Make the box up and dip it again in watery gathered twigs and stormy sky distress stain.
P1050941
7. Stain some old book paper with the gathered twigs and die-cut butterfly frenzy several times, then dip some of them in the stormy sky.
P1050916
8. The little tray was overflowing with butterflies, most of them I didn't dip in another colour as that can be done when you need them to fit with the colours of future projects.
P1050928
9. Put two butterflies together, edging them with walnut stain first and layering them to get a 3D effect.
P1050925
10. Adhere some to the box.
P1050929
11. I now have my own frenzy of butterfly embellishments ready for future projects. What about you?
P1050931

This would make a fabulous gift to send to a crafty friend as a little present don’t you think?

We look forward to seeing you over at the Country View Crafts Challenge this month, do come and join us.

Thanks for dropping by today. Have a wonderful weekend and hopefully some creative time.

hugs Brenda xx


These products I used are available from Country View Crafts. Click on them and you will be transported over there.


Friday, 31 October 2014

Tim’s tag for October – a Halloween journal pouch

OMG here I am just coming in under the wire with my October ‘tag’ and it’s the last Halloween make for this year. I decided to make a tag pouch using the giant size 12 tag from Ranger. I had a brand new set of Retro Halloween framelits sitting on my shelf  just waiting to be used and as they come with both stamps and dies I thought they would be perfect for Tim’s technique using a mask to cover the image.
P1190040
I have followed Tim’s instructions for the outside but used a mixed-media layered technique for the inside.
I began with blending victorian velvet distress paint through the gothic stencil and went on to add some aged mahogany through halloween words.
P1180977
I dipped the tag in distress stains and dried it, then used more stencils to blend distress inks over the top.
P1180979
I love the colours and how they mixed together creating some fabulous blends.
P1180980
I used the reverse side to create the outside of the pouch following Tim’s techniques – go take a look at his process steps, they are so easy to follow and he produces amazing results.
P1180981
You can see I used texture paste in both white and black.
P1180984P1180985
When all the layers had dried I stamped, painted and die-cut all the images from the framelits set and found some mini movers and shapers dies which I cut from black card.
P1190033
I added phrases and quotes to both side to create more of a journalling effect. The lettering was made up of chit-chat stickers, label letters, the stenciled lettering and some were computer generated.
P1190036
I got right to the end and suddenly realised that the front cover didn’t look quite right.
P1190043
Can you see what I changed?
P1190044
Distress inks – seedless preserves
Distress stains – victorian velvet ,dusty concord, stormy sky
Distress sprays – iced spruce, dusty concord, tattered rose, brushed pewter
Phew, so pleased I had time to play today and do this piece, I was feeling so disappointed that I hadn’t found time to take part and now I feel re-inspired and ready to move on and make some more DT and workshop samples.

I am linking to Tim's blog and wish to say thanks Tim for your continuing inspiration and ideas.

Just before I go it’s officially the hottest Halloween ever in the UK, today we have had highs of 23 degrees Celsius which is 73 degrees Fahrenheit. At home we have had all the windows and doors open as it’s just like a really warm summer day. The only difference is that the shadows are long and the cherry trees have completely lost their leaves. what is happening to our weather?

I have flowers still budding.
P1190026
Summer bedding still full of colour.
P1180996
Spring flowers blooming again.
P1180998
Pots still a riot of colour.
P1180987
And the cats enjoying the sunshine.
P1190016
This is my bee box, I’ve seen bees going in, but need to do some research about how they use it.
P1180999
And lastly I just love this photo of a single red rose peeking through the bare branches of the Cherry tree.
Update - it seemed silly having a bee box and not knowing how it was used so googled it and found out -
Red mason bees need a box filled with hollow pipes, such as cut lengths of bamboo. They lay their eggs one at a time with a supply of pollen or nectar and a plug of mud between them.
So now I know what will happen next year when the eggs hatch, we will have lots of Red Mason bees in the garden yay.
P1190004

Have a great Halloween evening with plenty of treats and no tricks.

See you again in the morning.

hugs Brenda xx