Wednesday, 8 October 2014

Distress Spray Stains at Country View Crafts

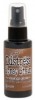
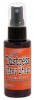
Did you know that Susan has the brand new distress spray stains in the shop? I have been having a play and made another Christmas card using the sprays for the background.


All the process steps can be found at Country View Crafts project blog today. It would be lovely if you could pop over and take a look.

I hope your week is going well.

Thanks for stopping by.

hugs Brenda xxx


Monday, 6 October 2014

Whispers in the wind Journal Page for Crafty Individuals

There is a new challenge at Crafty Individuals chosen by Gio and is called Halloween Madness or Christmas Frenzy, so plenty of opportunity to get into holiday mode.


Imagine it is All Hallows Eve, the time for wandering souls to mingle on earth, a time when the spiritual and physical worlds are closest together and spectres can be seen roaming the countryside. It’s a moody, haunting evening on All Hallows Eve with an ominous, forbidding sky and the darkened, creepy silhouette of a ruined abbey. The black trees stand against the last light before it disappears to a deep inky black where only the glint of the moon peeking from behind the rooftop will light the way for ghosts and ghouls.
P1180505web
I have used stamp sets – 227, 259, 361, 209 and 116 plus a background stamp I used for the sky from my other supplies.
P1180499web
I began by stamping the abbey, masking it and adding the trees. To get the feel of a scene I used a black pen to draw in and outline areas which made the stamps meld together more.
P1180497web
The sky was created by using brushed pewter distress paint with the back ground stamp, heat drying it so that it became a resist and which gives this quite eerie glowing effect. I masked the ground and dipped the top part in a mix of weathered wood and stormy sky distress inks and when dry I masked off that part and dipped the ground area in frayed burlap, forest moss and crushed olive and when it was dry I dipped it again in walnut stain.
P1180503web
To get the gloomy look I blended pumice stone over everything starting darker at the edges, I painted in the moon and a bit of sky with scattered straw and then blended walnut stain round the edges.
P1180512web
To finish off I added just the quote which is on the Crafty Individuals stamps but I typed and printed it off in a different font and size so that it fitted in more with my scene and of course the raven from set 361. I’ve added it to a journal where I keep pieces with quotes added to them.
P1180517
I hope you will pop over to see some fabulous projects over on the blog. If you join in you must use at least one product from the CI shop and once you have linked up you get a 25% discount code to use for new goodies, now that's a bonus for sure.

I hope you have a good week. It has suddenly changed to Autumn here and it's pouring of rain, but what a wonderful summer we've had.

Take care.

hugs Brenda xxx

Friday, 3 October 2014

Heavy Metal at A Vintage Journey

Sorry I'm late Blogger didn't go for me at midnight but I am here now.
I got really excited when I saw Terry had chosen ‘Heavy Metal’ as her challenge at AVJ and loads of ideas kept popping into my head but I was finding it difficult to play with those ideas at the time. But once I did sit down to design and create all those ideas seemed to have vanished in a puff of nothing. Does this ever happen to you? What to do? (and not a lot of time to do it in either lol). So here is my offering to help start this fabulous challenge off.


I began with a piece of copper foil sheet that I ran through Tim’s cobwebs embossing folder. I adhered it to a piece of greyboard with red line tape and used my 10 second studio pointy tool to add some other textures on it.


Next I used a palette knife to spread some of Wendy Vecchi’s black embossing paste in areas, leaving it quite matted and pitted.


I dried it and then added broken china, peeled paint and black soot distress paints, smudging them together with a piece of kitchen towel and when dry dabbed over some pumice stone DP and I used a piece of cut and dry to blend in some white gesso. I then left it to dry overnight.


The following day dripped black gesso and distress paints over rubbing some of it away. I also used about five different treasure gold metallic pastes on it. But what to do next?


Out came a jumbo tag and I got carried away using the new distress spray stains including brushed pewter and ordinary distress stains with Tim’s new Halloween mask. Before I sprayed I stamped the skull from the Apothecary set and masked it off and I also stamped with the text from the same set.


I die cut the bats, spider and 31 in black card and layered paints and stains again on the spider.


Using some wire I had in my drawer I made some barbed wire and added it to a word band which has picker fence distress paint rubbed over it to get the saying to stand out more…..


…. and I distressed a spinner and found a rusted ring fastener that I put through the tag hole.
After distressing the edges of the tag and using the chit chat words and label letters, I am now really quite pleased with the outcome.


We are looking forward to seeing what heavy metal you incorporate into your projects over the next couple of weeks.

Have a wonderful weekend, I shall be at Swanage Blues Festival down on the south coast. I am really looking forward to getting by the sea for a few days.

Take care.

hugs Brenda xxx
Wednesday, 1 October 2014

Sparkle and Shine for Country View Crafts

My great teamie Doreen has chosen the theme for this month’s challenge at Country View Crafts and what a great opportunity to start you Christmas cards if you haven’t already. This is my first for this season.
P1180706a
I began with a piece of white card and a stamp from Tim Holtz Festive Knits set, stamping in embossing ink and adding gold embossing powder. Over that a did the wrinkle free technique with Festive Berries and Antique Linen distress inks, carefully heat drying so as not to re-melt the EP.
P1180693
The wooden star I found in my Christmas craft box and added Xmas Red stickles  …….
P1180710
…. I die-cut the Noel, inked it over with antique linen ……
P1180694
and then added glossy accents and antique linen distress glitter. The great fun thing with these glitters is that you can ink over them to change the look.
P1180697
I stained the ribbon with Festive Berries, Barn Door and Aged Mahogany distress inks to get a mottled look. 
P1180695
Made a triple bow and adhering it to a piece of ribbon stuck across the card ....
P1180701
... and the button I found in one of my sewing boxes and blended walnut stain distress ink over it to give it a more aged look.
P1180705
I hope you will join us at some point during October with something that sparkles or shines. Don’t forget every entry that complies with the rules is in with a chance of winning a £20 shop token from Country View Crafts, so come and have some fun.
P1180708
Thanks for joining me today and have a wonderful month.

hugs Brenda xxx