Monday, 3 March 2014

The Wallflower Collection

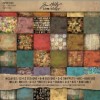
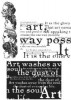
I was lucky to receive my Wallflower paper stash by Tim Holtz last week and couldn’t wait to have a play with it. It has fabulous nature inspired pages all done in a collage style and gorgeous patterned pages as well. If you are a nature lover I think you are going to love these 12 x 12’s and Tim has made great links with his new products. I can see a spending spree coming on lol.
P1160108
A sneak peek at the card I have made and this is the page I used from the stack.
P1160111
Hope you can spare a moment to go and take a look at the project at Country View Crafts.

I would like to welcome new followers who have come on board in the last few weeks, thank you for being here and sharing my creative journey. I always try to come and visit you too, but Blogger doesn’t always show your blog in my followers list, if I haven’t been over, please leave me a message with a link so I can come and see what you are doing too.

Have a wonderful week ahead.

hugs Brenda xx

Saturday, 1 March 2014

Paper Chase 1 for Country View Crafts

Welcome to my blog where today we are celebrating Country View Crafts FIRST birthday in true traditional style and as is the custom for first anniversaries we are celebrating all things paper.
P1160027
I decided to sign up for 52 card pickup after seeing several friends making these fabulous playing cards in a wonderful journaling style – I wanted to learn more so these are my first attempts at them and they will be used for something special which you will see in my second inspirational piece for Paper Chase.
P1160032P1160037_edited-1
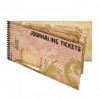
This card uses music score script for the background and some Tim Holtz journaling tickets, tissue tape and chit-chat stickers.
P1160047P1160052
The background for this one uses the ATC sized papers from the Shabby Vintage set of papers, also the remnant runs and label letters.
P1160055P1160058
This one pleased me no end as I used an old AA map book of the British Isles for the background and I tore the heart from the music score paper which I distressed with paint and inks. This also included one of Tim’s stamps on the background as well.
P1160064P1160081
This last one again used an old vintage photo from the Lost and Found stack, tissue paper, tissue wrap and I think the heart was a punched one – I found it in my box of bits.

Hope you like the style, I am hooked on these at the moment and will have some more to show you soon.

I hope to see you over on the CVC challenge blog – have fun.

hugs {brenda} x0x


Friday, 28 February 2014

A new blog on the block

Are you vintage or shabby chic inspired?
Do you like a good challenge?
P1150690
Then there’s a new challenge blog that could be right up your street.

Starting Friday the 7th March ‘A Vintage Journey’ will open it’s doors for anyone who loves to make projects with a vintage, shabby chic or mixed-media focus and would like to join us.

We have the most AMAZING  Design Team of super talented artists to inspire you who all love to focus on the style, techniques, products and ideas of Tim Holtz, we will use distress inks, distress paints, distress stains and lots of Idea-Ology including metal trinkets and embellishments to help inspire you and of course rubber stamps, dies, embossing powders and folders. Our aim is to show you projects that have a Tim Holtz link or focus and demonstrate how these can be used with products from other companies that many of like to use too.

The challenges will be fortnightly and in between we will provide you with technique tutorials or step by step processes to get your creative juices flowing.

We accept all types of projects like cards, albums, 3D assemblage, scrapbook layouts and pages, tags, frames, shadow boxes and anything else as long it is in a shabby vintage style.

We have a regular sponsor – Country View Crafts - who will be giving the fortnightly winner a £10 voucher to spend at their on-line store.

So please do pop over and become a follower so that you can keep track of what we are doing in your blog reader. We are really looking forward to beginning a new creative and vintage journey with you.

Thanks for reading and I hope to see you on this vintage journey sometime.

hugs Brenda xx

Thursday, 27 February 2014

Stencils and Texture for Frilly and Funkie

I was so surprised and pleased that my Valentine tag was chosen as a winner at Frilly and Funkie and that gave me the chance to be a Guest Designer for their new challenge – Stencils and Texture.
P1150943
So here is my multi-layered collage that includes both of those requirements, lots of it in fact :0).
P1150908
I began with a piece of white card, dictionary and music score paper and tore pieces of both and adhered to the card. I heat dried it and then added borders in both black and white to add some texture. I had already ‘planned’ the layout in my head so I knew where I wanted some of the borders to create part frames round the images. Once the borders were in place I painted a layer of gesso over everything to bring some conformity to all the pieces and heat dried it.
P1150912
I stamped and painted my images with distress inks and then cut two pieces of paper roughly the same size so I could use them as  markers for where the images would go, and then I didn’t have to keep handling them as I began to build the layers further.
P1150913
Next I began adding the block pieces of patterned papers’ cutting them to size and edging them all with walnut stain. I always like to do this as I feel it frames each piece and makes them stand out as part of the composition really well.
P1150918
Once I was happy with the way the design was developing I began to add some tissue tape and then got out two of Tim’s masks and ‘painted’ decoart modelling paste through them, going over some of the patterned paper too.
P1150916P1150918
I also used distress inks through one of Tim’s new masks – Lattice work …….
P1150924
… and I used walnut crystal ink to splatter all over and drip over some of the textured areas.
P1150923
The borders weren't stuck down fully so that I could tuck some other pieces beneath them if I wanted.
P1150929
P1150957
Then I glued in the images, adding more borders, lace and tape where I felt it was needed.
P1150950
Now I started to gather metal trinkets to add as embellishments and I added a couple of little flowers from Linda’s shop. Once happy with where they were all going I lightly painted the metal pieces with gesso and stuck some of them together to layer up. I then adhered them into place and brushed treasure gold white fire over them all, this brings some conformity to them as they were all different metals.
P1150954P1150958
Finally I stamped some Artistic Outpost words and used one of my own chatty words, a button, ticket and a glass dome over the #35 to finish off.
P1150948
I made this piece on white card so that I could start a collage journal. I did a lot of collage oil paintings when I was at college (many moons ago now) and a couple of years ago I did a Claudine Helmuth on-line course in learning more about how collage works. Last year doing a 2 day workshop with Finnabair really ignited my passion for it all over again, so I am going to keep my samples and notes to go with them all in one place.

Thanks again to the fabulous team at Frilly and Funkie for choosing my tag and enabling me to be a Guest Designer, I have really enjoyed creating this. The Artistic Outpost stamps, Tim’s masks and the lace all come from Linda's Funkie Junkie Boutique, if you haven’t explored it yet as somewhere to buy from I recommend you go take a look at the fabulous products and competitive prices.

hugs Brenda xx

Sunday, 23 February 2014

A fine romance

I am showing a collage for Crafty Individuals today. I started with the lovely new stamp (CI - 402) they released earlier in the year called 'Just be my Friend' and made a collage board.

P1040394a

I began with masks and texture paste and when dry added some watered down distress inks and also blended distress ink through a mask

P1040386

I collected lots of ephemera and elements that I though I might use and kept to a black and white theme.

P1040392

To create a more vintage feel I painted and blended some of the images with some walnut stain distress ink and I stamped the bicycle with distress paint and a text stamp.
 P1040397

I started to build the collage wanting to create a story and a scene of two young lovers, enjoying their time together .......
 P1040398

 ...... and being in love.

P1040399

I included the Eiffel tower and postmark to represent the city of love, who knows perhaps they are on their honeymoon.

P1040400

This is obviously a fine romance and a special moment in time.

There are still a few days for you to enter the challenge and once you have entered you can claim 25% off your next order.

Happy Sunday.

hugs Brenda xx

Friday, 21 February 2014

A vintage burlap panel

It’s my turn to post over at the Country View Crafts Updates blog and I chose to use one of those little burlap panels from Tim Holtz.

P1150872
I have used lots of distress products, Idea-Ology …….
P1150868
… and some rusting powder.
P1150867


I would love it if you had the time to pop over to see how I put this one together.

The sun is shining, we have clear blue skies, what a wonderful morning to wake up to and the weekend starts here.
Have fun.


I have updated this post to include all the details - just trying to keep my blog a diary of all my projects.


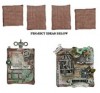
I have used one of the smallest burlap panels from the shop, they actually come in a pack of 4 containing two x 8cm square panels and two - 9x7 cm panels.


I started by gathering together the elements I thought I would use ......


.... and altering them to suit the vintage feel I wanted to create. The mini tag was distressed and stamped with a small piece of tissue tape added to it. This became the base for the photo.
This frame was stamped with antique linen distress paint using a Tim Holtz stamp.


I also used distress paints on the burlap panel and some walnut stain distress ink when the paints were dry.


I added tissue tape .....


.... and some gesso through the splatter mask.....


.... and then began assembling the pieces onto the panel. 


I used stamps, die-cuts and Idea-Ology together. The label letters created the word ink.


I added some beads and a rusty bell to the side and I also used rusting powder on the spinner and pen nib.
To finish off I used the chit-chat words to tell the story. Who are You?

Have a great weekend and see you back here on Monday with Sue.

Brenda xx