Friday, 21 February 2014

A vintage burlap panel

It’s my turn to post over at the Country View Crafts Updates blog and I chose to use one of those little burlap panels from Tim Holtz.

P1150872
I have used lots of distress products, Idea-Ology …….
P1150868
… and some rusting powder.
P1150867


I would love it if you had the time to pop over to see how I put this one together.

The sun is shining, we have clear blue skies, what a wonderful morning to wake up to and the weekend starts here.
Have fun.


I have updated this post to include all the details - just trying to keep my blog a diary of all my projects.


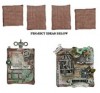
I have used one of the smallest burlap panels from the shop, they actually come in a pack of 4 containing two x 8cm square panels and two - 9x7 cm panels.


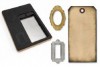
I started by gathering together the elements I thought I would use ......


.... and altering them to suit the vintage feel I wanted to create. The mini tag was distressed and stamped with a small piece of tissue tape added to it. This became the base for the photo.
This frame was stamped with antique linen distress paint using a Tim Holtz stamp.


I also used distress paints on the burlap panel and some walnut stain distress ink when the paints were dry.


I added tissue tape .....


.... and some gesso through the splatter mask.....


.... and then began assembling the pieces onto the panel. 


I used stamps, die-cuts and Idea-Ology together. The label letters created the word ink.


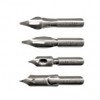
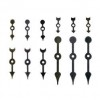
I added some beads and a rusty bell to the side and I also used rusting powder on the spinner and pen nib.
To finish off I used the chit-chat words to tell the story. Who are You?

Have a great weekend and see you back here on Monday with Sue.

Brenda xx


Wednesday, 19 February 2014

Stitches Trade Show

I had a fabulous few days in Birmingham both at the trade show and staying with some very good friends in Walsall and met up with lots of fabulous crafters along the way

I thought I would share one of the workshop makes I did, led by Lindsay Mason for PI.
P1150772
This is a corrugated card hanging with a large corrugated heart as a topper.
P1150773
We were given all the components in a kit ready to make up, but it was still tight getting it finished as the workshop sessions are only 45 mins long
P1150774
The kit included the gorgeous jumbo tattered florals as well as a couple of the normal sized ones, some leaves and greenery
P1150776
The backgrounds were distress paints and treasure gold.

Lindsay was a great tutor and it was lovely to get my hands all covered in paints and inks as I was getting withdrawal symptoms, you can image surrounded by all those wonderful stands and products. I needed a crafty fix and this was one of the workshops that really helped.

I am taking Linda's hint and linking to Jenny's Flower challenge over at Frilly and Funkie where the flowers must be handmade. Thanks for the great challenges girls and thanks also for choosing my Valentine tag as a winner last week, more on that later.

Hope you are getting messy this week and creating some lovely projects, I am just about to delve in again now I am surrounded by my own supplies.

Take care xx

Friday, 14 February 2014

Tim’s Tags for February x 3

Happy Valentine's day to everyone. Before I take you through my tags I would like to say how excited I was yesterday morning to get a message from my friend Jenny congratulating me on a getting a Blogworthy link from the one and only Tim Holtz for the Valentine tag I posted just this week (Here if you haven’t had a chance to see it yet). It is a wonderful accolade to be recognised by Tim for the projects you make and I really couldn’t be more proud. What is even more special is that Jenny too was mentioned and Trace as well who are both great blogging buddies and it was lovely to see them receive the same special honour in the same post, great one girls.

Tim’s tag for February is a fabulous layered piece consisting of inks, embossing powder, chalk, glitter and and stickers. Full details can be found on Tim’s Blog.
I decided I would follow Tim’s technique with the products he used and then play with the other new CHA stencils and some more stamps from the Random Quotes set to create different designs.
P1150765
This was the third tag I made and I have to say is my favourite made with the brand new doily stencil.
P1150748
I used tumbled glass, pumice stone and frayed burlap stains for the background and peacock feathers, evergreen bough and tumbled glass inks through the stencil.
P1150769
Some washi tape, embellishments and chit chat stickers.
P1150771
I also used three different distress glitters on the butterfly.

P1150756
The second tag I made used the lattice work stencil.
P1150742
I love the design of this one, the pattern has a north african feel to it to me.
P1150761
This is one of Mario’s hashtags he uses on FB and I used the vintage lace strip die for the top and bottom borders.
P1150763
The ideaology star was ‘painted’ black with a promarker pen …..
P1150764
… and the silhouettes covered with black soot distress glitter.


P1150753
This is my copy of Tim’s original which has a wonderful vintage feel to it.
P1150741
I love the hearts with shades of different reds …..
P1150754
…. and the fabulous chalkboard technique used with the stamp.
P1150755
The glittered heart and industrial stickers are great embellishments.

I am linking these to Tim’s tags for February.

I hope you have a fabulous Valentine Day, we went out last night so will be staying in tonight, but we don’t need a special day to have a cosy night in front of the television!!!

Enjoy your weekend, I hope you get to have some crafty time and if you are going to Stitches in Birmingham, let me know and maybe we will catch up with each other.

xx

Monday, 10 February 2014

Red, white and pink Valentine

……… AND NO HEART
I took some inspiration this week from the fabulous team at Frilly and Funkie with their Valentine’s Day with a twist challenge and this is what came out of it.
P1150736_edited-1
A very tonal tag in pinks and reds.
P1150699
I started by smooshing and dipping my tag into festive berries distress stain…..
P1150700
… then brayering spun sugar and picket fence distress paint over the top.
P1150703
When it was dry I stamped over using picket fence distress paint again with the text stamp from Tim’s Love Struck set.
P1150706
I used some distress stain and distress paints (colours above) on the ribbon and stamped the Love text stamp over the top with black archival.
P1150707
A chipboard butterfly cut using the movers and shapers dies was covered in worn lipstick distress ink and I then covered it with festive berries and spun sugar distress glitter.
P1150711
I used my splatter brush with white paint on the stain/paint covered petals and the tag (thanks Trace for the recommendation - it works well) and started gathering the elements I thought I might use,  a cupid cut in corrugated card, painted white and stamped over, a strip of pink fabric like angel hair….
P1150721
….. and started to layout and add the things I wanted.  I added resin flowers to the crinoline petals, gathered the fabric and when stuck down I sponged over some white paint.
P1150717
Finding a plaquette with 14 on was perfect, I tied some stained jewellery line through the holes.
P1150728
When I was happy with everything I cut some patterned card and used it to change this into an extended tag and stamped the sentiment using Tim’s Simple Sayings set.

Thanks Cec and girls for the inspiration, this really got me thinking.

Happy Valentine’s when it arrives.

xx