
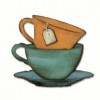
I am often asked what is the difference between the DecoArt crackle mediums so I thought I would take the four that I use most and give you an explanation of each one. Each of my coffee cups on this media board have been crackled with one of the four and the board itself and the saucer are a double up (see below). So four products and five outcomes. This was a brilliant opportunity to have fun with crackle so thank you Evelyn for the fabulous theme, which is the new challenge over at Country View Crafts Challenge Blog.

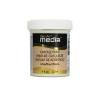
Crackle Paint
Fast-drying Crackle Paint crackles as it dries naturally to create an eggshell pattern in just one step. Apply with a soft brush over a sealed surface and as the paint dries, it will begin to crack, showing the base colour underneath. The size of the cracks are governed by the thickness of the application - ie the thinner the paint is applied the smaller the cracks and the thicker the application the larger the cracks. White Crackle Paint is tintable and can be coloured with up to 20% of the media fluid acrylics or can also be painted. It is also available in black.

1. Base colour - Raw Umber. White Crackle Paint

1. Base colour - Raw Umber. White Crackle Paint
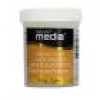
Crackle Glaze
Clear Crackle Glaze is a fast-drying, acid-free topcoat that will crackle as it dries to create an eggshell pattern in one step. It should be applied over painted, sealed surfaces, its clear finish allows details and colours to show through and it is self-levelling. Apply with a soft brush and again the the size of the cracks is governed by the thickness of the application. Once dry, the cracks can be antiqued with Media Antiquing Creams, apply your chosen colour, let it dry and then wipe back with a soft damp cloth. You can also stamp over it.


2. Base colour - Medium Grey Value 6. Clear Crackle Glaze
Antiquing Cream - white
Antiquing Cream - white
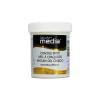
Crackle Paste
Dimensional Crackle Paste is a white paste that creates an eggshell cracking pattern as it air dries. It can be used alone or as a stencil paste. It can also be used with a palette knife to build texture, and will give bigger cracks with thicker application and shows the base colour underneath. Media Crackle Paste can be tinted with up to 20% Media Fluid Acrylics or painted with them.


3. Base colour - Paynes Grey. White Crackle Paste through a cracked stencil
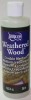
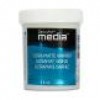
Weathered Wood crackle medium
Weathered Wood is from the DecoArt Americana range Apply this medium after base coating with the colour you want to appear through the cracks. Top with the final coat of paint and it will crackle almost immediately as it dries to create an eggshell pattern, giving a vintage, distressed finish. DecoArt advise that you let this product dry naturally but I have had good results by drying it with my heat gun and heat drying the top coat of paint too. You can also change the way the cracks appear by painting the top coat in different directions. Take a look at Andy Skinner's video here.


4. Base colour - Dark Grey Value 3. Weathered Wood Crackle Medium
Top Coat - Titanium White
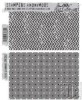
Mega Crackle
Mega Crackle is achieved by combining two DecoArt mediums, weathered wood and white crackle paint. Really large cracks can be achieved with this technique as can be seen on this media canvas board and yes it works on canvas too. See how it is achieved by watching Andy's video here.


Here they are all together.

I distressed the cups .....

.... found a quote I like and typed it out on media paint distressed card (this saying could definitely be me lol) ......

.... and stamped and stencilled and sealed the background with ultra matte varnish .....

...... and finally completed the project.

I hope you will be able to stop by the Country View Crafts challenge blog to take a look at the fabulous projects from the rest of the team and maybe enter one yourself.
For now have a fabulous week with whatever you have planned.
hugs Brenda xxx
Products for this project
Mega Crackle
Mega Crackle is achieved by combining two DecoArt mediums, weathered wood and white crackle paint. Really large cracks can be achieved with this technique as can be seen on this media canvas board and yes it works on canvas too. See how it is achieved by watching Andy's video here.

I used the same technique on the saucer too.

I distressed the cups .....
.... found a quote I like and typed it out on media paint distressed card (this saying could definitely be me lol) ......
.... and stamped and stencilled and sealed the background with ultra matte varnish .....
...... and finally completed the project.
I hope you will be able to stop by the Country View Crafts challenge blog to take a look at the fabulous projects from the rest of the team and maybe enter one yourself.
For now have a fabulous week with whatever you have planned.
hugs Brenda xxx
Products for this project


I really love this and your brilliant explanations!
ReplyDeleteWhat a brilliant post Brenda....so clear and your cups project shows the crackles off perfectly. Fabulous...no wonder DecoArt have welcomed you to their fold.Keep warm, I don't know where our flaming June is yet ;0) Hugs xx
ReplyDeleteWow Brenda, your tutorial is so professional!!! The DecoArt hit the jackpot with having you!!! Your canvas is revelling in crackles!!! Amazing! Oh, and last but not at least, I love your quote! Hugs
ReplyDeleteThankyou so much for this tutorial. It's very usefull and the results
ReplyDeletelook great. Wonderful the background with the cups.
Great idea and so well explained Brenda...its crackle-icious! Xx
ReplyDeleteWow. This looks fantastic. Great idea.
ReplyDeleteWow Brenda! what a brilliant way of showing us just how different the finishes are with the different crackle pastes. I just love this and the use of each product is so well explained this is a really useful post - Thank you. ps I think your Mojo is well and truly back! Mo x
ReplyDeleteJust LOVE that crackle!! Fantastic Brenda! I love the colours too xx
ReplyDeleteWonderful project, Brenda! Thank you for the explanation. I love the various effects.
ReplyDeleteThat is such a clever way to show the way the different crackle mediums work! Love the overall effect too xx
ReplyDeleteOh wow - if only I had seen this when I first started using crackle Brenda. THIS is SERIOUSLY the BEST tutorial example EVER for a visual learner like me. And that you actually DID a REAL project using all the examples is AMAZING. Most would just show it on a card or something but you actually gave us REALITY. LOVE your cups and background - fun sentiment too. Wouldn't it be perfect just to print your wonderful creation and label it and keep it - to show which one of these wonderful projects will give us the exact "look" we need????? Even though I think I know them by heart now... I'm gonna do that - I just decided! There are days when my brain doesn't want to think so I can now just look at your coffee cups and KNOW. TRULY A GREAT GIFT! Thanks bunches. YOU continually leave me in AWE with your GENIUS. HAPPY JUNE sweet gal. XXj.
ReplyDeleteGorgeous crackle tutorial! The tea cups look amazing! Love it!!!!
ReplyDeleteCrackle at its best, Brenda!
ReplyDeleteAnd I love that quote too! lol
Hugs,
Claudia x
Brenda...this is a fantastic tutorial on crackle effects and your resulting project is so adorable!!! Fantastic step by step! Thank you for taking the time it took to do this so professionally. It's truly amazing.
ReplyDeleteWhat a fabulous project and awesome tutorial! Beautifully done!!
ReplyDeleteSo many crackle solutions... I had no idea! Great project to show the comparisons and how amazing is that crackle combination in the background! Your quote is my motto, in fact until I've had my first cup of coffee I can't do anything right...
ReplyDeleteHi Brenda, I love ♥ your tutorial..thank you. I've never had much success with crackle but you have given me the inspiration to have another go. x
ReplyDeleteOh Brenda - it's great - so many different crakle effects - such a great artwork!!! Thank you so much for this fantastic Tutorial 😍😘
ReplyDeleteI hope I will find time to try this 👍🌸💕
Many Hugs, Dagmar
How lovely!
ReplyDeleteWow Brenda, what a fabulous way to show the differences in the products! I love the pattern you achieved with the crackle paste particularly. Your canvas is beautiful too! Hugs, Anne xx
ReplyDeleteWhat a fabulous run through of all those crackle mediums, and what a fun way to showcase them all! Great canvas! And I absolutely love that quote, I think I am a great procaffinator, glad I now finally have a word for it...
ReplyDeleteThis is brilliant Brenda, and the quote is just perfect for your project xx
ReplyDeletethis is awesome Brenda - so very clever - I love love love it xx
ReplyDeleteFantastic tutorial of the variations of using crackle mediums!! Love the different looks you created, Brenda! Absolutely love it!!
ReplyDeletexx Evelyn
THE absolute BEST tutorial ever! And that's not just because it's on crackle, but wow! You have really covered all the bases and this one is being pinned for future reference! Great piece of crackled art! Hugs!
ReplyDeletePS Love the quote!
ReplyDeleteI have always struggled with crackle media so this was especially helpful to me. Thank you Brenda :D XXX
ReplyDeleteHoly macaroni Brenda! I am completely captivated by this gorgeous crackly project! I have never seen so many amazing crackle techniques in one place before, and I have to say that it is brilliant and beautiful!! WOW, you sure do know how to make me drool!! lol. Love it! hugs :)
ReplyDeleteSuper informative post Brenda, I'm in crackle heaven ! All the different crackles look fantastic layered up on your coffee cups.
ReplyDeleteTFS, Julie x
Fabulous canvas Brenda and a clear explanation of the different crackle mediums. Love that quote, suites me perfectly.
ReplyDeleteAvfil xx
Gorgeous Brenda, it's lovely to see all the crackle mediums used together for a great comparison. Love your design and the tea cups are perfect to highlight the crackle medium. Tracy x
ReplyDeleteLove your Procaffeinating board Brenda, what a fabulous piece! And thank you so much for the wonderful explanations of the various crackle mediums, you have combined them masterfully and they look totally amazing together! Deb xo
ReplyDeletethis is stunning.. a magnificent masterclass and wonderful creation. wow wow wow. just love that quote... brilliant. have good weekend... xxx
ReplyDeleteSpectacular crackle variations - I'm not sure I fancy drinking out of any of those cups, but they'd make a marvellous vintage display. Wonderful!
ReplyDeleteAlison x
Just FASCINATING! I love this!
ReplyDeleteAs a terrible crackler.. :) I really needed this post not only from an understanding of how to do it better but from a product perspective! And then of course there is the beautiful end result with a clever and funny sentiment!
ReplyDeleteI ADORE this project! fabulous tutorial! Love love love! barbara
ReplyDeleteBrilliant Brenda and nearly missed it. Love the way you've used the cup die. Have a great week, Angela x
ReplyDeleteExcellent review of the various crackle mediums available by Deco Art - thanks Branda for taking the time to write this .
ReplyDeleteYour media board is utterly fab and all that crackle is a sheer delight . The perfect choice of die to demonstrate the crackle mediums too .
thanks again for sharing your knowledge
hugs x
Wow Brenda! This is fabulous - all that brilliant crackle going on! LoVe the quote too! Chrisx
ReplyDeleteWonderful project, great idea and absolutely gorgeous each crackles. I adore your artwork. xx
ReplyDelete